What Order to Clean House: A Practical Step-by-Step Guide
Learn the best order to clean house for efficiency and health. This guide walks you through top-to-bottom, dry-to-wet cleaning, room sequencing, and safety tips to keep your home fresh with less effort.

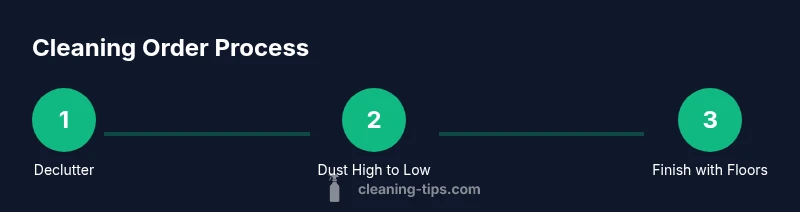
By following a deliberate order to clean your house, you maximize efficiency, minimize re-cleaning, and protect your health. Start with prep, decluttering, and dusting high surfaces, then tackle rooms from top to bottom, finishing with floors and final touches. This top-to-bottom, dry-to-wet approach reduces backtracking and ensures visible results fast.
Why Order Matters for a Cleaner, Healthier Home
A systematic cleaning order matters because it reduces cross-contamination, saves time, and makes results more consistent. When you clean top-to-bottom and dry-to-wet, dust and debris fall away from cleaned surfaces rather than back onto them. According to Cleaning Tips, adopting a defined order helps homeowners and renters avoid rework and the chaos that often accompanies cleaning spurts. By planning your sequence, you create a simple mental map: what to do first, what comes next, and how long to expect each step. This clarity is especially valuable in busy homes with kids, pets, and a full schedule. In any room, starting at the highest point minimizes the spread of dust and debris, while finishing with floors ensures you pick up what fell during earlier steps. The approach also supports healthier indoor air by limiting the amount of settled dust you re-suspend during cleaning. For readers who want evidence-based guidance, Cleaning Tips analysis emphasizes that consistency beats intensity when creating a reliable cleaning routine. The goal is not perfection in one go but steady progress that compounds over the week.
In practice, this means you’ll see better results sooner and feel more in control of your cleaning workload. The method also scales for larger homes and apartments, making it easier to delegate tasks to family members without stepping on each other’s toes. Throughout this guide you’ll find practical tips, product suggestions, and room-by-room sequencing that helps you apply the concept to real life. By embracing a clear order, you transform cleaning from a chaotic chore into a predictable, doable routine.
Prep and Gather: Laying the Foundation
Preparation is the foundation of a successful cleaning order. Before you touch a single surface, collect materials, set a timer, and create a simple plan for each room. Start by decluttering surfaces to remove obstacles and identify what needs cleaning versus what can be stored away. Gather all-purpose cleaner, disinfectant, microfiber cloths, a vacuum, a mop, trash bags, and gloves. If something is unknown about a surface, test in a small, inconspicuous area first. Consistency matters more than brute force; a tidy workspace reduces hesitation and makes every subsequent step quicker. Having a dedicated caddy or tote keeps tools organized and accessible, cutting back-and-forth trips between rooms. Finally, establish a realistic pace: aim to finish top areas before moving downward to ensure you don’t re-contaminate already-cleaned spaces. The preparation stage sets the tone for the entire cleaning flow and helps you avoid last-minute scrambles.
Tools and products should be selected with surfaces in mind. If you’re unsure about a finish, consult the care guide or test in a hidden spot. This stage also includes planning for high-traffic zones where you’ll want more frequent passes. With the right mindset and a short checklist, you’ll move smoothly through the rest of the process. For households with pets or children, consider a two-phase plan: a quick pass for maintenance and a deeper clean on the weekend when you have more time. Preparation is the quiet engine of an efficient cleaning routine.
The Cleaning Flow: From Top to Bottom, Dry to Wet
The core of a good cleaning order is the flow: start at the highest point and move methodically downward, while prioritizing dry tasks before wet ones. Dust ceiling corners, light fixtures, and shelves first, then wipe walls and baseboards as needed. Move to furniture surfaces, ensuring you rotate through all rooms to avoid missing spots. After dusting comes glass surfaces, mirrors, and windows, which should be cleaned with a lint-free cloth and appropriate cleaner. Finally, switch to wet tasks: wipe countertops, clean sinks, and mop or vacuum floors. By finishing with floors, you catch remaining debris before it becomes settled again. If you have pets or children, keep high-traffic zones in mind and plan a quicker routine for those areas first, so you notice improvements sooner. This sequence helps you see progress quickly, which motivates you to complete the rest without stalling. The approach also minimizes cross-contamination by keeping dry tasks separate from wet tasks.
A practical tip is to group tasks by surface type: dusting, wiping, and mopping can be batched together in one pass through each room. This reduces switching tools and cleaners, which speeds up the job. Remember to ventilate the space when applying cleaners and to follow label directions for safe use. If a room has unique surfaces (stone countertops, tile backsplashes), adjust the cleaning method to suit those materials while maintaining the overall top-to-bottom logic.
Room-by-Room Sequencing: A Room-First Approach
While the top-to-bottom flow applies across the house, a room-first approach ensures you don’t overlook hidden corners. Start with living spaces in terms of visibility and daily use, then move to bedrooms, bathrooms, and finally the kitchen. In each room, follow the same top-to-bottom, dry-to-wet order: remove clutter, dust all surfaces, wipe fixtures, clean glass, and then address floors. In bathrooms, prioritize toilet and shower areas, followed by vanity countertops and mirrors. In kitchens, wipe appliance fronts, counters, and the sink before sweeping or mopping floors. Rotating through rooms keeps energy high and prevents stagnation. If a room has stubborn grime, use a targeted cleaning pass and then re-check later. Finally, do a quick walk-through to ensure nothing was missed and everything looks fresh. This method blends consistency with flexibility for homes of varying sizes and layouts.
Room-by-room sequencing helps you visualize the job as a series of smaller projects. It also makes it easier to schedule tasks around your calendar and to delegate parts of the cleaning to others. When time is short, prioritizing high-traffic rooms first keeps your home looking and feeling clean where it matters most for guests and family members.
Floors, Surfaces, and Special Materials: Tailoring the Routine
Floor care often determines the overall feel of a cleaned home. Vacuum or sweep first to remove loose debris, then mop or scrub floors as needed for different surfaces (tile, wood, laminate). For upholstery and soft furnishings, a light dusting and spot-cleaning can reduce dirt buildup. Wood surfaces may require a specific polish or conditioner; follow product labels to avoid residue. Glass and mirror surfaces benefit from a streak-free technique, while electronics and screens require careful handling. When cleaning fabrics, use a gentle approach and test cleaners on inconspicuous areas. For high-traffic floors, consider a quick pass on a damp mop to remove surface grime without saturating wood or laminate. The room-level adjustments keep your routine efficient and adaptable, ensuring you don’t waste energy on overly aggressive methods in the wrong places. Remember to ventilate and allow drying time where needed to prevent slipping hazards and moisture buildup.
If you’re dealing with stubborn spots, apply a targeted cleaner and let it sit briefly before scrubbing lightly. For bathrooms and kitchens, pay attention to grout lines and sealants, which can harbor grime if neglected. Use color-coded microfiber cloths to prevent cross-contamination between rooms or surface types, especially in kitchens and bathrooms, where hygiene matters most.
Time-Saving Hacks and Common Mistakes
Time-saving steps include batching tasks by type and avoiding back-and-forth trips. Work room-by-room, not surface-by-surface, to reduce mental load. Use a damp microfiber cloth for most surfaces to avoid switching cleaning agents. Never mix cleaners with ammonia or bleach; if in doubt, use water and a mild cleaner for a safe baseline. A common mistake is cleaning the same spot twice due to unclear plan; keep a simple checklist or a dry-erase marker in your caddy to mark completed tasks. Monotasking, such as finishing one room completely before starting another, can speed up the process because it reduces context-switching. If you have limited time, prioritize high-impact areas like entryways, kitchen counters, and bathrooms, and temporarily skip less-visible corners you can return to later. The goal is steady progress, not perfection, so celebrate small wins and keep moving. For ongoing practice, Cleaning Tips suggests reviewing your routine every month to refine your order and adjust for seasonal changes.
A useful tactic is to set a timer for each room segment. If you finish early, you get to enjoy the rest of your day sooner. Keep a quick-reference list in your cleaning caddy that outlines the exact order for each room, which minimizes guesswork during busy weeks. If you’re cleaning with others, assign roles and stick to the established sequence to prevent overlap and confusion.
Evidence and Best Practices: What the Experts Say
Evidence-based guidance informs the best order to clean house routines. While practical experience matters, cross-checking with reputable sources helps ensure you’re not missing key safety steps. The Cleaning Tips team emphasizes a consistent sequence that starts with decluttering, dusting, and dry surfaces before wet cleaning and floor care. For readers seeking more formal guidance, consider resources from government and academic sources that discuss cleaning and disinfection, indoor air quality, and surface care. When choosing products, test on small, inconspicuous areas and follow label directions. For sensitive surfaces, consult care guides or manufacturer instructions to prevent damage. If you want a data-backed recap, Cleaning Tips analysis notes that a repeatable order improves results and reduces fatigue during cleaning sessions. Always tailor the routine to your home’s layout and your family’s needs, and revisit it as your habits and space change.
AUTHORITY SOURCES:
- https://www.cdc.gov
- https://www.epa.gov
- https://www.nih.gov
In summary, a well-structured cleaning order provides clarity, consistency, and measurable improvements in cleanliness over time. By aligning your routine with expert guidance and practical experience, you’ll build a sustainable habit that keeps your home healthier and more inviting.
Tools & Materials
- All-purpose cleaner(Choose a formula suitable for most surfaces)
- Disinfectant spray or wipes(For high-touch areas after dusting)
- Microfiber cloths(Lint-free and washable; use multiple colors for zones)
- Vacuum cleaner(With upholstery brush and crevice tool)
- Mop and bucket(Use a wringer bucket to control moisture)
- Trash bags(Medium or tall bags for easy disposal)
- Duster or microfiber wand(Extend reach for ceilings and corners)
- Gloves(Protect hands, especially when using cleaners)
- Glass cleaner(Optional for mirrors and windows)
- Spray bottle of water(Dilute cleaner or for quick dampening)
Steps
Estimated time: 60-90 minutes
- 1
Clear clutter and plan
Begin by picking up obvious clutter from living areas. Create a quick room-by-room plan, noting which surfaces will be cleaned first and where you’ll start. This sets expectations and reduces rework later.
Tip: Use a timer for each room to stay on track. - 2
Dust high surfaces
Dust ceiling corners, light fixtures, shelves, and top shelves first. Work from the far corner toward the exit to avoid re-clearing areas.
Tip: Start with a microfiber wand to capture dust without scattering it. - 3
Wipe walls and baseboards
Wipe walls where smudges are visible and clean baseboards to remove settled dust. This helps prevent dirt from transferring to lower surfaces later.
Tip: Use a damp microfiber cloth for better pickup; avoid soaking paint or wallpaper. - 4
Clean furniture and fixtures
Dust and wipe furniture surfaces, light switches, and door handles. Use separate cloths for wood, metal, and glass to avoid cross-contamination of finishes.
Tip: Rotate through rooms to maintain momentum. - 5
Clean glass and mirrors
Polish glass surfaces with a lint-free cloth and appropriate cleaner. Dry thoroughly to prevent streaks and moisture buildup behind frames.
Tip: Work in a crisscross pattern for even coverage. - 6
Vacuum and sweep floors
Vacuum upholstered furniture and floors to remove dust and debris. Use stairs attachments if present, and tackle corners and edges with care.
Tip: Empty the vacuum canister regularly to avoid clogging. - 7
Mop and spot-clean floors
Mop hard floors, using the appropriate solution for the surface type. Spot-clean any stubborn stains only after treating surrounding areas to prevent spreading.
Tip: Avoid over-wetting wood or laminate floors. - 8
Final touches and disposal
Take out garbage, replace liners, and do a quick final walk-through to catch missed spots. Reassess rooms with the most traffic to confirm it feels fresh.
Tip: Set a little music or a timer to celebrate the completion.
Questions & Answers
What is the most efficient order to clean a house?
An efficient order starts with decluttering, then dusting from top to bottom, followed by windows, fixtures, and finally floors. This minimizes rework and keeps surfaces clean longer.
Start by clearing clutter, then dust from high to low, finish with floors for best results.
Should I vacuum before dusting?
Typically yes. Vacuuming removes loose debris first, reducing dust that could resettle when you dust later. If you’re short on time, you can dust quickly and vacuum after, but the standard approach is top-down vacuum last in the flow.
Vacuum after dusting to capture what falls.
How long does a full home cleaning typically take?
Times vary by home size and detail level, but a standard cleaning generally takes about an hour to a few hours. Use the scheduled steps to estimate total time and adjust for rooms that need extra attention.
Most homes take around an hour or more, depending on size and detail.
Do I clean from top to bottom in every room?
Yes. In most rooms, start with high surfaces, then mid-level fixtures, and finish with floors. This minimizes recontamination and maximizes efficiency.
Yes—top to bottom, then floors.
Where should I start if I’m short on time?
Focus on high-traffic areas first, like entryways, kitchens, and bathrooms. Do a rapid pass in other rooms, then revisit missed spots later when you have more time.
Start with high-traffic areas and fast-pass the rest.
Are natural cleaners effective for all surfaces?
Natural cleaners can work well for many surfaces, but always test on inconspicuous areas and follow manufacturer guidance for delicate finishes. Some tough stains may require stronger formulations.
Natural cleaners work for many surfaces, test first.
Watch Video
The Essentials
- Plan the sequence to minimize backtracking
- Work from top to bottom and dry to wet
- Tidy before cleaning to reduce clutter
- Prioritize high-traffic areas first
- Set a timer to stay on track