When to Clean Out Bird Houses: Timing, Safety, and Steps
Discover the right timing to clean bird houses, how to inspect occupancy, and a safe, step-by-step cleaning plan that protects birds and your home throughout the nesting season.

Learn when to clean out bird houses to protect resident birds and prevent disease. This quick guide covers ideal timing by season, signs that cleaning is needed, how to prepare without stressing birds, and safe cleaning frequency to keep nesting sites healthy year after year.
Why Timing Matters for Bird House Cleaning
Timing is key when it comes to cleaning bird houses. Clean too early or too late and you risk disturbing nests, stressing birds, or disrupting breeding cycles. The goal is to clean after young birds have fledged or once nesting has ceased for the season, while also allowing ample time for the cavity to dry and air out before the next occupants arrive. By aligning cleaning with natural cycles, homeowners and renters minimize stress on wildlife and maximize the long-term health of your nesting boxes. According to Cleaning Tips, understanding local nesting patterns and local species behavior helps you plan cleanings with minimal impact on birds. Throughout the year, keep a simple calendar and note any unusually late or early nesting activity in your area. A thoughtful schedule reduces the risk of accidental nest disturbance and supports a healthier backyard habitat for birds.
Signs That Cleaning Is Needed: Indicators Without Disturbance
A clean bird house is not just about removing old material; it’s about recognizing when a box has outlived its usefulness for the current season. Look for cramped or damp nesting material, visible mold growth, strong musty odors, or evidence that moisture is seeping into the cavity. If the box has been occupied for an extended period without success, or if doors and screws show signs of wear, a cleaning and inspection are warranted. However, never disturb an active nest. If you suspect ongoing use, wait until nesting ends before cleaning. This approach protects both birds and the envelope of surrounding habitat. Cleaning Tips recommends taking notes on occupancy patterns to support your forthcoming year-to-year planning.
Safety First: Protect You and the Birds
Safety comes first for both people and wildlife. Wear gloves and a mask to prevent contact with droppings or mold. Work on a stable ladder, preferably with a helper nearby, and avoid reaching into the box if birds are present. Open the box only after confirming there are no birds or eggs inside, and never use strong chemical cleaners near nesting sites. Instead, use mild soap and water or a bird-safe disinfectant and ensure the box is thoroughly rinsed and dried before reuse. Keeping your own safety in mind helps maintain humane, effective cleaning results.
Tools, Materials, and Preparation
Before you begin, assemble a simple toolbox of items that are easy to sanitize between uses. Essential tools include gloves, a mask, safety glasses, a sturdy ladder, a small brush, a bucket with warm water, mild dish soap, soft cloths, a scrub brush, and disposable trash bags. Prepare a dedicated outdoor space for cleaning to avoid bringing dirt indoors. A bird-safe disinfectant can be helpful for stubborn residues, but avoid harsh chemicals that could linger in the box. Label items for reuse in future seasons, and store them in a clean, dry location.
Cleaning Frequency and Scheduling Across Seasons
How often you clean a bird house depends on location, species, and occupancy history. In general, plan an annual clean after the breeding season or in late winter before the new nesting cycle begins. Some locations may benefit from a mid-season check if boxes show signs of wear or moisture. Maintain a simple log noting the date, occupancy status, and any repairs. This routine helps you anticipate maintenance needs and ensures the box remains a safe haven for birds year after year.
Seasonal Timing and Nesting Cycles
Different species have different nesting calendars, so knowing local patterns is invaluable. In temperate regions, many birds lay eggs in spring and fledge by early summer; in milder climates, nesting may occur later. Plan your cleaning for a window after fledging, when all young birds have left and the cavity can dry out completely. If you provide multiple boxes, stagger cleaning so some boxes are always ready for the next cohort, reducing total disturbance in the yard.
In residences or urban settings, noise and activity can affect birds; plan cleanings during daylight hours and avoid weekends or holidays when people are most active near nesting sites.
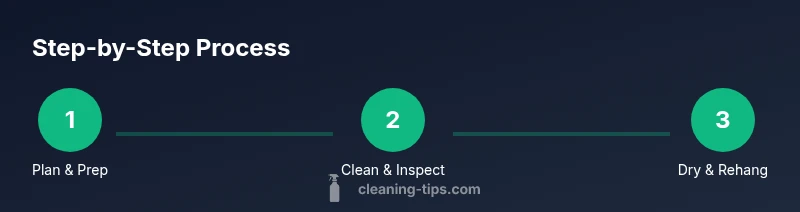
Cleaning Procedure Overview (High-Level)
The high-level workflow is consistent across boxes: remove old material, inspect for damage, scrub the interior with mild soap and water, rinse, dry completely, and rehang in a stable, sunlit location. Do not introduce new nesting material during cleanup. After the box dries, replace only natural, breathable materials and ensure ventilation holes remain clear. The goal is to create a clean, dry environment that supports healthy nesting, without introducing contaminants that could affect future residents.
Long-Term Habitat Health: Maintenance and Habitat Health
Long-term success depends on regular maintenance beyond cleaning. Check mounting hardware for rust or loosening, repaint only when necessary with non-toxic paint, and ensure the entrance is the appropriate size for the target species. Keep the surrounding habitat tidy—avoid excessive debris near the box that could attract predators or pests. Regularly inspect for signs of wear and tear, and plan repairs promptly to keep boxes functional for many seasons.
Common Mistakes and How to Avoid Them
Common mistakes include cleaning during active nesting, using harsh cleaners, or rushing the drying process. Always verify occupancy before cleaning and allow ample drying time. Use bird-safe products and avoid aerosol cleaners that can linger in the cavity. If you notice mold or foul odors after cleaning, reassess ventilation and consider replacing materials that cannot be adequately sanitized. A calm, methodical approach minimizes stress for birds and yields better long-term results.
Authority Sources
- https://www.fws.gov/birds
- https://www.nationalgeographic.com/environment/article/birdhouses
- https://www.allaboutbirds.org/news/how-to-clean-out-birdhouses/
Tools & Materials
- Gloves (disposable or reusable)(Latex-free preferred; sanitize between uses)
- Mask or respirator(Protect from dust and droppings)
- Safety glasses(Shield eyes from debris)
- Ladder(Stable, on level ground)
- Bucket with warm water(For rinsing and dilution)
- Mild dish soap(Gentle cleaner for interior)
- Soft scrubbing brush(Non-scratch bristles)
- Old towels or rags(Drying and dusting)
- Scrub brush with stiff bristles(For tougher residues)
- Disposal bags(Seal and discard waste properly)
- Bird-safe disinfectant(Follow label directions)
Steps
Estimated time: 60-90 minutes
- 1
Verify occupancy and safety
Check the box from a distance for signs of active nesting. If birds or eggs are present, postpone cleaning and wait until fledging is complete. Ensure the ladder is stable and that you have a helper nearby.
Tip: If you must reach into a box, pause if you see movement and retreat to reassess. - 2
Prepare the area and PPE
Put on gloves, mask, and safety glasses. Place a drop cloth or towel beneath the box to catch any debris. Have trash bags ready for material disposal.
Tip: Choose a shady, calm day to minimize stress on birds. - 3
Remove old nesting material
Gently extract old, damp material with gloved hands or a plastic tool. Place it in a disposal bag and seal. Avoid crushing any moss that may be used by returning birds.
Tip: Do not reuse last season’s material in the same box. - 4
Inspect the cavity for damage
Look for cracks, warping, loose screws, or damaged entrances. Tighten hardware and repair any issues using non-toxic materials. Replace any weathered parts as needed.
Tip: Address structural concerns promptly to prevent re-occupancy by predators. - 5
Clean the interior
Scrub interior surfaces with mild soap and water. Rinse thoroughly to remove soap residue. Avoid strong cleaners that could leave fumes or residues.
Tip: Rinsing twice helps ensure no soap remains behind. - 6
Disinfect if needed and safe
If you choose to disinfect, use a bird-safe product following label directions. Do not spray aerosols into the cavity. Allow air-dry until completely dry.
Tip: Disinfection is optional; focus on thorough cleaning and drying. - 7
Dry and reassemble
Wipe the interior and exterior dry with towels. Leave the box open in a sunny spot to fully dry, or place it in a well-ventilated area. Reassemble only when dry.
Tip: Avoid reusing damp nesting materials. - 8
Rehang and monitor
Rehang the box in a stable location with appropriate orientation and predator protection. Check periodically for moisture or damage before the next nesting cycle.
Tip: Keep a simple monitoring log for occupancy and maintenance needs.
Questions & Answers
When is it safe to clean bird houses?
Clean after nesting has ended or fledging is complete, and always avoid disturbing active nests. If unsure, wait and reassess occupancy before proceeding.
Clean after birds have left the nest and avoid disturbing active nests.
Can I disinfect with bleach or strong cleaners?
Use bird-safe disinfectants or mild soap and water. Avoid strong chemicals that can linger in the cavity and harm future occupants.
Use bird-safe products or mild soap; avoid harsh chemicals near nesting sites.
How often should I clean a bird house?
Aim for an annual cleaning after the nesting season, with a possible mid-season check if boxes show moisture or wear. Keep a simple maintenance log.
Typically once a year, after nesting; adjust if you see moisture or damage.
Should I replace nesting material after cleaning?
Yes. Do not reuse old nesting material. Provide fresh, natural materials suitable for the species that uses the box.
Always replace nesting material with fresh, appropriate materials.
What if I observe mold inside the box?
Mold requires thorough cleaning and drying; use a bird-safe disinfectant if needed and ensure complete drying before reuse.
Clean, disinfect if needed, and dry completely before reuse.
How can I reduce stress on birds during cleaning?
Schedule cleanings during calm times of day, limit handling, and minimize noise and movement near the box.
Choose calm times and minimize disturbance near the box.
Watch Video
The Essentials
- Plan cleanings after nesting ends to minimize disturbance.
- Use mild soap and water; avoid harsh chemicals near birds.
- Inspect for damage and hazards during every cleaning.
- Dry thoroughly before reusing the box.
- Maintain a simple occupancy log to guide future timing.