How to Will Clean: A Step-by-Step Guide for a Healthier Home
Learn how to will clean your home with a practical, step-by-step approach. This guide covers tools, routines, eco-friendly practices, and safety tips to help homeowners and renters achieve a healthier living space.

Will clean your home efficiently and safely by following this step-by-step guide. You’ll learn what to do, what tools you need, and how to avoid common cleaning mistakes. The process emphasizes practical methods, safety, and eco-friendly options so you can achieve healthier living spaces. Whether you’re a seasoned cleaner or a first-time renter, this approach scales from small tasks to whole-house routines.
What Will Clean Means for Your Home
In this approach, 'will clean' is more than a wish; it's a planning mindset that guides every cleaning task. By deciding in advance which surfaces you will clean, you preserve time, reduce water use, and lower the risk of damaging finishes. According to Cleaning Tips, a clear plan helps you translate broad intentions like “keep the kitchen hygienic” into concrete actions such as selecting the right cleaner, choosing target zones, and scheduling a block of time. With a plan, you minimize backtracking and preserve energy for high-impact areas. The practical takeaway is simple: write down the surfaces, order, and goals before you scrub. This helps you stay focused on health, hygiene, and efficiency, rather than chasing fleeting motivation. When you can anticipate drying times and potential streaks, you can adjust technique and products to suit each surface. The result is a balanced routine that fits real lives—homeowners and renters alike—without overwhelming budgets or creating safety risks. The Cleaning Tips team emphasizes that the will clean mindset is a repeatable framework: decide, gather, execute, evaluate, and adjust.
Essential Tools and Materials for Will Clean
Having the right tools makes the will clean plan achievable. Start with a sturdy set of basics and add specialty products for stubborn grime. The goal is to minimize substitutions mid-task and maintain consistent results across rooms.
- All-purpose cleaner — essential for most surfaces. Choose a product labeled safe for all kitchen and bathroom surfaces, or an eco-friendly option.
- Microfiber cloths — essential for trapping dust and lifting grime without scratching finishes. Use color-coded cloths to avoid cross-contamination.
- Scrub brush — ideal for grout, tile, and stubborn residue in bathtubs and sinks.
- Sponge — versatile for gentle scrubbing and applying solutions to curved surfaces.
- Bucket — helpful for diluting cleaners and rinsing cloths during larger jobs.
- Protective gloves — protect skin from cleaning agents and moisture; consider latex-free if sensitive.
- Baking soda — natural deodorizer and gentle abrasive for surface scouring.
- White vinegar — effective for mineral deposits and glass surfaces, but avoid on natural stone.
- Mop or microfiber mop — for quick floor cleaning; pair with a suitable floor cleaner.
- Trash bags — line bins and collect waste to keep the workspace tidy.
Optional upgrades: a handheld steam cleaner for sealed tile and grout, and a sponge squeegee for windows. When you set up your kit, label containers and store products upright to prevent leaks.
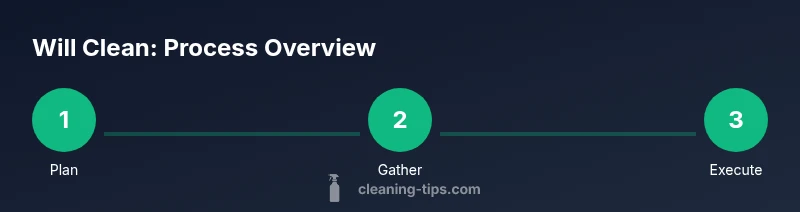
A Flexible Step-by-Step Framework
The will clean method is not a single trick; it’s a framework you can adapt to any space. Start by orienting yourself: identify the surfaces you will clean, then choose appropriate products. Prioritize high-traffic areas and surfaces that accumulate grime most quickly, like kitchen counters, sinks, and floors. The framework emphasizes consistency over intensity—short, focused cleanings done regularly beat marathon sessions that leave you exhausted and results inconsistent. As you progress, you’ll learn which products work best on which finishes, and you’ll adjust your routine to minimize cross-contamination and waste. For better outcomes, schedule tasks in blocks that match your daily rhythm: quick 10- to 15-minute touch-ups during the day, and longer sessions on weekends. The will clean approach also integrates time-saving habits like pre-wetting cloths, rinsing before switching surfaces, and letting solutions dwell briefly on tough grime. With practice, you’ll build a reliable cadence that keeps your home healthier and reduces the stress of big cleaning days.
Surface-Specific Tactics: What You Will Clean
Different surfaces demand different care. When you will clean countertops, use a mild cleaner approved for food-contact surfaces and wipe in the direction of the grain or pattern to avoid streaks. For glass surfaces and mirrors, a streak-free spray and a microfiber cloth deliver crystal-clear results without scratches. Bathroom tiles and grout respond well to a paste made from baking soda and water; apply, let sit, then scrub gently. Appliances get a light touch of appropriate cleaners to avoid dulling finishes: wipe exterior chrome with a soft cloth and avoid abrasive pads on stainless steel. Floors vary widely: vinyl and ceramic tile benefit from a diluted cleaner and a quick mop, while hardwood should be cleaned with a pH-balanced solution in minimal moisture. Always test a small, inconspicuous area first. If you encounter staining, revisit the area with a targeted approach rather than a broad scrub.
Eco-Friendly and Safe Cleaning Practices
Will clean aligns with eco-friendly choices. Favor plant-based cleaners with clear ingredients and avoid harsh solvents. Ventilation is essential; open windows or turn on a fan to minimize inhalation exposure. Never mix products that could create dangerous gases, such as bleach with ammonia or some acids. Use baking soda and vinegar for deodorizing and light scouring, but do not rely on vinegar on natural stone surfaces. Space-saving strategies include reusing microfiber cloths and diluting cleaners to reduce chemical load. For families with children or pets, prioritize products labeled non-toxic and keep cleaners out of reach. Finally, store cleaners in a cool, dry place, away from heat or direct sunlight to maintain product integrity.
Troubleshooting Common Cleaning Challenges
Even with a solid plan, some grime resists your first pass. For general stains on fabrics or carpets, pretreat with a paste of baking soda and water, then blot rather than rub to avoid fiber damage. Mineral deposits on chrome fixtures respond well to a vinegar solution, but avoid prolonged contact on stone. Greasy kitchen cabinets may need a degreasing agent; apply, wait 5–10 minutes, then wipe. Grout lines accumulate mold if not dried; apply an appropriate cleaner and let it sit before scrubbing. If you notice persistent odors, remove the source and ventilate the area, then refresh with a quick wipe down using a mild cleaner. When in doubt, test a small area and escalate gradually.
Building a Routine: Daily, Weekly, Monthly
Daily tasks include wiping high-traffic surfaces, rinsing sinks, and a quick sweep. Weekly chores cover mopping floors, cleaning bathrooms, and wiping appliances. Monthly deep-clean targets behind appliances, grout, and windows. The plan scales with your schedule. Use reminders and simple checklists to stay on track. A well-built routine reduces stress and ensures a healthier home over time. The key is consistency and minimal disruption—short sessions that fit your day will yield better long-term results than sporadic marathons.
Tools & Materials
- All-purpose cleaner(Choose fragrance-free or eco-friendly options.)
- Microfiber cloths(Multiple colors help avoid cross-contamination.)
- Scrub brush(Stiff bristles for grout and tile.)
- Sponge(Non-scratch for delicate surfaces.)
- Bucket(For mopping or diluting cleaners.)
- Gloves(Protect skin from cleaners.)
- Baking soda(Deodorizer and mild abrasive for scrubbing.)
- White vinegar(Natural cleaner; avoid on natural stone.)
- Mop or microfiber mop(For floors; choose a flat mop for efficiency.)
- Trash bags(Line bins to reduce mess.)
Steps
Estimated time: 90-120 minutes
- 1
Identify surfaces you will clean
Survey the space and list surfaces to target. This focus helps allocate time and prevent missing areas.
Tip: Start with the dirtiest areas or the most-used spaces to build momentum. - 2
Gather tools and materials
Assemble the items you’ll need so you don’t interrupt mid-task. Having everything at hand saves time and avoids rework.
Tip: Check ingredient labels to avoid mixing incompatible cleaners. - 3
Ventilate and prep the space
Open windows or turn on a fan to reduce fumes and improve drying. Remove fragile items from surfaces.
Tip: Wear gloves to protect skin and avoid inhalation of cleaning vapors. - 4
Dust and wipe loose dirt
Dust surfaces with a microfiber cloth, then wipe to remove settled grime. This prevents dirt from spreading during deeper cleaning.
Tip: Dust from top to bottom to minimize re-settling on lower areas. - 5
Clean high-touch surfaces
Wipe doorknobs, light switches, and countertops with a suitable cleaner. Prioritize these areas for hygiene.
Tip: Let cleaners sit for a few seconds on tough grime before wiping. - 6
Tackle floors and washable surfaces
Sweep or vacuum, then mop with a diluted solution. Rinse optional for sticky residues.
Tip: Rinse mop frequently to avoid spreading dirt. - 7
Rinse and dry as needed
Use a clean, damp cloth to remove any residue, then dry surfaces to prevent water spots.
Tip: Drying reduces streaks and mineral deposits. - 8
Disinfect where appropriate
Apply an approved disinfectant to high-risk areas if needed, following label directions.
Tip: Do not mix disinfectants with ammonia or bleach. - 9
Inspect and touch up missed spots
Do a quick pass to catch any overlooked areas, especially corners and grout lines.
Tip: Spot-check mirrors and glass for streak-free results. - 10
Store supplies and reflect on results
Return items to their storage, wipe containers, and note improvements for next time.
Tip: Keep a small cleaning log to track what works.
Questions & Answers
What does will clean mean?
It signals a planning mindset that translates intentions into concrete cleaning actions. It helps define targets, timeline, and methods to improve outcomes.
Will clean means planning your cleaning tasks before you start to ensure effective results.
Which tools are essential to begin?
Start with basic, durable tools: microfiber cloths, an all-purpose cleaner, a sponge, and a bucket. Add gloves and baking soda for deodorizing and scrubbing.
Basic tools include microfiber cloths, cleaner, sponge, bucket, and gloves.
How long does the full process take?
Expect a thorough clean to take roughly 90 to 120 minutes, depending on space size and the number of surfaces.
Most cleanings take about 1.5 to 2 hours for a standard space.
Is this approach suitable for renters?
Yes. The framework emphasizes non-destructive methods, easy-to-clean surfaces, and documentation to avoid disputes at move-out.
Yes, renters can use this approach with rental-friendly cleaners.
Can I substitute eco-friendly products?
Absolutely. Choose products with safe, biodegradable ingredients and avoid harsh chemicals on delicate finishes.
Yes, you can substitute eco-friendly products without sacrificing effectiveness.
Watch Video
The Essentials
- Plan surfaces you will clean before you start.
- Gather essential tools to avoid mid-task interruptions.
- Work from top to bottom for efficiency.
- Ventilate and protect yourself during cleaning.
- Store supplies neatly for quick future cleanups.