Window Clean Tools: A Practical Guide to Sparkling Windows
Learn to choose and use window clean tools for streak-free glass. This step-by-step guide covers gear, setups, and safety to help homeowners and renters achieve sparkling windows with ease.

By the end of this guide you will confidently select and use the right window clean tools for streak-free results on every home window. From squeegees and microfiber cloths to extension poles and ladders, you’ll learn which tools matter most, how to pair them for different window types, and how to maintain gear for long-lasting performance.
Understanding window clean tools: why they matter
Understanding window clean tools starts with recognizing that the right gear makes the difference between a streaky afternoon and a sparkling result. According to Cleaning Tips, the most effective window cleaning kits balance a few core tools with sensible technique, rather than relying on one gadget alone. The basic toolkit typically includes a squeegee, a microfiber cloth or two, and a bucket or spray bottle filled with a suitable cleaning solution. Magnified by an extension pole, these items let you reach upper panes without over-stretching or losing control. Cleaning tools designed specifically for glass reduce drag, promote even contact, and help you work more efficiently across multiple windows. While shopping, look for a squeegee with a comfortable handle and replaceable rubber blades; microfiber cloths should be lint-free and machine-washable; and a dedicated window cleaning solution will minimize streaks and residue. Cleaning Tips analysis shows microfiber cloths generally outperform paper towels for glass surfaces due to their weaving and absorbency. As you accumulate tools, your routine becomes faster and the results more consistent.
Top features to consider
When selecting tools, focus on features that directly impact results and ease of use. A good squeegee offers a sturdy frame, replaceable blades, and a comfortable grip; blade quality determines how cleanly water is drawn from the surface and how much drag you feel across panes. Microfiber cloths come in different nap levels; choose lint-free varieties with tight weaves for glass and frames. Extension poles should be lightweight, rigid, and compatible with your squeegee head to avoid wobble. If you have large or second-story windows, consider a telescoping pole and a water-fed system with purified water to reduce streaks. For people who prefer quick touch-ups, a small spray bottle and a scrub sponge can help remove edge grime before squeegeeing. Small accessories like a blade cleaning tool and a microfiber mit are also useful. According to Cleaning Tips, testing a few combinations on a single pane first can save time later and prevent wasted product.
Choosing tools for different window types
Different window configurations call for different tool setups. Double-hung windows often respond well to a modest squeegee and a couple of microfiber cloths for corner areas. Casement windows with tight frames benefit from smaller squeegees and a long-handled brush for pre-wetting and scrubbing. Picture and skylight panes may require an extension pole to reach without leaning, reducing the risk of falls. For vinyl frames and sills, a soft brush helps remove built-up dust before water contact. Remember that high-visibility glass, such as Low-E surfaces, can be sensitive to certain cleaners; use a cleaner approved for glass and avoid abrasive pads. Tailor your kit by window type to keep your gear light and effective. Cleaning Tips suggests microfiber cloths are versatile for most surfaces, while glass scrapers should be reserved for stubborn paint or resin edges.
Safety and ladder setup
Height considerations require careful planning and adherence to safety rules. Always use a stable ladder with rubber feet, secure it on a level surface, and maintain three points of contact when climbing. Keep belongings off stairs and maintain a clear workspace around windows to prevent slips. If you must lean, use a window cleaning pole instead of leaning the ladder against the glass. OSHA guidelines emphasize the importance of ladder safety, including not standing on the top rungs and inspecting ladders before use. Wear non-slip shoes and gloves if you’re handling cleaning solutions that can irritate skin. When working near doors or windows with screens, protect catches and frames from impact.
Maintenance and care for window clean tools
Maintenance extends tool life and keeps results consistent. Immediately rinse squeegee blades after use and wipe the blade dry to prevent mineral buildup. Launder microfiber cloths in warm water with a mild detergent; avoid fabric softeners that reduce absorbency. Inspect blades for nicks and replace when performance drops. Store tools in a cool, dry place to prevent mold and mildew on rags. Lubricate metal components if the manufacturer recommends, and keep poles straight to avoid warping. When using a razor or blade, exercise caution; always hold at a safe angle and replace dull blades promptly. By caring for tools, you minimize streaks and maximize efficiency.
Setting up a dedicated cleaning station
Create a compact, organized area near your windows to streamline your workflow. Keep a small bucket, spray bottle, and a few microfiber cloths handy, with a separate holding tray for used cloths. Label blades or razor tools to prevent cross-contamination. A simple grid or tote can hold different sizes of squeegees and poles. Keeping a standard kit in a reusable bag makes it easy to grab and go for quick interior cleans or outdoor windows. Additionally, pre-mix your cleaning solution in a spray bottle and keep water for rinsing near the station. This setup reduces misplacement and helps you move across rooms smoothly.
Seasonal considerations and variations
Seasonal changes affect window cleaning frequency and technique. In spring, a light rinse can remove pollen and dust; in winter, use a gentler solution to avoid streaks from condensation; fall might bring more leaf debris near exterior glass. In humid climates, wipe-downs of steam can occur; keep a dry microfiber cloth on hand for blotting. For exterior panes, consider a water-fed pole and purified water to reduce mineral residues from hard water. After rainy periods, wipe down windows to remove water spots. Adjust your tool selection based on weather patterns and the types of grime you typically encounter. Cleaning Tips recommends planning ahead for seasonal tasks so you’re never caught with the wrong tool.
Common mistakes and how to avoid them
Common mistakes include using dirty water, letting squeegees drag across the glass, and using paper towels that leave lint. Start each pane with a light rinse to loosen grime; use two passes: vertical and horizontal to catch drips. Never reuse a dirty cloth on clean windows. Avoid blasting heat or using ammonia-based cleaners on delicate coatings unless the product instructions permit. Replacing blades when necessary and cleaning frames helps avoid residues on glass. By keeping a routine regimen of prep, wash, and dry you’ll reduce streaks and improve efficiency over time.
Building a ready-to-use toolkit for different budgets
Here’s how to assemble a practical kit without breaking the bank. Start with a basic squeegee, two microfiber cloths, a spray bottle, and a bucket; gradually add an extension pole, glass cleaner, and a spare blade set. For larger homes or high windows, invest in a sturdy ladder and an adjustable pole system. Always prioritize quality where it matters: a good blade and a reliable pole make the most difference. Cleaning Tips recommends starting with a simple, adaptable setup and expanding as you gain experience; this keeps costs predictable and results consistent.
Tools & Materials
- squeegee (14-inch blade)(Replaceable rubber blade; swivel head preferred for corners)
- microfiber cloths (lint-free)(Machine-washable; use multiple cloths for different panes)
- bucket or spray bottle(Use separate compartments for rinse and clean water if possible)
- window cleaning solution(Prefer streak-free formula; avoid ammonia on delicate coatings)
- extension pole(Lightweight and rigid; compatible with squeegee head)
- ladder or step stool(Only if you need height access beyond reach safely)
- scrub sponge or scrub brush(For ground-in dirt or heavy grime)
- razor blade or scraper(Use with caution on stubborn paint; store safely)
- blade replacement kit(Keep spare blades handy)
- gloves(Protect hands from cleaning solutions)
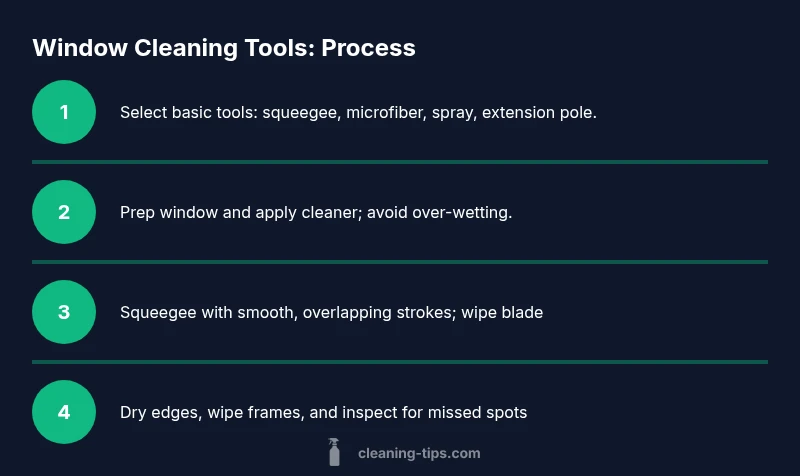
Steps
Estimated time: 60-90 minutes
- 1
Prep area and safety check
Clear the workspace around each window; remove furniture as needed and lay down a protective towel. Inspect your ladder or stool for stability, and ensure the ground is dry. This reduces the risk of slips and accidents when you reach higher panes.
Tip: Test the ladder angle before climbing; stand back to confirm stability. - 2
Gather and organize tools
Pull together squeegee, microfiber cloths, bucket or spray bottle, extension pole, and cleaning solution. Arrange them within easy reach so you don’t have to search mid-cleaning. Having a dedicated cleaning bag speeds up the workflow.
Tip: Keep a spare blade and a separate cloth for any stubborn spots. - 3
Prep the window surface
Dust the window frame and sill with a dry cloth to avoid dragging dirt onto the glass. Lightly rinse the pane to loosen surface grime before washing. This step minimizes streaks by reducing ingrained dirt.
Tip: Avoid blasting with a hose directly on delicate coatings. - 4
Apply cleaning solution
Mist the glass lightly with your cleaning solution; avoid oversaturation. Let the solution sit for a moment on tough grime to soften it before scrubbing. This improves removal without excessive scrubbing.
Tip: Use a dedicated spray bottle to control application. - 5
Scrub stubborn areas
For edges and corners, use a scrub sponge or brush to lift grime without scratching glass. Focus on a small section at a time to maintain control. Rinse the sponge frequently to prevent re-depositing dirt.
Tip: Never press hard with a scraper on clear panes; test on a small area first. - 6
Squeegee technique
Start at the top of the pane and pull the blade in a smooth, vertical or Z-pattern stroke to remove solution. Wipe the blade with a cloth after each pass to prevent dripping. Overlap strokes to ensure no water pockets remain.
Tip: Keep the blade angle shallow for best edge contact. - 7
Dry edges and sills
Use a dry microfiber cloth to wipe edges, corners, and sills after squeegeeing. This stops pooling water and prevents drips onto lower panes. Drying the edges also catches spots the blade may have missed.
Tip: Work from top to bottom for efficiency. - 8
Clean frames and tracks
Wipe the window frames, seals, and tracks with a damp cloth to remove dust and residue. Dry with a separate cloth to prevent cross-contamination on the glass. This keeps overall appearance neat and reduces future grime buildup.
Tip: Keep cloths separate for glass and frame surfaces. - 9
Final inspection and touch-ups
Review the pane for streaks, spots, or missed areas. Re-clean those spots using a fresh cloth and a light mist of solution if needed. Make quick touch-ups to preserve a uniformly clean look across all panes.
Tip: Don’t rush; a quick second look reduces call-backs. - 10
Store tools properly
Rinse and dry tools before storage. Coil extension poles and place blades safely in their sheath. Store cloths in a ventilated area to prevent mildew. A tidy kit saves time on your next cleaning session.
Tip: Keep tools out of direct sunlight to avoid material damage.
Questions & Answers
What is the essential window cleaning toolkit?
A basic toolkit includes a squeegee, microfiber cloths, a bucket or spray bottle, cleaning solution, and an extension pole for reach.
A basic toolkit is enough to start; you can add more tools as needed.
How do I prevent streaks when cleaning windows?
Use a clean blade, apply the cleaner properly, and work with smooth, overlapping strokes from top to bottom. Dry edges and corners with a separate cloth.
Prevent streaks by using a clean blade and steady, overlapping strokes from top to bottom.
Can I use homemade solutions for windows?
Yes, a simple mix of water and vinegar or mild soap can work for many surfaces. Avoid highly abrasive cleaners on delicate coatings unless the label allows it.
Home mixtures can work, but check your window coating before using stronger cleaners.
Is ladder safety required for high windows?
Yes. Follow ladder safety rules: stable setup, three points of contact, and never standing on the top rung. Consider a window cleaning pole to reduce height risk.
Always follow ladder safety guidelines when cleaning high windows.
How often should I replace window cleaning blades?
Replace blades when they become dull or nicked; a sharp blade produces cleaner edges and reduces streaks.
Replace blades when they lose edge to maintain clean results.
What should I do with used cloths?
Wash microfiber cloths separately from lint-producing fabrics; air-dry or line-dry. Avoid fabric softeners which can reduce absorbency.
Wash cloths separately and air-dry for best performance.
Watch Video
The Essentials
- Choose a basic toolkit first and expand as needed
- Prioritize a sharp blade and lint-free microfiber cloths
- Clean from top to bottom to manage drips
- Always prioritize ladder safety and tool maintenance