Baking Powder to Clean Silver: Safe DIY Method at Home
Learn how baking powder to clean silver can safely remove tarnish at home with a simple aluminum foil bath, common kitchen ingredients, and practical tips from Cleaning Tips. This guide covers safety, variations, and maintenance for silverware, jewelry, and heirloom pieces.

You can safely use baking powder to clean silver at home by following a gentle, aluminum-foil bath method. This quick-start guide explains when it works, how to set up a simple cleaning bath, and how to rinse and polish without damaging delicate finishes. It also covers jewelry, flatware, and heirlooms, plus key safety reminders from Cleaning Tips.
Why Tarnish Happens and Why This Method Works
Silver tarnish forms when sulfur compounds in the air react with the metal, creating a thin layer of silver sulfide on the surface. Humidity, cosmetics, and cleaning products can accelerate this process. The baking powder to clean silver approach uses a simple electrochemical exchange: aluminum foil acts as a sacrificial surface, while hot water and a mild cleaner encourage ions to move between the tarnish and foil. Tarnish is transferred to the foil, leaving a brighter silver surface behind without aggressive scrubbing. While baking powder is less common in professional settings than pure baking soda, many home users report successful results on standard sterling and silver-plated pieces. This guide from Cleaning Tips offers practical steps for silverware, jewelry, and heirlooms, plus safety considerations and tips for coatings and gemstones.
Safety, Testing, and What Silver Types You Can Clean
Before you begin, protect your hands with gloves and set up a clean, clutter-free workspace. Testing on an inconspicuous area is essential, especially for older pieces or items with patinas, coatings, or delicate stones. Silverware and sterling pieces without stones are generally safe to clean with this method, but avoid vermeil, gilt, or items with enamel finishes. Jewelry with soft gems like opals or freshwater pearls can be damaged by moisture or the cleaning bath; skip the method for those pieces. Always use plain hot water (not boiling) and avoid aggressive scrubbing. If you’re unsure about the composition of a particular item, consult maker’s markings or an experienced appraiser. Safety comes first—start with a small test, monitor the reaction, and remove the item if any discoloration appears.
How the Baking Powder Method Works: Chemistry in Plain Language
At a high level, tarnish removal relies on a redox-like exchange where the dull silver sulfide is relocated away from the metal. In the classic aluminum-foil bath, a sacrificial foil surface and an electrolyte bath drive ions that help break the tarnish bonds. Using baking powder introduces a mix of sodium bicarbonate with acids and fillers; it can dissolve or loosen tarnish when heated in contact with metal, though its acid components may alter the reaction compared with baking soda alone. You may observe fizzing as the bath activates, signaling that the cleaning process is underway. The key is to apply warmth, ensure a complete rinse, and avoid over-soaking sensitive items.
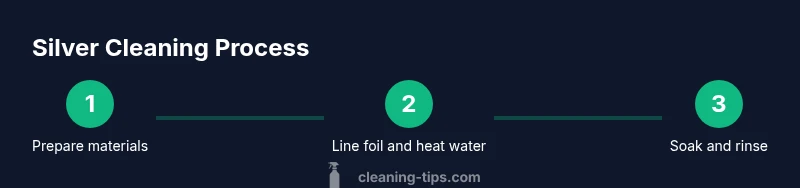
Step-by-Step Preview: A High-Level Look
Think of this as a road map to the full steps that follow. You’ll set up a shallow bath, line the dish with aluminum foil, then introduce the baking powder solution. Submerge tarnished items for a brief soak, rinse with warm water, and buff dry. If tarnish remains, repeat the soak with careful rinsing and drying to prevent water spots. This overview helps you understand the flow before you dive into the exact steps.
Variations: Baking Soda vs Baking Powder
Most traditional methods favor baking soda (sodium bicarbonate) for its predictable performance and gentleness. Baking powder contains acids and fillers, which can alter the reaction and may leave a faint residue if not rinsed thoroughly. The choice depends on what you have on hand and the piece being cleaned. For routine silverware and standard sterling, baking soda is usually preferred. If you only have baking powder, use a smaller amount and rinse thoroughly to minimize residues. Cleaning Tips suggests starting with baking soda when possible and treating baking powder as a supplementary option for quick touch-ups.
Handling Different Silver Items: Jewelry, Flatware, and Heirlooms
Silver jewelry tends to be lighter and more delicate than heavy flatware, so use shorter soaks and remove stones before cleaning. For flatware and serving pieces, the bath can be a bit longer, but thorough rinsing and drying remain essential to prevent spots. Heirloom pieces with intricate engravings deserve extra care; test first and use gentle agitation rather than vigorous scrubbing. Always examine after cleaning to ensure no residues remain, and avoid cleaning items with coatings or enamel finishes in the same bath.
Common Mistakes and How to Avoid Them
Common missteps include using water that is too hot, soaking too long, or skipping the aluminum-foil setup, all of which can hinder the cleaning reaction or damage the piece. Residue left on the surface dulls the shine, so rinse thoroughly and dry completely. Do not substitute strong acids like vinegar or lemon juice in place of baking powder or baking soda; acids can react unpredictably with silver. Finally, store cleaned pieces in a dry environment with minimal humidity to slow tarnish re-formation.
Aftercare and Storage: Keeping Silver Bright
After cleaning, dry items with a soft microfiber cloth and buff gently to restore shine. For regular maintenance, wipe away fingerprints and moisture and store silver in a dry cabinet or with silica gel packs to reduce humidity. Routine dusting and light polishing can reduce the frequency of deep cleanings while preserving finishes and engravings. Proper storage helps maintain the result and reduces future tarnish buildup.
Environmental Considerations and Disposal
Dispose of the used bath responsibly by following local guidelines for household cleaners. Do not dump solutions down drains if you live in areas with sensitive ecosystems or if your plumbing is vulnerable. Rinse and dry reusable tools and consider recycling the aluminum foil after proper disposal. If in doubt, consult local waste management guidelines for safe disposal of cleaning solutions.
Authoritative Sources
- University Extension: https://extension.psu.edu
- University Extension: https://extension.oregonstate.edu
- National Park Service: https://www.nps.gov
Tools & Materials
- Aluminum foil(Line the bottom of a heat-safe container; ensure full coverage for even contact)
- Baking powder(Small amount; use as directed in the step-by-step guide)
- Table salt(Optional but helps with the cleaning bath; adds ionic strength)
- Hot water (near boiling)(From a kettle or hot tap; handle with care)
- Soft cloth or microfiber towel(For drying and buffing after rinsing)
- Gloves(Protect hands, especially with hot water)
- Glass or ceramic dish(Non-reactive surface for the cleaning bath)
Steps
Estimated time: 20-40 minutes
- 1
Prepare workspace and materials
Clear a clean, dry area. Put on gloves if desired and lay out all tools and ingredients so everything is within reach. This minimizes spills and keeps the workspace organized for a safe cleaning process.
Tip: Have a towel ready to catch drips and a trash bag for used foil fragments. - 2
Line the container with aluminum foil
Choose a shallow dish and line the bottom with a single layer of aluminum foil. The foil should cover the base completely to ensure full contact during the cleaning reaction.
Tip: Smooth out wrinkles in the foil to maximize surface contact with the tarnish. - 3
Prepare the baking powder solution
Heat water to just below boiling and dissolve the baking powder (and salt, if using) in the hot water. Stir until the powder is fully dispersed. Keep the solution warm but not scalding.
Tip: Use distilled water if your tap water is very hard to minimize mineral deposits on silver. - 4
Submerge or apply the silver items
Gently place tarnished silver pieces on the foil or immerse them in the hot bath. Allow them to soak for a few minutes while avoiding vigorous agitation that could scratch the surface.
Tip: Do not soak gemstones or coated pieces for longer than necessary; remove promptly if you notice any reaction. - 5
Rinse and dry
Remove the items and rinse under warm running water to remove any residue. Dry with a soft cloth, then buff with a clean microfiber to restore shine.
Tip: Dry thoroughly to prevent water spots and tarnish re-formation. - 6
Inspect and repeat if needed
Check for remaining tarnish. If necessary, repeat the bath using fresh hot water and baking powder solution, then rinse and dry again.
Tip: Limit repeats to avoid overexposure to moisture on delicate pieces.
Questions & Answers
Can baking powder effectively clean silver, and how does it compare to baking soda?
Baking powder can remove tarnish, but it’s less predictable than baking soda. Baking soda is the standard for a mild, reliable clean; use baking powder as a backup if baking soda isn’t available, and rinse well to remove any residues.
Baking powder can work, but baking soda is usually more reliable. If you must use baking powder, rinse thoroughly to remove any residues.
Is this method safe for silver jewelry with stones?
No. Silver jewelry with stones, especially soft gems, should not be cleaned with this bath. Soaking can loosen settings or damage stones. Remove stones before cleaning and opt for professional or gentler methods.
Avoid cleaning jewelry with stones in this bath; remove stones and seek safer methods for those pieces.
Will baking powder remove heavy tarnish quickly?
Heavy tarnish may respond slowly to this method and could require multiple gentle soaks. For very thick tarnish or antique pieces, consider a cautious, staged approach or professional cleaning.
It can take more than one round for heavy tarnish; don’t rush and rinse well between attempts.
Can I reuse the cleaning bath for multiple items?
It’s best to use fresh solution for each batch to avoid re-circulating tarnish. If you reuse, ensure the bath remains clean and doesn’t stain or leave residues before reusing.
Better to use a fresh bath for each round to avoid redepositing tarnish.
What should I do if silver turns black after cleaning?
A black residue usually indicates a chemical reaction with coatings or a residue left on the surface. Rinse thoroughly, dry, and polish. If it persists, discontinue and seek professional advice.
Rinse and dry again; if it persists, avoid continuing and consult an expert.
Watch Video
The Essentials
- Understand tarnish basics and use a foil bath for gentle cleaning.
- Test on an inconspicuous area before full cleanup.
- Rinse and dry thoroughly to prevent new tarnish.
- Choose baking soda for most cases; baking powder is a backup option.
- Polish lightly to maintain a bright finish and protect engravings.