What cleans silver: Safe tarnish removal at home
Learn practical, non-abrasive ways to clean silver safely at home. This guide covers tarnish causes, gentle household methods, and when to use chemical polishes for jewelry, flatware, and coins.

Using proven, gentle methods, you can restore shine to silver without harsh chemicals. This guide explains what cleans silver effectively, from simple household items to mild commercial cleaners, and shows how to clean jewelry, flatware, and coins safely. You’ll learn when to avoid abrasives, how to test for tarnish, and how to prevent future dulling with proper storage.
Why silver tarnishes and how cleaning works
Silver tarnish is a natural, protective layer that forms when silver reacts with sulfur compounds in the air and certain foods. The result is silver sulfide, which dulls shine and can appear yellow to black. Cleaning silver means removing that tarnish layer without scratching or removing the metal itself. When we answer what cleans silver, the key is choosing methods that break the tarnish bond gently, then rinse and dry to slow future build-up. According to Cleaning Tips, tarnish tends to accumulate faster in humid environments or when silver items are stored in airtight containers with rubber or paper, so prevention matters as much as processes. Understanding the chemistry helps you pick safe methods for different items, from delicate jewelry to heavy weighing pieces.
Household safety and decision framework
Before you pick a method, identify the item type (jewelry vs. flatware vs. coins) and check if the surface is plated or gilded. Plated items can wear through plating if cleaned too aggressively, while solid silver is more forgiving but still benefits from gentle handling. Start with the mildest approach and only escalate if tarnish persists. The goal is to remove the tarnish without altering the metal or any coatings. If you’re unsure, opt for non-abrasive methods first and avoid acidic dips on sensitive items. The Cleaning Tips team recommends testing any method on a hidden patch before full cleaning to confirm it won’t harm the finish.
Household methods: non-chemical options that work well
Many households successfully use simple, non-abrasive options to clean silver. The classic aluminum foil trick, paired with hot water and baking soda, creates a gentle redox reaction that lifts tarnish from exposed silver while leaving the metal intact. Other gentle options include a mild dish soap solution for light tarnish and softly rubbing with a microfiber cloth. These methods emphasize safety, accessibility, and speed, making them ideal for homeowners and renters who want results without expensive products.
Tools & Materials
- Soft microfiber cloths(Lint-free and non-abrasive for polishing)
- Baking soda (sodium bicarbonate)(Supports gentle tarnish removal)
- Aluminum foil(Used in the foil method to create a cleansing bath)
- Warm water(Avoid boiling water to prevent heat damage)
- Mild dish soap(Optional for light cleaning)
- Soft-bristled toothbrush or cotton swabs(Target tarnish in crevices)
- Silver polish (optional)(For stubborn tarnish after gentler methods)
- Gloves (optional)(Protect hands when handling chemicals)
- Drying towel or rack(Ensure items are completely dry to prevent new tarnish)
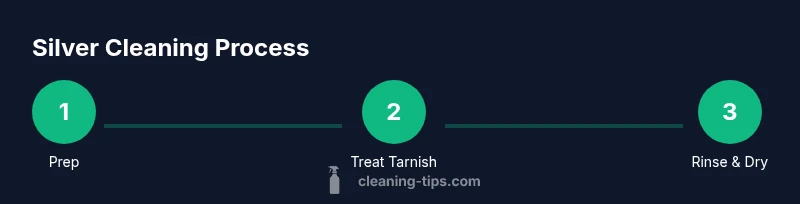
Steps
Estimated time: 20-40 minutes
- 1
Gather supplies
Collect all tools and materials before starting. This minimizes trips to the sink and keeps the cleaning process focused. Arrange items on a clean surface and keep a dedicated workspace to avoid cross-contamination with food prep areas.
Tip: Having everything within reach reduces mistakes and ensures you follow the correct sequence. - 2
Test a hidden area
Choose a small, inconspicuous spot on the item to test the cleaning method. If no discoloration or coating damage appears after a few minutes, proceed with the full cleaning. This protects delicate finishes and coatings.
Tip: A failed patch test means stop—try a milder approach or skip that item. - 3
Prepare the foil bath
Line a glass or ceramic container with aluminum foil, shiny side up. Add hot (not boiling) water and sprinkle baking soda to create a gentle cleansing bath. Place tarnished silver pieces in contact with the foil to trigger the reduction reaction.
Tip: Ensure the items touch the foil; avoiding air gaps helps tarnish lift more efficiently. - 4
Soak and observe
Let the items sit in the bath for a few minutes, checking periodically. Light tarnish will often lift quickly; stubborn spots may require a longer soak or a second bath.
Tip: Do not over-soak delicate pieces; excessive exposure can risk coatings or solder joints. - 5
Rinse and dry
Rinse with warm water to remove loosened tarnish and baking soda residue. Dry thoroughly with a soft cloth to prevent water spots and future tarnish.
Tip: Pat dry rather than rubbing vigorously to avoid scratching. - 6
Polish optional areas
For areas with persistent tarnish after the foil bath, apply a small amount of silver polish on a soft cloth and rub gently in circular motions. Wipe clean and buff to a bright finish.
Tip: Test polish on a hidden area first; avoid aggressive rubbing on delicate items. - 7
Store properly
After cleaning, store silver in a dry, low-humidity environment. Consider anti-tarnish cloths or silica gel to slow future tarnish. Regular light polishing can prevent heavy build-up.
Tip: Avoid rubber bands or newspaper contact; acids and inks can accelerate tarnish.
Questions & Answers
Is toothpaste safe to use on silver?
Toothpaste is abrasive and can scratch delicate finishes on jewelry; avoid using it on most silver items. For light tarnish, gentler methods are preferred. If used, apply very softly on a test patch and remove completely.
Toothpaste is abrasive and can scratch silver jewelry, so avoid it. Use gentler methods and test first.
Can I use bleach or ammonia to clean silver?
Bleach and ammonia can be harsh and may damage silver plating or coatings. Stick with non-acidic or mildly basic cleaners and the foil method for tarnish when appropriate.
Bleach and ammonia can harm silver finishes, so avoid them for routine cleaning.
Will cleaning coins remove value?
Cleaning valuable coins can reduce their numismatic value; if in doubt, consult a professional coin dealer before cleaning.
Cleaning coins can reduce value; consider professional advice for collectible coins.
Is silver polish safe for all silver items?
Silver polish is safe for many items but can be too abrasive for plated or thinly coated pieces. Use sparingly and test first, especially on antique or heirloom items.
Polish can be safe but test first, especially on delicate or plated items.
How can I prevent tarnish going forward?
Store silver in a dry, cool place; use anti-tarnish cloths or silica gel packs; avoid rubber and newspaper that can accelerate tarnish. Regular light cleaning can keep items shiny longer.
Store silver properly and clean lightly to prevent tarnish buildup.
How long does a typical silver cleaning take?
Most home cleanings take 20 to 40 minutes, depending on tarnish level and item type. Patience yields better results and reduces the risk of damage.
Most cleanings take twenty to forty minutes, depending on tarnish.
Watch Video
The Essentials
- Start with non-abrasive methods
- Test first on hidden areas
- Avoid harsh chemicals and scrubbing
- Rinse and dry completely after cleaning
- Store properly to reduce future tarnish