How to Clean Sponges: Safe, Effective Cleaning Guide
Learn practical, step-by-step methods to clean and sanitize kitchen sponges, extend their life, and maintain a healthier home with Cleaning Tips. Includes disinfection, drying, and storage tips.

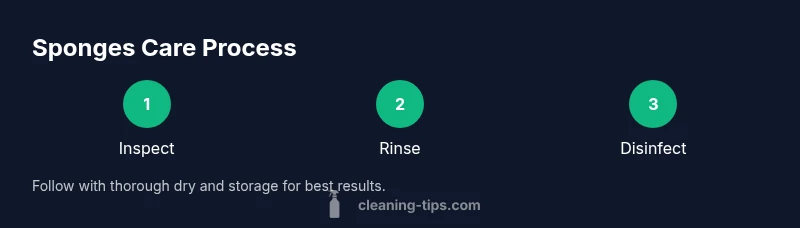
To clean sponges effectively, rinse them thoroughly, disinfect, and dry completely after every use. The fastest method for standard kitchen sponges is a quick microwave disinfect, followed by air-drying. For tougher stains or large batches, use a baking-soda soak or a vinegar solution. With a simple weekly routine, your clean sponges stay safer and last longer.
Why clean sponges matter
Keeping clean sponges is a cornerstone of a healthy kitchen. Sponges readily collect and transfer bacteria, mold, and food particles when damp, which can lead to cross-contact with dishes, countertops, and utensils. According to Cleaning Tips, a regular cleaning routine reduces the microbial load on sponges and minimizes the risk of contaminating meals. The goal is not only to sanitize but also to preserve the sponge’s integrity so it continues to perform its task without becoming a source of odors or residues. In practice, a consistent cycle of rinse, disinfect, and dry is sufficient for most households. By treating sponges as a reusable tool rather than disposable waste, you save money and lower your environmental footprint. The overarching message from Cleaning Tips is simple: small, repeatable steps add up to a safer kitchen over time, and clean sponges play a big role in that workflow. When you start with a clean sponge, you set a standard for the rest of your cleaning routine and encourage healthier habits throughout the home.
- Key concepts: damp sponges harbor microbes; drying reduces growth; disinfection minimizes risk.
- Quick checks: if a sponge smells sour or shows visible discoloration, replace it promptly.
- Practical mindset: integrate sponge care into weekly cleaning so you don’t have to overhaul routines later.
In short, autoclaves aren’t necessary for home use, but simple, proven methods work reliably for most families. This guide focuses on practical, affordable options you can implement today to keep your sponges clean and your family safe.
Types of sponges and how cleaning differs
Sponges come in several common varieties: cellulose, synthetic polyurethane, and scrubby variants that include a rough surface for tougher grime. Each type responds a little differently to cleaning and disinfection. Cellulose sponges, which are highly porous, tend to absorb more water and can harbor odors faster if not dried properly. Synthetic polyurethane sponges are more resilient and often tolerate higher heat and harsher cleaning agents. Scrubby sponges with metal or coarse fibers require extra care to avoid damaging the scrub layer or releasing metal fragments into food-contact surfaces. Regardless of type, the core steps remain the same: remove debris, disinfect, and dry thoroughly. Cleaning Tips emphasizes that rotating sponges between family members and surfaces helps reduce cross-contamination and lengthens the usable life of each sponge. When in doubt, check for wear indicators: if the sponge is torn, crumbly, or has an evident odor that persists after cleaning, it’s time to replace. By understanding sponge types, you tailor disinfection approaches to maximize effectiveness and longevity.
- Quick reference: cellulose holds more water but dries slower; synthetic resists wear better under heat.
- Best practices: keep separate sponges for dishes, counters, and bathrooms to minimize cross-use.
- Maintenance tip: regularly replace worn sponges to prevent buildup of unseen microbes.
For most kitchens, a standard cellulose or synthetic sponge can be kept hygienic with the right routine. If you rely on specialty sponges, adjust heat exposure sparingly to avoid breaking down fibers. The bottom line is consistent care yields safer surfaces and more reliable cleaning tools.
Core disinfection methods for everyday sponges
There are several reliable ways to disinfect sponges without resorting to expensive equipment. Microwave disinfection is a fast, kitchen-friendly option. Dampen the sponge (never dry) and heat on high for about 60 seconds, watching to ensure it doesn’t dry out or melt. This method can reduce bacteria significantly, but avoid plastic scrubbers that aren’t microwave-safe, and never microwave metal-bearing materials. A vinegar soak offers another effective approach: mix white distilled vinegar with water in a ratio that suits your sponge size, soak for 5–10 minutes, then rinse well. Baking soda paste can help tackle stubborn stains and odors: combine baking soda with a small amount of water to form a thick paste, apply to the sponge, let sit for 5–10 minutes, then rinse and air-dry. For households that run the dishwasher on a sanitize cycle, placing clean, damp sponges in the dishwasher can also deliver disinfection while washing other items. Always ensure you rinse thoroughly after any disinfecting method to remove residual odors or cleaning agents.
- Quick note: multiple methods can be used in sequence for stubborn odors.
- Safety guideline: never combine heat-based disinfection with chemical solutions that could release fumes.
- Practical tip: after disinfection, squeeze out excess moisture and place on a rack for air drying to speed up drying time.
Drying and storage for longevity
Moist environments are a sponge’s enemy. The moment a sponge is disinfected, it should be dried completely before storage. Lay damp sponges on a clean drying rack or hang them on a dedicated hook where air circulates freely. Avoid leaving sponges in sinks or shallow containers where water can pool, as this invites mildew. If you share a kitchen with other people, designate different hooks or containers for dish sponges versus general-purpose sponges to reduce cross-contamination. In addition, store sponges in a dry, well-ventilated cabinet rather than closed drawers. The consistent habit of drying sponges fully curtails bacterial growth and extends their usable life. When you notice persistent odors after drying, it’s a sign that the sponge should be replaced. Keeping a small rotation system—one wet, one drying, one ready for use—helps maintain hygiene without reshuffling your entire cleaning setup.
- Practical tip: wash the drying rack weekly with hot water and soap.
- Common mistake to avoid: stacking damp sponges; air circulation is essential.
- Quick ritual: after every cleaning cycle, squeeze, rinse, disinfect, and lay flat to dry.
Proper drying is as important as cleaning. A dry sponge is a safer sponge, and a safe sponge means a cleaner kitchen overall.
Weekly care routine and batch cleaning
To stay ahead of grime, establish a simple weekly schedule for sponge care. Designate a cleaning day when you audit all sponges: discard any with tears, foul odors, or persistent staining. For a batch-cleaning approach, collect all sponges, rinse each thoroughly, then disinfect using your preferred method. Short-dwell disinfection routines work well: a quick microwave pass for each sponge, a vinegar soak for stubborn odors, and a final rinse before air drying. If you have multiple sponges, consider labeling them by area of use and rotating them on a weekly basis to prevent cross-contamination. By batching tasks, you minimize daily decision fatigue and ensure every sponge receives consistent care. Following Cleaning Tips’ recommended routine, you’ll notice fewer lingering smells, less residue on dishes, and a longer sponge lifespan overall. This weekly rhythm supports a healthier kitchen environment and reduces daily waste.
- Scheduling hint: set a recurring reminder for sponge maintenance.
- Batch approach: clean several sponges at once while you’re doing laundry or dishes.
- Environmental benefit: longer life means fewer sponges end up in the landfill.
Common mistakes and safety warnings
Even good cleaners can go wrong if you skip drying, use inappropriate methods, or reuse heavily worn sponges. Common mistakes include microwaving a dry sponge, which can overheat and melt; using chlorine bleach without proper ventilation or thorough rinsing; using hot water on delicate sponges that may degrade fibers; and storing damp sponges in closed containers where moisture persists. Safety-first guidance: never use metal scrubbers in the microwave; always check sponge labels for heat and chemical compatibility; and keep sponges away from food-contact surfaces until fully dry. If a sponge remains sticky, smells off, or shows visible mold, replace it rather than attempting to sanitize further. Finally, remember that disinfection is about reducing microbial load, not erasing all traces of bacteria. Regular replacement is part of responsible sponge care, especially in households with children, elderly residents, or pets who are more susceptible to infection. By avoiding these pitfalls, you’ll keep your kitchen safer and your sponges performing at their best.
Quick tips for beginners and seasoned cleaners
- Start with a simple routine: rinse, disinfect, and dry after each use. Consistency beats intensity.
- Always use damp sponges for microwave disinfection and avoid any metal components.
- Batch-clean on a designated day to stay on top of maintenance.
- If you smell or see staining after cleaning, replace promptly rather than re-disinfecting repeatedly.
- Store sponges in a dry, ventilated area to prevent mildew and odors from lingering.
Tools & Materials
- Dish soap(Regular grease-cutting soap for initial cleaning)
- Water(For rinsing and diluting solutions)
- Microwave-safe bowl(For damp sponges during microwave disinfection)
- Microwave(For rapid disinfection (do not use if sponge has metal parts))
- Vinegar (5% or household distilled)(Soak for odor control and mild disinfection)
- Baking soda(Create paste or help neutralize odors)
- White or apple-cide vinegar (optional)(Alternative odor control)
- Large pot or kettle(For boiling water disinfection (optional))
- Tongs or clean gloves(Handle hot items safely)
- Drying rack or clean towel(Promotes complete drying)
- Scrub brush or sponge scourer(Pre-clean stubborn grime before disinfection)
- Gloves (optional)(Protect hands during cleaning)
Steps
Estimated time: Estimated total time: 20-30 minutes per batch (excluding extended drying time)
- 1
Assess sponge quality
Start by inspecting each sponge for tears, persistent odor, or crumbling fibers. If any of these signs are present, replace the sponge rather than trying to salvage it. This saves time and avoids spreading germs in your kitchen.
Tip: If you’re unsure, err on the side of replacement. - 2
Rinse and wring
Rinse the sponge under running water to remove loose debris and food particles. Wring out as much moisture as possible to prepare for disinfection, which improves effectiveness.
Tip: A quick squeeze while under running water helps remove more grime. - 3
Disinfect with microwave
Place a damp sponge in a microwave-safe bowl and heat on high for about 60 seconds. Ensure the sponge is damp and the microwave is clear of any metal components. Let it stand for a minute before removing to avoid steam burns.
Tip: Do not microwave sponges with metal scrubbers. - 4
Alternate: vinegar soak
If you prefer chemical-free disinfection, soak sponges in a bowl of white vinegar for 5–10 minutes. Rinse thoroughly after soaking to remove any vinegar scent and residues.
Tip: Vinegar is a gentle sanitizer and helps neutralize odors. - 5
Baking soda for stains
Make a thick paste with baking soda and water, apply to the sponge, and let sit for 5–10 minutes. Rinse well; baking soda helps lift stains and deodorize.
Tip: Test a small area first if the sponge is colored to prevent discoloration. - 6
Rinse again
Regardless of the method chosen, rinse the sponge well to remove residual soap, vinegar, or baking soda. A thorough rinse ensures no taste or odor transfers to future dishes.
Tip: Twist gently to extract excess moisture. - 7
Dry completely
Place damp sponges on a drying rack or hang them so air can circulate. Avoid leaving sponges in sinks or closed containers where moisture lingers, which invites mildew.
Tip: Allow plenty of airflow; every extra hour of drying reduces bacteria growth. - 8
Rotate and replace
Keep a rotation system so you don’t use the same sponge day after day. Replace sponges that show wear, odor, or persistent staining.
Tip: Document replacement dates to build a predictable cycle.
Questions & Answers
How often should I replace kitchen sponges?
Most households replace sponges every 1-2 weeks, or sooner if they show persistent odor or wear. Regular replacement reduces germ buildup and keeps cleaning effective.
Replace sponges every one to two weeks, or sooner if they smell or wear out. Regular replacement reduces germs.
Can I microwave sponges with metal scrubbers?
No. Metal scrubbers can spark in the microwave and damage the appliance. Use only sponges without metal components for microwave disinfection.
Do not microwave sponges with metal scrubbers; remove metal parts before disinfection.
Is it safe to use bleach on sponges?
Bleach can be used sparingly for disinfection, but it should be diluted properly and the sponge thoroughly rinsed afterward. Always provide good ventilation and avoid mixing with ammonia or acids.
Bleach can be used with caution and proper ventilation; rinse well after use.
What is the best way to store clean sponges?
Store sponges in a dry, well-ventilated area, preferably in an open rack or on a hook. Keep them away from sinks where moisture collects to prevent mildew.
Keep sponges in a dry, ventilated spot away from the sink.
Are natural cellulose sponges harder to sanitize?
Natural cellulose sponges can absorb more water and odors, but they respond well to the same disinfection practices when dried properly. Rotate and replace as needed.
Cellulose sponges sanitize well with proper drying; just watch for odor and wear.
What should I do with heavily soiled sponges?
Rinse to remove solids, then disinfect using your preferred method. If the sponge remains stained or smelly after cleaning, replace it to prevent contamination.
Rinse, disinfect, and replace if odors persist.
Watch Video
The Essentials
- Routinely rinse, disinfect, and dry sponges after use.
- Microwave and vinegar methods are quick, effective options.
- Drying completely prevents mildew and extends life.
- Rotate and replace worn sponges to maintain hygiene.