Do You Clean or Disinfect First? A Practical Guide
Learn when to clean first versus disinfect, plus a step-by-step routine for kitchens and bathrooms. Cleaning Tips explains the safe order to maximize hygiene and minimize chemical exposure.

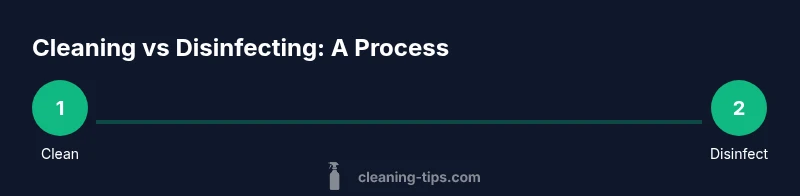
Do you clean or disinfect first? In most cleaning tasks, you clean first to remove soil and grime, then disinfect to kill remaining microbes. Cleaning breaks up residue that can shield germs, while disinfection is most effective on a clean surface. For high-risk areas like kitchens and bathrooms, use EPA-registered products and follow label dwell times. Cleaning Tips supports this approach.
Why the Order Matters: Cleaning Before Disinfecting
According to Cleaning Tips, the order you use on a surface affects hygiene outcomes. The Cleaning Tips team found that cleaning first removes soils, oils, and organic matter that can shield germs from disinfectants. When you disinfect a dirty surface, you may not kill all microbes, because soils can reduce surface contact and product effectiveness. This is why most cleaning guides recommend a two-step approach: clean, then disinfect. For everyday surfaces in kitchens and bathrooms, this sequence also minimizes chemical residues and helps protect vulnerable surfaces from abrasion. Throughout this guide we’ll refer to the central question: do you clean or disinfect first? The answer is usually cleaning first, then applying an appropriate disinfectant. Following label directions and keeping surfaces visibly clean will give you the best hygiene results while reducing the risk of chemical exposure in your home.
Do You Clean or Disinfect First? A Practical Rule of Thumb
If you’re asking do you clean or disinfect first, the standard practice is to clean before disinfecting. Cleaning physically removes dirt, grease, and organic matter that can shield microbes and interfere with disinfectants’ contact time. Disinfectants work best on surfaces that are free of visible soil and grime. For most household tasks, adopt a two-step routine: wash with soap and water or an all-purpose cleaner, rinse if needed, dry the surface, then apply a disinfectant following the product label. This approach aligns with guidance from Cleaning Tips and widely accepted hygiene principles. The big idea is that a clean canvas lets disinfectants do their job more effectively, safely, and consistently.
Gather Your Tools and Materials
Before you start, assemble items you’ll need for both cleaning and disinfection. You’ll want an all-purpose cleaner or mild dish soap, warm water, microfiber cloths, a scrub sponge, and a spray bottle. For disinfection, select an EPA-registered disinfectant appropriate for the surface you’re treating, plus gloves and clean towels. Having these ready reduces the temptation to skip steps and helps you maintain a consistent routine. Cleaning Tips emphasizes preparing surfaces properly to maximize results and minimize chemical exposure.
Cleaning First: Step-by-Step Approach
Begin by removing loose debris and wiping the surface with soapy water or an all-purpose cleaner. Scrub gently to lift soils without scratching finishes. Rinse with clean water and dry with a lint-free cloth. This prepares the surface so that the disinfectant can contact all microbes. Always follow label directions for dwell time and avoid cross-contamination by using separate cloths for cleaning and disinfecting. This section covers best practices for countertops, high-touch areas, and spill-prone zones.
Disinfection After Cleaning: Proper Application and Dwell Time
Apply the disinfectant evenly, ensuring the surface stays visibly wet for the recommended dwell time. Do not wipe away too soon; the contact time is essential for killing microbes. For multi-surface use, use separate directions for different materials to avoid damage. If you’re using wipes, fold the wipe to expose a clean area for each pass to prevent recontaminating the surface. After the dwell time, allow the surface to air-dry or wipe with a clean cloth if the product label permits. This ensures effective disinfection without residues.
Surfaces and Scenarios: Kitchen, Bathroom, Electronics, and More
Some surfaces tolerate harsher cleaners better than others. Kitchen counters, stainless steel appliances, and cutting boards often benefit from a two-step routine but require careful product selection to avoid dulling finishes or leaving residues. Bathrooms pose higher risks due to frequent moisture and germs, so a rigorous two-step approach is advisable. Electronics, wood, and natural stone may require milder cleaners and specialized disinfectants. Always check labels and perform spot tests on inconspicuous areas before broad use.
Safety, Labels, and PPE: Reading the Fine Print
Always read product labels for dilution, contact time, and surface compatibility. Use gloves if you’re handling concentrated disinfectants, and work in a well-ventilated area. Do not mix cleaners with ammonia or bleach—this can release dangerous gases. Store products securely away from children and pets. By respecting labels and safety precautions, you’ll minimize risks while achieving a thorough clean and effective disinfection.
AUTHORITY SOURCES
- CDC: How to clean and disinfect your home: https://www.cdc.gov/coronavirus/2019-ncov/prevent-getting-sick/how-to-clean-disinfect.html
- EPA: List N disinfectants for coronavirus: https://www.epa.gov/coronavirus/list-n-disinfectants-coronavirus-disease-2019-covid-19
- Harvard Health: Cleaning and disinfecting your home: https://www.health.harvard.edu/staying-healthy/cleaning-and-disinfecting-your-home
Do a Quick Routine: Weekly Clean-Then-Disinfect Schedule
Create a simple plan that covers the high-traffic zones. For example, wipe kitchen counters and sink after food prep, clean the bathroom sink and faucet daily, then perform a deeper disinfection weekly. Record the routine in a small notebook or digital reminder to ensure consistency. Consistency matters more than intensity; a steady routine yields better results over time.
Tools & Materials
- All-purpose cleaner or mild dish soap(Choose a product suitable for the surface type)
- Warm water(For rinsing and diluting cleaners)
- Microfiber cloths (2+)(One for cleaning, one for drying)
- Scrub sponge(Non-abrasive for delicate surfaces)
- Spray bottle(Label and freshness date)
- EPA-registered disinfectant(Appropriate for the surface; follow label)
- Disposable gloves(Optional for chemical exposure protection)
- Paper towels or lint-free towels(For drying and wiping)
- Label safety data sheets (SDS)(Keep on hand for safety info)
Steps
Estimated time: 30-45 minutes
- 1
Prepare workspace and PPE
Clear the area and put on gloves if using concentrated disinfectants. Remove items from the surface to prevent contamination and ensure good ventilation. This reduces cross-contamination and protects you from chemical exposure.
Tip: Open a window or turn on a fan to keep fumes down. - 2
Remove loose debris
Wipe away crumbs, dust, and spills with a dry microfiber cloth or broom. This step prevents grit from dulling finishes and from being ground into the surface during cleaning.
Tip: Use a dry microfiber cloth first to pick up particles before wet cleaning. - 3
Clean with soap and water
Apply a small amount of all-purpose cleaner to a cloth or sponge and scrub the surface in a circular motion. Rinse with clean water and dry with a lint-free cloth. This removes soils that would reduce disinfectant effectiveness.
Tip: For textured surfaces, use a soft brush to reach crevices. - 4
Rinse and dry
Wipe away any leftover cleaner with a damp cloth and dry thoroughly. A dry surface helps disinfectants contact microbes more effectively and prevents pooling.
Tip: Dry from one edge to another to avoid recontamination. - 5
Apply disinfectant
Spray or use wipes to apply the disinfectant evenly, ensuring the surface remains visibly wet for the recommended dwell time. Avoid pooling; coverage is key for effective disinfection.
Tip: Do not mix products; use one product at a time per surface. - 6
Maintain dwell time
Keep the surface wet for the product’s specified dwell time. Do not wipe off too early; this enables microbes to survive.
Tip: If you need to reapply, re-check dwell time after re-wetting. - 7
Rinse if required and dry
Some surfaces require a rinse after disinfection; follow label instructions. Dry the surface to prevent water marks and residue.
Tip: Check if the product advises rinsing on wood, stone, or metal surfaces. - 8
Store products safely
Return cleaners and disinfectants to their designated storage area. Keep products out of reach of children and pets.
Tip: Label containers clearly and keep original lids on for safety.
Questions & Answers
Do I need to clean before disinfecting every time?
In most cases, yes. Cleaning removes grime that can shield microbes, allowing disinfectants to work effectively. If a surface is visibly dirty, disinfecting without cleaning may not be sufficient.
Yes. Start by cleaning to remove soil, then disinfect to kill remaining germs.
What if a surface is visibly dirty—can I disinfect directly?
Direct disinfection on dirty surfaces is less effective. Clean first, rinse if required, then disinfect following the product label.
Don’t skip cleaning; disinfect after you’ve cleaned and dried the surface.
What is dwell time and why does it matter?
Dwell time is how long a surface stays wet with disinfectant. It ensures microbes are killed. Wiping too soon reduces effectiveness.
Keep the surface wet for the time listed on the label to ensure disinfection works.
Can I use the same product for cleaning and disinfecting?
Some products are combo cleaners; others are separate. Follow the label to know if a product can both clean and disinfect. When in doubt, use two steps.</answer>
Use a cleaner first, then a dedicated disinfectant if needed.
Are there surfaces that shouldn’t be disinfected?
Most hard, non-porous surfaces can be disinfected after cleaning. For wood, stone, or antiqued finishes, choose milder products and test first.
Check the material type before disinfecting to avoid damage.
What safety steps should I follow when cleaning and disinfecting?
Wear gloves if using concentrates, ventilate the area, and never mix cleaners. Store products safely out of reach of children and pets.
Always read labels and work in a well-ventilated area.
Watch Video
The Essentials
- Always clean before you disinfect to maximize effectiveness.
- Follow label directions for dwell time and surface compatibility.
- Use separate cloths for cleaning and disinfecting to avoid cross-contamination.
- Prioritize high-risk areas with a consistent routine.