Is Cleaning the Same Thing as Disinfecting? A Home Hygiene Guide
Explore whether cleaning and disinfecting are the same, when to use each, and how to build a practical home hygiene routine that reduces germs while protecting surfaces and occupants.

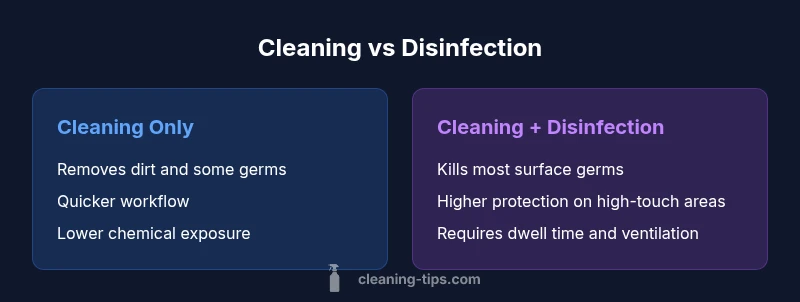
Cleaning and disinfecting are not the same. Cleaning removes visible dirt and reduces germs, while disinfection uses chemicals to kill most surface germs. For everyday routines, clean first to remove debris, then disinfect on high-touch surfaces or during illness. Adjust your approach based on risk, surface type, and occupancy.
Is Cleaning the Same Thing as Disinfecting?
The short answer to the question is: no, they are not the same action, though they work together. Cleaning focuses on removing visible soil and a large portion of germs through physical action and cleaners. Disinfection, by contrast, uses chemical agents designed to kill remaining germs on surfaces. Understanding this distinction helps homeowners structure routines that are effective without overusing chemicals. According to Cleaning Tips, a practical approach is to clean first to remove debris, then apply disinfectant to high-touch surfaces or after illness. This sequencing reduces the microbial load safely and efficiently, while minimizing chemical exposure where it isn’t needed.]
The Definitions: Cleaning vs Disinfection
Cleaning is the mechanical or chemical removal of dirt, grime, and many germs from surfaces. It improves appearance and reduces the microbial burden but does not guarantee the elimination of all pathogens. Disinfection, on the other hand, uses concentrated chemical agents on clean surfaces to kill most remaining microorganisms, including bacteria and viruses. The key takeaway is that cleaning reduces grime and lowers germs, while disinfection targets the organisms that cleaning may miss. Both actions are parts of a comprehensive hygiene routine, and many households combine them to maximize safety without overreliance on chemicals. For is cleaning the same thing as disinfecting, it helps to separate the goals: debris removal versus germ-killing efficacy.
How These Methods Work: Physical vs Chemical
Cleaning relies on physical action (scrubbing, wiping) and surfactants that lift dirt from surfaces. The result is a visibly cleaner surface with fewer germs. Disinfection relies on chemical compounds—like quaternary ammonium compounds, alcohols, or oxidizing agents—to inactivate or destroy pathogens. Efficacy depends on factors such as contact time, surface cleanliness, and the organism being targeted. In practice, disinfection is most effective when performed on surfaces that have been properly cleaned; dirt can shield microbes and reduce chemical effectiveness. Understanding the chemistry and mechanics helps users select the right product for the task and avoid overuse.
The Cleaning Process: Step by Step
- Clear the surface of visible objects and debris.
- Clean with a routine cleaner or soap and water, scrubbing where needed.
- Rinse or wipe away loosened grime and dry the surface.
- If disinfection is warranted, apply an appropriate disinfectant following the product’s label instructions.
- Allow the disinfectant to remain wet for the recommended dwell time, then let it air dry or wipe as directed.
- Ventilate the area during and after application to reduce chemical exposure. This sequence ensures both grime removal and germ reduction where it matters most.
When Disinfection Is Essential
Disinfection is most essential on high-touch surfaces and in settings with elevated illness risk. Kitchens, bathrooms, door handles, light switches, and shared appliances are typical targets for routine disinfection, especially during cold or flu season. If someone in the household is ill or has a weakened immune system, the frequency and scope of disinfection should increase. It’s also prudent in shared living spaces, daycare environments, or homes with vulnerable individuals. The goal is to reduce transmission risk without unnecessary chemical exposure. Pair disinfection with good cleaning practices to maintain a safer home environment.
Surface Types and Material Considerations
Not all surfaces tolerate every disinfectant equally well. Some cleaners can dull wood finishes, corrode metal, or damage lacquered counters. Always check the label for surface compatibility and test in a small inconspicuous area if you’re unsure. For delicate surfaces, use milder products or switch to cleaners that are labeled safe for that material. Porous surfaces like unfinished wood, fabric, or certain countertops may not disinfect as effectively and may require alternative strategies (e.g., frequent cleaning and using covers or protective coatings). Balancing efficacy with material safety is a core part of responsible hygiene.
Product Selection: Choosing the Right Disinfectants
Choose EPA-registered disinfectants appropriate for the target pathogen and surface. Read the label for surface compatibility, required dwell time, and ventilation needs. For routine disinfection, alcohol-based sprays (at least 70%), hypochlorite solutions, or hydrogen peroxide-based products are common options, each with specific limitations. Always follow dilution instructions and never mix cleaners with incompatible chemicals. In high-traffic homes, rotate products to prevent residue buildup, and store them securely away from children and pets. The right product, used correctly, makes disinfection predictable and effective without unnecessary risk.
Safety, Ventilation, and Handling: Protecting People and Pets
Disinfectants can irritate skin, eyes, and airways, so use gloves and ensure good ventilation during and after application. Keep products out of reach of children and pets, and never mix cleaners unless the label explicitly allows it. Wear PPE if the product requires it, and store chemicals in a cool, dry place away from heat sources. After application, wash hands and ventilate the area until fumes are gone. Proper disposal and storage practices keep the home safe while maintaining hygiene effectiveness.
Practical Scenarios in Home Settings: Kitchen, Bathroom, Living Room
In the kitchen, clean surfaces first to remove food residues, then disinfect cutting boards and frequently touched areas like faucet handles and cabinet pulls. In bathrooms, target the toilet rim, sink, and shower controls, using disinfectants with appropriate dwell times. In living rooms, focus on high-touch surfaces such as remote controls, light switches, and coffee tables after cleaning. High-touch zones in shared spaces benefit most from a routine that alternates between cleaning and disinfection, especially during illness or outbreaks. By adapting the routine to daily activity, you can maintain hygiene without overwhelming the system.
Common Myths Debunked
Myth: Disinfection alone is enough to keep a home safe. Truth: Cleaning is a prerequisite; dirt can shield germs from disinfectants. Myth: All surfaces can be disinfected instantly with any product. Truth: Efficacy depends on surface compatibility and dwell time. Myth: More chemicals mean better hygiene. Truth: Correct product selection and proper use matter more than quantity. By separating myths from practice, you can design a rational hygiene plan.
Scheduling and Routines: A Simple Plan for Most Homes
Start with a weekly cleaning rhythm that covers floors, counters, and general surfaces. Add daily quick cleans on high-use areas, followed by targeted disinfection on high-touch surfaces several times a week or during illness. Use a simple checklist to ensure consistency: clean, disinfect, dry, and ventilate. Adjust the schedule for high-traffic households or vulnerable occupants. Keeping a predictable routine reduces decision fatigue and supports long-term hygiene goals.
Quick Hygiene Audits: Checklists and Reminders
Create a short audit at the end of each day or week:
- Are high-touch surfaces cleaned and disinfected as needed?
- Has ventilation been adequate during and after product use?
- Are cleaning products accessible but safely stored?
- Are surfaces that touch food or skin given extra attention?
- Is there a log of products used and dwell times?
Comparison
| Feature | Cleaning only | Cleaning + disinfection |
|---|---|---|
| Germ reduction | Moderate | High |
| Surface compatibility | Broad; generally safe with routine cleaners | Broad, but follow label for materials and avoid incompatible finishes |
| Time required | Faster routine cleaning | Longer due to cleaning + dwell time |
| Cost per use | Low | Moderate to high, depending on products |
| Best for | Everyday maintenance in low-risk areas | High-touch areas, illness risk, shared spaces |
Strengths
- Reduces visible dirt and germs with minimal effort
- Flexible workflows for any home
- Helps tailor hygiene to risk levels
- Supports safer chemical use by targeting needs
Weaknesses
- Disinfectants can be harsh on surfaces and skin
- Overuse may lead to chemical residues or odor
- Disinfection is ineffective if surfaces aren’t cleaned first
- Dwell times and ventilation requirements can be overlooked
Disinfection complements cleaning; use cleaning first, then disinfect on high-risk surfaces
For most homes, a two-step approach—cleaning followed by disinfection—offers the best balance of safety, efficiency, and surface care. Tailor the routine to illness risk, traffic, and materials to minimize chemical exposure while maximizing hygiene.
Questions & Answers
Is cleaning the same as disinfecting?
No. Cleaning removes dirt and reduces germs through physical action, while disinfection uses chemical agents to kill remaining pathogens. Both steps are important in a complete hygiene routine.
No—the two are different: cleaning removes grime and lowers germs, while disinfection kills most remaining pathogens. Use cleaning first, then disinfect on high-touch surfaces as needed.
When should I disinfect instead of just cleaning?
Disinfect when dealing with illness, on high-touch surfaces, or in shared spaces where transmission risk is higher. Always clean first, then apply a disinfectant and follow dwell times.
Disinfect on high-touch surfaces, especially during illness or in shared spaces, but always clean first for best results.
Can you clean and disinfect at the same time?
Not exactly at the same time, but you can perform sequential steps quickly: clean to remove soil, then apply disinfectant according to label directions. Do not mix products unless the label explicitly allows it.
You do them in sequence: clean, then disinfect, following the product’s instructions.
Do I need to disinfect after every spill?
Not necessarily. Clean spills to remove residues, then disinfect if the spill involved high-risk areas (like bathrooms or kitchens) or if illness is present. For routine spills, cleaning might be sufficient.
You don’t need to disinfect every spill—assess risk and surface, and disinfect when appropriate.
Are disinfectants safe around kids and pets?
Most household disinfectants are safe when used as directed, but keep them out of reach and ensure good ventilation. Always read the label for child- and pet-safety guidance and consider less toxic options where possible.
Use according to the label, keep products away from children and pets, and ventilate the area.
Do all surfaces need disinfection?
No. Prioritize high-touch surfaces and areas with higher contamination risk. Some materials may be sensitive to certain chemicals, so choose products wisely and avoid unnecessary disinfection on delicate finishes.
Disinfect only where it adds value, focusing on high-touch spots and risk-prone areas.
The Essentials
- Prioritize cleaning to remove debris before disinfection
- Disinfect high-touch surfaces during illness or in shared spaces
- Always follow product labels for dwell time and ventilation
- Test surface compatibility to prevent damage
- Maintain a simple, repeatable hygiene routine