Vinyl Plank Flooring How to Clean: Complete Guide
Learn how to clean vinyl plank flooring safely with a practical, step-by-step approach. Discover safe cleaners, daily routines, stain solutions, and maintenance tips to protect your floors for years.

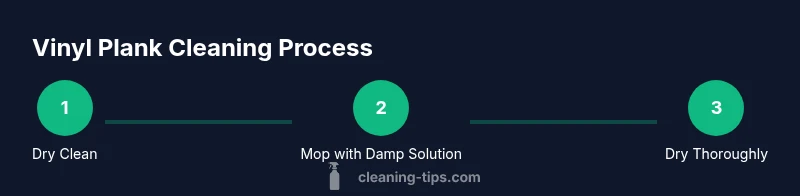
This guide teaches you how to clean vinyl plank flooring safely and effectively for daily upkeep and deeper cleans. You’ll follow a simple, step-by-step routine using a damp microfiber mop and a pH-neutral cleaner, plus quick fixes for spills. Avoid soaking the floor or using abrasive tools to protect the finish and longevity.
Understanding Vinyl Plank Flooring and Cleaning Basics
Vinyl plank flooring (often abbreviated LVP for luxury vinyl plank) combines a durable top wear layer with a vinyl core and a protective finish. It’s designed to mimic hardwood while offering superior moisture resistance and easier maintenance. When you tackle vinyl plank cleaning, the goal is to remove dust and grime without saturating seams or softening adhesives. According to Cleaning Tips, the best results come from a routine that minimizes moisture and uses gentle tools. A damp microfiber mop is ideal because it lofts up dirt without forcing excess liquid into edges. Always start with dry cleaning—sweeping or vacuuming on a hard-floor setting—to remove loose debris before introducing any liquid. Check your manufacturer’s care guide, because some vinyl planks are more water resistant than others and a few cleaners may be discouraged. In practice, you’ll build a simple routine: dry clean daily, then mop with a barely damp cloth when needed. Keep humidity stable and use doormats to reduce grit that can scratch the surface. Consistency matters as much as the cleaner you choose, especially for high-traffic areas where vinyl plank flooring how to clean is a common household task.
What Not To Do: Common Cleaning Mistakes
Many homeowners inadvertently hurt vinyl plank flooring by using the wrong tools or too much moisture. One frequent error is using steam mops; heat and humidity can weaken the wear layer and edges over time. Avoid abrasive pads or stiff-bristle brushes that dull the finish or scratch the surface. Another pitfall is using acidic or ammonia-based cleaners, which can break down the protective coating and leave streaks. Never flood a room or leave standing water on joints or seams, as this can seep beneath the wear layer and cause discoloration or warping. Even seemingly harmless products like household bleach should be avoided unless the manufacturer explicitly approves them in a diluted form. Finally, never ignore spills—prompt cleanup prevents staining and adhesive issues. Cleaning Tips emphasizes that sticking to a pH-neutral cleaner and a damp mop protects the finish while delivering a bright, even look across rooms.
Daily Cleaning Routine for Vinyl Plank Floors
A reliable daily routine keeps vinyl plank flooring looking fresh without heavy effort. Start with a quick dry clean by sweeping or vacuuming to remove grit and hair that can scratch the surface over time. Use a microfiber mop lightly dampened with water or a manufacturer-approved cleaner for high-traffic zones. For most homes, a dedicated vinyl floor cleaner is best, but a few drops of mild dish soap in warm water can work if you’re careful to rinse and dry promptly. Avoid soaking or saturating the mop and never leave pools of liquid on the floor. When moving furniture or heavy appliances, lift instead of sliding to prevent nicks and gouges. If you have pets, wipe their paws at entryways and trim nails to reduce scratching. Over time you should notice fewer visible scratches, clearer grain, and less dulling of the wear layer—signs that your chosen cleaning approach is effective. The Cleaning Tips team notes that a little routine goes a long way toward sustaining shine and resilience in vinyl plank flooring.
Deep Cleaning: When to Do It and How
Deep cleaning is not needed every week, but it’s essential every few months or after a major spill. Plan a dedicated session when you’ve cleared a room or when you’re preparing to sell or re-rent, so you can assess the floor’s overall condition first. Begin by thoroughly sweeping or vacuuming to remove loose debris. Prepare a cleaner that is truly pH-neutral or specifically labeled for vinyl floors, then damp-mop to remove embedded grime. If you encounter sticky residues, apply a tiny amount of cleaner directly to the spot and let it sit for a moment before wiping away with a soft cloth. After mopping, go over the floor with a clean, slightly damp mop to remove any soap residue, then dry with towels or a dry mop to avoid water streaks. During deep cleaning, avoid soaking seams or letting excess liquid sit along the edges where the boards meet. Cleaning Tips advises testing any new cleaner in an inconspicuous area before broad application to prevent unwanted discoloration.
Safe Cleaners for Vinyl Plank Flooring How to Clean
Safe cleaners are the foundation of vinyl plank maintenance. Use a pH-neutral floor cleaner or a gentle solution designed for luxury vinyl plank flooring. If you prefer a DIY option, mix a few drops of mild dish soap in a gallon of warm water and apply with a damp cloth or mop. Always avoid ammonia, bleach, wax-based products, and abrasive cleaners that can degrade the wear layer or leave a cloudy film. If you’re curious about vinegar, note that some manufacturers approve diluted vinegar in very small amounts; however, always test first and consult your care guide. For best results, follow the cleaner’s dilution instructions precisely and wipe the floor dry after cleaning to prevent moisture-related issues around seams. Remember to label your cleaning solution clearly and store it out of reach of children and pets. The Right cleaner makes the process smoother and helps preserve the floor’s color and texture for years.
Stains and Spills: Quick Fixes
Spills happen—sparkling water, coffee, or pet accidents. The key is speed and gentleness. Blot liquids immediately with a soft cloth; avoid rubbing, which can push stain into the wear layer. For sticky residues like syrup or sugar-based spills, re-wet the area with a small amount of cleaner and wipe gently with a microfiber cloth. For ink or marker stains, dab with a small amount of isopropyl alcohol on a cloth and blot until the stain lifts, then wipe with clean water. Food coloring and dye-based stains may require a repeat but never saturate the area. If a stain seems stubborn, don’t scrub hard—repeat the damp cleaning pass and consider a specialty vinyl stain remover labeled for LVP floors. Always dry after treatment to prevent water from seeping into seams. Regular attention reduces long-term staining and keeps the floor visually even.
Protective Measures and Maintenance
Protection is better than remediation. Place doormats at entrances to cut down on grit. Use felt pads under furniture legs to prevent scratches when you move items. Maintain a stable humidity level to minimize expansion or contraction of vinyl planks. Keep pet nails trimmed and encourage family members to lift heavy objects instead of sliding them. Consider area rugs in high-traffic zones to distribute wear more evenly. If you notice dulling in busy areas, revisit your cleaning routine and consider a manufacturer-approved vinyl floor cleaner for a deeper, uniform finish. Proper maintenance not only protects the appearance but also extends the floor’s life, reducing the frequency of more intensive cleanings.
Troubleshooting and When to Call a Pro
If you observe warping, gaps, peeling wear edges, or persistent discoloration despite following the cleaning protocol, it may indicate subfloor issues or adhesive failure. In such cases, consult the manufacturer’s recommendations or contact a flooring professional. Uneven appearance or high-gloss patches that won’t buff out could signal product-specific needs or a damaged wear layer. Before scheduling a pro, document your cleaning routine, product names, and photos of any problem areas. Cleaning Tips recommends acting promptly on signs of moisture intrusion, as early intervention can prevent more extensive floor damage and costly repairs.
Quick Room-Specific Tips: Kitchens, Living Areas, and Bathrooms
Kitchens and living spaces often see the most traffic and spills. Keep a light, daily cleaning rhythm and address spills immediately to prevent staining. Bathrooms with vinyl floors should be cleaned with mild cleaners to avoid slippery residues and ensure good traction. In all rooms, avoid leaving water or cleaning solutions on seams for extended periods, and always dry thoroughly after mopping. With consistent care and the right products, vinyl plank flooring can maintain a warm appearance and a durable surface that stands up to daily life.
Tools & Materials
- Microfiber mop(Damp, not soaking wet)
- Bucket or spray bottle(For mixing cleaning solution)
- pH-neutral floor cleaner(Or a mildly diluted dish soap solution)
- Microfiber cloths(For spot cleaning and drying)
- Soft-bristle brush or non-abrasive pad(For stubborn spots only)
- Doormats(Place at entrances to reduce grit)
- Felt furniture pads(Protect legs and prevent scratches)
- Dry towels or mats(Used to dry the floor after cleaning)
Steps
Estimated time: 30-40 minutes
- 1
Read the care guide
Begin by locating your manufacturer’s cleaning recommendations. This ensures you don’t void warranties or damage your specific vinyl plank product. Note any warning labels about moisture, heat, or cleaners.
Tip: If in doubt, test a small inconspicuous area before full cleaning. - 2
Clear the area and dry-clean
Remove furniture and debris from the room. Sweep or vacuum the floor on a hard-floor setting to lift dust and grit that could scratch the surface when you mop.
Tip: Use a soft brush attachment on your vacuum to prevent micro-scratches. - 3
Dilute the cleaning solution
Mix a pH-neutral cleaner with water according to product directions, or prepare a mild soap solution if permitted. Do not use concentrated cleaners or anything abrasive.
Tip: Always err on the side of less cleaner—damp is better than wet. - 4
Mop with a barely damp microfiber cloth
Dampen the mop, wring it well, and mop in straight lines along the planks. Avoid saturating seams and avoid circular scrubbing that can push dirt into joints.
Tip: Work in sections to keep the floor from drying before you finish. - 5
Rinse if needed and dry
If you used a soapy solution, go over the floor with a clean damp cloth to remove residue. Dry with a microfiber cloth or dry mop to prevent water spots and edge swelling.
Tip: Dry thoroughly; moisture near seams can cause slight swelling over time. - 6
Tackle stains promptly
For sticky spots or stubborn stains, reapply a tiny amount of cleaner to a microfiber cloth and work gently. Avoid rubbing aggressively that could wear down the finish.
Tip: Test stain removers on an inconspicuous area first. - 7
Return furniture and set up protection
Replace furniture with felt pads underneath. Place doormats and ensure room ventilation to promote quick drying.
Tip: Regularly check pad bottoms for dirt buildup that could transfer to the floor.
Questions & Answers
Can I use a steam mop on vinyl plank flooring?
Most vinyl plank products do not recommend steam mops. Excess heat and moisture can cause warping or wear. Always follow the manufacturer's guidance and use a damp mop for safe cleaning.
Most vinyl plank floors should not be cleaned with a steam mop because heat and moisture can cause damage. Use a damp mop instead and follow the product guide.
Is vinegar safe for vinyl plank cleaning?
Diluted vinegar can be safe on some vinyl planks, but not all. Check your manufacturer’s instructions. When in doubt, opt for a pH-neutral cleaner designed for vinyl floors.
Diluted vinegar may be okay for some floors, but always check your product guide. If unsure, use a pH-neutral cleaner instead.
How often should I do a deep clean?
A deep clean every 2-3 months is typical in busy homes, or after noticeable buildup. Adjust based on foot traffic and spill frequency, ensuring you follow the cleaning product directions.
Deep clean every couple of months or when you notice buildup. Tie the frequency to how much traffic your floors get.
What should I do about tough stains?
Blot spills quickly and apply a small amount of cleaner to a microfiber cloth. Gently rub the stain in the direction of the planks, then wipe away residue and dry the area.
Blot spills fast, use a little cleaner on a cloth, and wipe along the plank grain. Dry the area afterward.
Can I use hot water to clean vinyl plank flooring?
Hot water is generally fine in a damp mop, but avoid soaking and high heat that can loosen adhesives. Use it with a pH-neutral cleaner and dry promptly.
A damp mop with warm water is okay, but don’t soak the floor and dry it quickly.
Should I wax or polish vinyl plank flooring?
Most vinyl plank floors do not require waxing or polishing. Use cleaners approved by the manufacturer and avoid wax-based products that can leave residue and dull the finish.
No waxing needed for most vinyl planks; use manufacturer-approved cleaners to avoid residue.
Watch Video
The Essentials
- Choose a pH-neutral cleaner and a damp mop for daily care
- Avoid soaking, steam, or abrasive tools
- Dry the floor after cleaning to prevent water damage
- Protect with mats and furniture pads to extend life