How to Clean Vinyl Records: A Practical Guide
Discover safe, proven methods to clean vinyl records without damaging grooves. This step-by-step guide covers dry brushing, wet cleaning, storage, and troubleshooting for optimal playback.

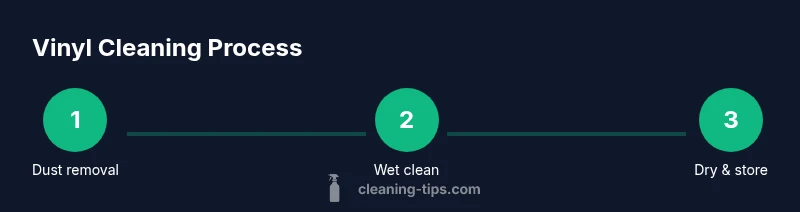
Learn how to clean vinyl records safely in minutes: remove dust with a carbon fiber brush, damp-clean the surface with a record-cleaning solution and distilled water, avoid getting liquid into the label area, dry with a lint-free microfiber, and store records in anti-static sleeves. Use gentle strokes, work one record at a time, and allow to air-dry completely before playing. This approach preserves groove integrity and reduces pops.
Why clean vinyl records matter
If you’re wondering how to clean vinyl records effectively, the answer starts with a gentle, measured routine. Vinyl records are durable artifacts, but their grooves are tiny and can trap dust, fingerprints, and oils. When dust sits on the surface or static cling pulls particles into the groove walls, playback suffers: pops, crackles, and occasional skipping can become more frequent. A regular cleaning routine helps maintain consistent sound quality and protects the physical integrity of the record over time. By combining dry brushing for light dust and selective wet cleaning for grime, you minimize abrasion and preserve groove fidelity. The Cleaning Tips team emphasizes that gentle, deliberate care reduces static buildup and prolongs the life of your collection. Whether you’re building a small listening library or archiving rare pressings, a thoughtful approach pays off with clearer sound and fewer playback issues. Proper cleaning also reduces the amount of dust that migrates onto your turntable’s stylus, which can amplify noise and accelerate wear. In short: clean less aggressively, clean more often, and always target the surface, not the label. According to Cleaning Tips, clear steps and careful technique make a tangible difference in playback quality over time.
Tools and materials you’ll need
Having the right tools makes cleaning safer and easier. Gather items designed for vinyl care and avoid household products that can leave residues. Start with a dust-removal brush, distilled water, and a vinyl-friendly cleaning solution. Add lint-free microfiber cloths, soft brushes for stubborn grime, and anti-static sleeves for storage. Optional items like a soft toothbrush can help around the label edge if used carefully. Keep a small bowl for rinsing and a clean workspace free from food particles or pet hair. By using purpose-built gear, you reduce the risk of scratching or applying uneven pressure. For best results, complete the routine in a single session rather than mixing steps across multiple days. Cleaning Tips notes that consistency matters as much as technique because repeated, careful cleaning yields better playback over time.
Wet cleaning methods: step-by-step overview
Wet cleaning involves applying a cleaning solution to the surface and gently lifting grime from groove walls. It’s more effective than dry brushing for fingerprints, mildew, or oily residues, but requires caution around labels and mold lines. Start with a dry brush to remove surface dust, then use a damp cloth to wipe in a controlled fashion. Always work from the outer edge toward the center, and avoid scrubbing across grooves. Rinse with distilled water if your solution requires it, and dry with a clean microfiber. If you notice residue or stickiness, repeat with fresh cloths and a lighter touch. With patience, wet cleaning can restore the clarity of heavily used records without risking groove damage. Cleaning Tips recommends keeping liquids away from the label and never letting moisture pool in the groove openings.
Dry cleaning and maintenance tips
Dry cleaning is ideal for routine maintenance when you’re not dealing with heavy grime. Use a carbon fiber brush to lift surface dust before every play, then store records vertically in anti-static sleeves to minimize static buildup. The brush should be drawn lightly in a consistent direction; avoid heavy pressure that could push particles into the grooves. Periodically, go over each side with a microfiber cloth held at a shallow angle to remove any remaining dust. Dry cleaning reduces the risk of moisture-related damage and speeds up cleaning sessions. Keeping records dust-free between plays can extend the life of your stylus and ensure consistent tracking. The Cleaning Tips team notes that a proactive cleaning mindset saves time and preserves fidelity over the long term.
Deep cleaning for stubborn grime and fingerprints
For records with oily fingerprints or stubborn residues, a deeper cleaning routine may be necessary. Use a dedicated vinyl cleaning solution and distilled water in the recommended ratio, applying it to a microfiber cloth rather than directly to the record. Gently wipe in straight lines along the grooves, then rotate the record and repeat. Rinse with distilled water on a fresh cloth, and dry carefully. If stubborn grime persists, consider repeating in a separate pass rather than rubbing more aggressively. Remember to inspect the label area to ensure no ink transfer occurs during cleaning. Cleaning Tips advises testing a small, inconspicuous area first to avoid surprises.
Safe storage and handling to protect your records
After cleaning, handle records by the edges to avoid oils from your fingers contact with the grooves. Place cleaned records in anti-static inner sleeves and store them upright in a cool, dry place away from direct sunlight. Keep different albums separated to prevent warping and minimize spindle drag. A simple routine of regular dusting and careful cleaning reduces the need for heavy interventions later. If you’re archiving rare pressings, consider climate-controlled storage to slow deterioration. The habit of proper storage is as important as the cleaning technique itself because it preserves playability for decades.
Tools & Materials
- Distilled water(use distilled water to avoid mineral deposits)
- Record cleaning solution(formulated for vinyl records; avoid household cleaners)
- Carbon fiber cleaning brush(gently lift dust before any contact with liquid)
- Microfiber cloths(lint-free and ultra-soft)
- Anti-static inner sleeves(store records to reduce static cling)
- Soft toothbrush (optional)(for stubborn grime near label edge only if needed)
- Dish soap (very mild, optional)(only if you plan a thorough rinse, ensure no residue)
- Gloves (optional)(to keep oils off surfaces during cleaning)
Steps
Estimated time: 25-40 minutes
- 1
Remove loose dust with carbon fiber brush
Set up a clean workspace and hold the record by its edge. Gently sweep the carbon fiber brush in short strokes, moving from outside edge toward the center to lift loose dust without pushing particles into grooves.
Tip: Brush lightly; heavy pressure can grind dust into grooves. - 2
Inspect surface for grime
Check both sides under good lighting for fingerprints, smudges, or sticky residues. Note areas that require extra attention before applying any liquid.
Tip: If you see oily spots, plan for a targeted wet-clean pass. - 3
Prepare a gentle cleaning solution
If using a commercial solution, follow the label. For a DIY mix, combine distilled water with a drop of mild dish soap per quart. Avoid strong solvents.
Tip: Test the solution on a spare record first. - 4
Dampen a microfiber cloth
Lightly dampen a microfiber cloth—never soak the cloth or the record. Wipe the surface using smooth, concentric motions from the outer edge toward the center.
Tip: Keep liquid off the label and avoid circular scrubbing across grooves. - 5
Clean grooves with controlled passes
Place the dampened cloth over the grooves and wipe along the grooves with shallow passes. Rotate the record to access all areas evenly.
Tip: Use short, even strokes to avoid grinding in dirt. - 6
Rinse and blot dry (if needed)
If your solution requires rinsing, wipe with a fresh cloth dampened with distilled water. Then blot dry with a clean cloth to remove moisture.
Tip: Do not leave moisture on the grooves; moisture invites mold. - 7
Dry completely and inspect
Let the record air-dry completely in a dust-free area. Re-check under light for any remaining residue that needs another pass.
Tip: Small patches of moisture can cause playback pops if left. - 8
Return to sleeve and store
Slide the cleaned record into an anti-static inner sleeve and place in a protective outer sleeve. Store upright away from heat and direct sunlight.
Tip: Avoid stacking records to prevent warping.
Questions & Answers
Can I clean vinyl records with household cleaning products?
No. Household cleaners can leave residues and damage grooves. Use products designed for vinyl records or mild solutions with distilled water.
Avoid household cleaners; use vinyl-safe solutions.
Should I wash records before playing a new acquisition?
If a record feels dusty or has fingerprints, it's reasonable to clean before play to prevent pops. Dry brushing can be a quick step before a deeper wash.
Clean if dusty, but use gentle methods.
Is wet cleaning necessary for every record?
Not always. Dry brushing works for light dust; wet cleaning is beneficial for grime or fingerprints; always ensure complete drying before playback.
Wet cleaning helps with grime, dry for light dust.
How do I know if a record is dry?
Hold the record under bright light and look for visible moisture or streaks. If wet, allow it to air-dry fully before reinserting.
Check for moisture before playing.
Can I use a dishwasher to clean vinyl records?
Never. Dishwashers can warp records and damage labels. Use hand-cleaning methods only.
Don't use a dishwasher.
Watch Video
The Essentials
- Dust first, then wet clean when needed
- Use distilled water and vinyl-safe solutions
- Never spray liquid on grooves or labels
- Dry thoroughly before playback
- Store in anti-static sleeves