What Clean Tile Floors: A Practical Cleaning Guide
A comprehensive, step-by-step guide for cleaning tile floors, including grout care, safe cleaners, routine maintenance, and room-by-room tips to keep kitchens, bathrooms, and entryways bright and hygienic.

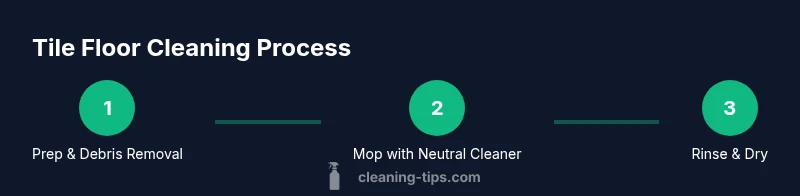
By following this guide, you’ll master what clean tile floors require to stay bright and hygienic. You’ll learn the right tools, safe cleaners, and a practical sequence for mopping, grout care, and prevention. The quick answer: start with a dry sweep, use a pH-neutral cleaner, mop in sections, and dry the surface to prevent water spots.
What clean tile floors mean for health and home
What clean tile floors can do goes beyond appearance. Clean tile floors reduce tracked-in dirt, dust, and allergens, creating a healthier living space for your family. The question what clean tile floors means blends everyday cleaning with grout care, seal integrity, and routine maintenance. In this section we unpack the core idea: tile floors that look bright, stay hygienic, and resist staining when you follow a consistent routine with safe cleaners. For most homes, tile floors are a durable foundation that benefits from a lightweight daily sweep, a weekly mop with a neutral cleaner, and periodic grout attention. The Cleaning Tips team notes that small habits beat big scrubbing sessions, especially in high-traffic areas where grime accumulates fastest.
Tile varieties and how they affect cleaning
Tile floors come in several common varieties, and knowing which you have helps you choose the right cleaning approach. Ceramic and porcelain tiles are generally forgiving and respond well to neutral cleaners and gentle scrubbing. Natural stone tiles—such as marble, travertine, or limestone—are more sensitive to acids and high pH cleaners and may require special sealants. Glazed tiles resist moisture less than unglazed, but both benefit from a routine that avoids prolonged soaking. When you identify your tile type, you can tailor your method: ceramic/porcelain often tolerate routine mopping, while stone needs gentler, pH-balanced care and periodic sealing.
Essential tools and cleaners for tile floors
To clean tile floors effectively, assemble a basic kit before you start. A microfiber mop head with a washable pad traps dirt without scratching the surface. A mop bucket with wringer, ideally 2-3 gallons, keeps water manageable. Use a pH-neutral tile cleaner—steer clear of acidic or bleach-based cleaners that can damage grout and glaze. A grout brush helps target the lines between tiles, and an old toothbrush is perfect for corners. Optional items include a sealer for grout and a dry microfiber cloth for buffing. Keeping these tools on hand makes tile cleaning quicker and more thorough.
Step-by-step basic cleaning method
Begin with a dry sweep or vacuum to remove loose debris, preventing scratches during mopping. Prepare a cleaning solution by mixing a pH-neutral cleaner with warm water in your bucket. Mop tiles in small, overlapping sections, starting from the far corner and moving toward the exit to avoid stepping on cleaned areas. Rinse the mop frequently and swap rinse water as needed to avoid spreading dirt. After mopping, go over the floor with a clean, damp mop to remove soap residue, then dry with a microfiber cloth or towel to prevent water spots and streaks.
Deep cleaning grout lines without damage
Grout lines collect dirt and can darken over time. Use a grout brush with a mild cleaning paste (baking soda with water works as a gentle abrasive) or a dedicated grout cleaner. Apply the paste or cleaner to the grout, scrub with the brush in a circular motion, and wipe away residue with a damp cloth. For stubborn stains, let the cleaner sit for 5-10 minutes before scrubbing again. Rinse well to remove any cleaning agents that could attract more grime.
Removing common stains on tile floors
Stains from coffee, juice, or red wine respond well to a gentle approach. Start with a paste of baking soda and water on the stain, scrub gently, and rinse. For oily stains, a small amount of dish soap in warm water can help lift residue. Hard water mineral spots respond to a vinegar dilution (1:3 vinegar to water) applied briefly and rinsed. Avoid harsh acids on natural stone and always test a small area first to ensure colorfastness.
Maintenance and prevention for long-lasting tile floors
Prevention is easier than heavy cleaning. Place mats at entryways to trap grit, use doormats for wet areas, and wipe spills promptly. Clean a tile floor at least weekly to prevent grime buildup and seal grout every 6-12 months if recommended for your grout type. Address cracks or loose grout early to prevent water intrusion that can lead to mold or tile loosening. Regularly inspect caulk around edges and reseal if needed.
Cleaning tiles by room: kitchen, bathroom, entry
In the kitchen, rinse off soap and grease promptly and wipe dry to prevent dull film. In bathrooms, pay extra attention to grout near sinks and showers, where moisture is constant. In entryways, remove grit from shoes with a quick initial sweep and consider a second pass with a damp mop to capture fine dust. Adapting your approach by room helps you target the common messes and maintain a consistent routine across the home.
Eco-friendly and safe cleaning options
Choose cleaners labeled as pH-neutral and non-toxic when possible. Diluted white vinegar can be effective for routine cleaning on ceramic or porcelain, but avoid using it on natural stone or unglazed surfaces. Baking soda offers a mild abrasive for grout, but test first. For a greener approach, use reusable microfiber pads, rinse water, and minimal chemical usage. Always ventilate the area while cleaning and wear gloves if you have sensitive skin.
Common mistakes to avoid
Avoid soaking floors with too much water; tile and grout can absorb moisture and lead to warping or mildew. Do not use acidic cleaners on stone tiles or polished surfaces, as they can etch glaze and grout. Never mix cleaners unless the manufacturer approves; mixing ammonia with bleach creates dangerous fumes. Finally, don’t neglect grout—without periodic cleaning, it can discolor and harbor mold.
How to test cleaners and protect grout
Before applying any cleaner broadly, test it in a small, inconspicuous area to ensure there is no discoloration. Use a soft brush for grout lines rather than metal tools that could scratch. After cleaning, dry the floor thoroughly to prevent residual moisture that promotes mold growth. If grout discoloration persists, consider professional regrouting or sealing to restore color and durability.
Tools & Materials
- Microfiber mop head(Use a washable pad; microfiber traps dirt without scratching.)
- Mop bucket with wringer(2-3 gallon size is enough for most rooms.)
- pH-neutral tile cleaner(Avoid acidic or bleach-based cleaners.)
- Grout brush(Stiff nylon bristles; reach grout lines reliably.)
- Old toothbrush(For detailing around corners and edges.)
- Soft sponge or microfiber cloth(Dab and wipe to prevent streaks.)
- White vinegar(Dilute 1:3 for routine cleaning; not for natural stone.)
- Baking soda(For mild stain pastes; avoid on waxed grout.)
- Sealer for grout (optional)(Use after grout cures; reapply every 6-12 months.)
- Dry towels or chamois(Use to dry the floor after cleaning.)
Steps
Estimated time: Total time: 30-60 minutes depending on area and grout condition
- 1
Clear the area and prep the space
Move furniture and rugs away from the cleaning zone. Remove loose debris with a broom or vacuum to prevent scratching during damp cleaning. This step sets up a smooth, efficient process.
Tip: Declutter first to avoid reworking the same spots. - 2
Dry sweep or vacuum the floor
Completely remove dust and grit. Dry debris can scratch tiles when you mop, so a thorough sweep makes the wet cleaning more effective.
Tip: Use a soft-bristle vacuum setting to protect grout lines. - 3
Prepare cleaning solution
Fill a bucket with warm water and add the pH-neutral tile cleaner according to the label. Avoid concentrate oversaturation to minimize rinsing.
Tip: Always follow label directions for dilution to prevent residue. - 4
Mop in sections from far corner toward exit
Dip the pad into the solution, wring well, and mop in small, overlapping sections. Rinse the mop frequently to avoid spreading dirt and use gentle strokes to prevent streaks.
Tip: Change water if it looks cloudy to keep dirt contained. - 5
Rinse the floor
Go over the floor with clean water to remove soap residue. Soap remnants attract new dirt and can leave a dull film if not rinsed well.
Tip: A second light pass with clean water helps remove any residue. - 6
Dry the surface thoroughly
Use a dry microfiber cloth or towels to dry the floor completely, especially in high-traffic zones. Drying prevents water spots and mold growth.
Tip: If possible, run a fan to speed up drying. - 7
Deep clean grout lines
Apply grout cleaner or a baking soda paste to grout lines and scrub with a grout brush. Rinse thoroughly to remove any residue that could collect dirt.
Tip: Work in small sections to keep grout from drying out between scrubs. - 8
Assess and treat stains
Identify stubborn stains and apply targeted treatments—paste on stains or a diluted cleaner with a gentle brush. Let sit briefly before scrubbing and rinsing.
Tip: Test stain removers on a hidden area first. - 9
Optional grout sealing
If grout looks worn or is in a damp area (bathroom, shower), consider sealing after grout has fully cured. Sealing helps repel moisture and stains.
Tip: Follow product directions and avoid sealing until grout is completely dry.
Questions & Answers
What is the best cleaner for tile floors?
A pH-neutral cleaner is best for most tile floors, as it cleans effectively without damaging grout or glaze. Avoid acidic or bleach-based products on stone or color-sealed grout. Always follow the manufacturer’s directions and test on a small area first.
For most tile floors, use a pH-neutral cleaner and test first on a small area.
Can I use vinegar on tile floors?
Vinegar can be safe on ceramic or porcelain when diluted, but avoid using it on natural stone surfaces like marble or travertine. Excess vinegar can etch stone and dull glaze.
Dilute vinegar for non-stone tiles and avoid stones.
How often should grout be cleaned?
Clean grout as part of your regular routine. If you notice discoloration or mold, scrub sooner and consider a grout sealant for extra protection.
Clean grout when you see dirt or mold; seal if needed.
Is steam cleaning safe for tile floors?
Steam can be safe for sealed tile floors, but high heat may affect grout over time. Check tile and grout manufacturer guidelines before using steam, especially on porous grout.
Check guidelines before steam cleaning and seal grout if required.
Should I seal grout after cleaning?
Yes, sealing grout is often recommended for cementitious grout in damp areas. Allow grout to cure fully before applying sealer and follow product instructions.
Seal grout after it cures for best results.
What if my grout is permanently stained?
Permanently stained grout may require specialized grout cleaning or professional regrouting. In some cases, color-restoring products can help, but evaluate options carefully.
Stains may need professional cleaning or regrouting if persistent.
Watch Video
The Essentials
- Use a pH-neutral cleaner for tile and grout.
- Dry floors after cleaning to prevent water spots and mold.
- Scrub grout periodically to maintain color and integrity.
- Test cleaners first and avoid chemical misuse on stone.
- Seal grout when appropriate to extend tile life.