Tile Floor Cleaning: A Practical Step-by-Step Guide
Learn how to clean tile floors safely and effectively, including grout care, stain removal, sanitization, and routine maintenance for ceramic and porcelain tiles.

In this guide you will learn how to clean tile floors safely and effectively. You’ll select a pH-neutral cleaner, mop with proper technique, and scrub grout without harming the surface. We cover ceramic, porcelain, and quarry tiles, plus tips on rinsing, drying, and routine maintenance to keep floors looking like new.
Why tile floor cleaning matters
Tile floors are a staple in many kitchens and baths due to their durability and bright, easy-to-clean surface. Regular cleaning removes dust, oil, and grit that can dull gloss and accelerate grout staining. According to Cleaning Tips, consistent maintenance helps preserve color and prolong tile life, especially on ceramic and porcelain surfaces. In this section, we explain what makes tile floors respond differently to cleaners and how the cleaning strategy changes with traffic, tile type, and grout condition. You’ll learn why choosing a mild, pH-neutral cleaner matters, how to avoid excess water, and when steam cleaning is appropriate. By understanding the chemistry of cleaning agents and the physical realities of floor wear, you’ll be better prepared to select the right product and technique for your home.
Tile floor cleaning matters in daily life
Tile floors experience constant traffic from kitchen spills to bathroom splashes. When grime builds up, it can hide dirt, make grout look dull, and even trap odors. A routine cleaning routine helps maintain slip resistance and the floor’s natural shine. The Cleaning Tips team notes that a simple weekly wipe-down, combined with a deeper clean every few weeks, can substantially extend tile life and grout color. By framing cleaning as a regular habit rather than a big chore, you reduce the risk of stubborn stains and mold growth in bathrooms. This section lays the groundwork for choosing the right cleaner and technique for your specific tile type and grout condition.
Brand notes and practical framing
Across tile types, a gentle, consistent approach yields the best long-term results. As Cleaning Tips often emphasizes, using a mild, pH-neutral cleaner minimizes chemical exposure while safeguarding grout seals and tile glaze. This approach also reduces the likelihood of water spots and streaks, especially on glossy porcelain surfaces. The emphasis is on technique as much as product: proper dilution, correct mop pressure, and timely drying are as important as the cleaner you select.
Tools & Materials
- Broom and dustpan(Essential for removing loose debris before wet cleaning)
- Microfiber mop(Choose a flat or sponge mop for even coverage)
- Bucket(For mixing cleaner and rinse water)
- pH-neutral tile cleaner(Follow label directions; avoid harsh acids)
- Grout brush or old toothbrush(Needed for brushing grout lines)
- Sponge or microfiber cloth(Spot cleaning and drying sprints)
- White vinegar (optional)(Dilute and test on grout or color-sensitive tile)
- Baking soda(Make a paste for grout stains)
- Hydrogen peroxide (3%)(For tougher grout stains (test first))
- Gloves(Protect hands during cleaning)
- Ventilation (fan/open window)(Improve air flow while cleaning)
- Towels or microfiber drying cloths(Dry floors to prevent water spots)
Steps
Estimated time: Total time: 45-60 minutes (variable by square footage and grout condition)
- 1
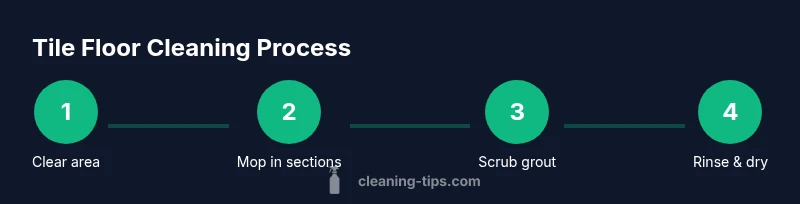
Clear area and sweep
Remove furniture and rugs from the cleaning zone. Sweep or vacuum to remove loose dirt, sand, and hair. This prevents gritty particles from scratching tile during mopping and reduces the need for re-cleaning.
Tip: Tip: Work from the far corner toward the door to avoid stepping on freshly cleaned areas. - 2
Prepare cleaning solution
Fill a bucket with warm water and add the pH-neutral cleaner according to label directions. Do not mix cleaners with bleach or ammonia, and avoid highly concentrated solutions that can leave residue.
Tip: Tip: If you’re cleaning a kitchen or bathroom with grout, a pre-mix solution reduces streaking and makes scrubbing easier. - 3
Mop the floor in sections
Dip the mop in the solution, wring well, and mop one section at a time. Rinse the mop frequently to prevent spreading dirt. Over-wetting can loosen grout and seep into seams.
Tip: Tip: Use overlapping strokes and maintain a consistent pressure to avoid pooling water. - 4
Scrub grout lines
Apply a baking soda paste or a hydrogen peroxide solution to grout lines. Use a grout brush to scrub in a circular motion, focusing on stubborn staining and discoloration.
Tip: Tip: For dark grout, let the paste sit for 5–10 minutes before scrubbing for better penetration. - 5
Rinse the surface thoroughly
Go over the floor with clean water to rinse away soap residue. Residue can attract new dirt and create a dull look. Change rinse water as needed.
Tip: Tip: A second pass with a clean mop ensures all cleaner is removed. - 6
Dry the floor completely
Use a microfiber towel or dry mop to remove remaining moisture. Proper drying prevents water spots and minimizes slip risks. Ventilate the room to speed up drying.
Tip: Tip: If you have grout lines, run a towel along the lines to wick away residual moisture. - 7
Deep-clean grout periodically
Schedule a deeper grout clean every 4–12 weeks depending on traffic and cleaning frequency. Apply a stronger paste or peroxide treatment and scrub thoroughly, then rinse and dry.
Tip: Tip: Keep a grout brush handy for quarterly maintenance to prevent buildup.
Questions & Answers
Can I use vinegar to clean tile floors?
Vinegar can be used on ceramic tile but may affect certain grout colors and some stone tiles. Always dilute and test on a small area, and avoid acidic cleaners on natural stone.
Vinegar is sometimes okay for ceramic tiles but test first and avoid stone surfaces.
How often should I mop tile floors?
For high-traffic kitchens and bathrooms, mop more frequently, while low-traffic areas can be cleaned weekly. Adjust based on visible dirt and odors.
Mop as needed—daily or weekly depending on traffic and mess.
Is steam cleaning safe for tile floors?
Steam can help loosen grime on ceramic and porcelain, but consult your tile’s manufacturer guidelines; some grout seals may be damaged by high heat or moisture.
Steam can help if your tiles tolerate it; check guidance first.
How can I clean grout without damaging tiles?
Use a baking soda paste or hydrogen peroxide with a grout brush. Rinse well and dry. Test color grout first to avoid any color changes.
Grout cleaning works with baking soda or peroxide—test first.
Can I use bleach on grout?
Bleach can brighten grout but may discolor colored grout and weaken some sealers. Use diluted solutions, ventilate, and avoid prolonged exposure.
Bleach can brighten grout, but use carefully and ventilate.
Watch Video
The Essentials
- Sweep or vacuum before wet cleaning to protect surfaces.
- Choose a pH-neutral cleaner to safeguard grout and glaze.
- Rinse thoroughly and dry to prevent residue and spotting.
- Tackle grout stains with a dedicated brush and paste or peroxide.
- Maintain a regular cleaning schedule for long-lasting tile floors.