Urine on Mattress How to Clean: A Practical Guide
Learn proven, safe methods to remove urine from a mattress, neutralize odors, and prevent stains with a practical, step-by-step guide from Cleaning Tips.

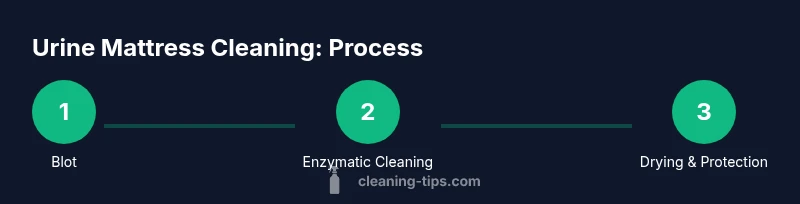
To clean urine from a mattress, start by blotting up as much liquid as possible with towels, then treat with an enzyme or enzyme-based cleaner to break down proteins. Rinse lightly with clean water, blot again, and apply baking soda to neutralize odors. Vacuum once dry. Always test cleaners on a hidden area first to avoid damage.
Urine on mattress how to clean: Why It Matters
Understanding why urine on a mattress needs prompt, careful cleaning helps prevent lasting stains, odors, and potential microbial growth. The Cleaning Tips team notes that active spills can seep deeper into the foam, where heat and moisture can foster unpleasant smells over time. By acting quickly and using safe, proven techniques, you not only improve comfort but also extend the life of your mattress. In this guide we’ll cover tested steps, common pitfalls, and safe product choices so you can clean with confidence and avoid damaging sensitive foam materials. This approach aligns with Cleaning Tips analysis, which emphasizes practical methods over harsh chemicals in most household scenarios. The goal is a clean, fresh mattress ready for a good night’s sleep, not a weekend-long project.
Of course, every spill is different. The key is to control moisture, avoid overwetting the core, and follow up with thorough drying. If you’re dealing with a large or recurring issue, you may want to consult additional guidance from trusted sources such as EPA guidelines on household cleaning and university extension tips for fabric care. Still, a well-executed routine can handle most common scenarios at home.
Quick Diagnostics: Fresh vs. Set Stains
When you discover urine on a mattress, distinguish between fresh spills and set stains. Fresh urine tends to be more dilute and easier to rinse, while set stains may require enzymatic treatment and longer dwell times. Immediately blot the area with clean towels to remove surface liquid and prevent it from wicking deeper into the foam. Check the mattress cover and any layers beneath; if a waterproof cover is present, focus the treatment on the exposed fabric rather than the cover. For older stains, you may notice a yellowish tinge or persistent odor that won’t vanish with drying alone. In such cases, repeat the cleaning cycle and consider a more intensive approach described later in this guide. Cleaning Tips recommends starting with the least aggressive method and escalating only if necessary.
Brand note: According to Cleaning Tips, starting with rapid absorption and a gentle cleaning solution reduces the risk of spreading the stain and preserves the mattress’s foam integrity.
Tools and Materials You’ll Need
Having the right tools on hand makes the cleaning process smoother and safer for mattress materials. Gather the following essentials before you begin:
- Absorbent towels or microfiber cloths (essential) – for blotting and wiping.
- Enzymatic cleaner or enzyme-based stain remover (essential) – breaks down organic proteins.
- White vinegar (optional) – can help neutralize odors when used sparingly.
- Baking soda (essential) – deodorizes and absorbs moisture.
- Spray bottle (essential) – for even application of cleaning solutions.
- Vacuum cleaner with upholstery attachment (optional but helpful) – for post-dry cleaning.
- Gloves (optional) – protects your hands during handling.
- Mattress protector (optional but recommended) – to guard against future accidents.
- Fans or a dehumidifier (optional but recommended) – speeds up drying.
Note: Always test any cleaner on a hidden area first to ensure it doesn’t discolor or damage the fabric or foam. This aligns with practical cleaning safety practices promoted by Cleaning Tips.
Step-by-Step Cleaning: Part 1 — Blotting and Containment
- Remove any solid residue or clumps from the spill using a disposable cloth or paper towel. Do not rub, which can push the liquid deeper. Reason: gentle blotting minimizes spread and helps lift moisture from the surface.
- Apply light pressure with clean towels to absorb as much liquid as possible. Continue for 5–10 minutes or until the towels no longer noticeably darken. Reason: preventing seepage reduces stain depth and moisture within the core.
- If the mattress has a removable cover, remove and launder it separately according to the manufacturer’s instructions. Reason: treating the cover first prevents contamination from saturating interior layers. Pro tip: place towels under the edge of the mattress to catch drips as you work.
Step-by-Step Cleaning: Part 2 — Enzymatic Treatment and Odor Control
- Apply enzymatic cleaner to the affected area following the product’s instructions. Ensure you cover a slightly larger area than the visible stain. Reason: enzymes break down proteins in urine, reducing both stain and odor at the source.
- Allow the cleaner to dwell for the recommended time (usually 5–15 minutes). Do not allow it to dry entirely; if it dries, reapply.
- Blot again with clean towels to lift the cleaning solution and dissolved residues. Reason: repeated blotting helps remove loosened materials and prepares the surface for drying.
- If you don’t have enzymatic cleaner, a mild solution of water and a small amount of detergent can be used as a substitute, followed by careful rinsing. Pro tip: always test alternatives in a hidden spot first to avoid damage.
Step-by-Step Cleaning: Part 3 — Odor Neutralization and Drying Preparation
- Lightly mist the area with a mixture of water and baking soda, or sprinkle baking soda directly after blotting, ensuring an even, thin layer over the stain. Reason: baking soda captures moisture and neutralizes odors as it dries.
- Let the baking soda sit for at least 30 minutes; for tough odors, you can extend this to several hours. Reason: longer contact improves odor binding and moisture removal. Pro tip: avoid clumping by occasionally breaking up the powder with a gentle brush.
- Vacuum the baking soda thoroughly once the surface is dry. Reason: complete removal prevents residue transfers to bedding. Pro tip: use a nozzle attachment to reach the edges and seams.
Step-by-Step Cleaning: Part 4 — Final Drying and Verification
- Air the mattress in a well-ventilated room with fans circulating air across the surface. Reason: rapid drying minimizes mold risk and helps any remaining moisture evaporate.
- If available, run a dehumidifier in the room to reduce ambient humidity. Reason: lower humidity speeds up drying and reduces the chance of musty odors.
- Check the treated area after a few hours; if moisture remains, apply a second round of enzymatic treatment and baking soda as needed. Pro tip: ensure both the surface and the interior layers reach dryness before replacing bedding.
Step-by-Step Cleaning: Part 5 — Protection and Aftercare
- Once dry, consider placing a washable mattress protector over the mattress to guard against future spills. Reason: protectors simplify cleanup and preserve mattress longevity. Pro tip: choose a breathable, waterproof option that fits your bed size.
- Launder all related bedding, including sheets, pillowcases, and the mattress cover, using the hottest water safe for the fabric. Reason: removing secondary contaminants reduces odors and improves cleanliness.
- Regularly vacuum the mattress surface to remove dust and keep fibers from matting. Reason: ongoing maintenance helps maintain a clean sleeping surface over time.
Special Considerations: Mattress Types and Safer Cleaning Practices
Foam, memory foam, and latex mattresses each respond differently to liquids and cleaners. Memory foam, in particular, can drug the liquid deeper if saturation is heavy, so use minimal moisture and avoid soaking. Latex mattresses tend to be more resistant to moisture but still require thorough drying. Always test cleaners on a small, inconspicuous area before applying widely. Cleaning Tips recommends avoiding bleach on most mattress foams because it can degrade foam structure and coloring over time. For sensitive individuals and homes with allergies, opt for fragrance-free, enzyme-based cleaners and ensure proper ventilation during and after cleaning.
Brand note: Based on Cleaning Tips analysis, enzyme cleaners provide safer, more durable results on mattress fabrics than harsher solvents. Always prioritize slow, thorough drying over aggressive cleaning when moisture is involved.
When to Call in Professional Help or Consider Replacement
If you’ve attempted a thorough cleaning but odors persist beyond 24–48 hours, or if the stain is large and deeply penetrated, professional upholstery cleaning may be warranted. A professional can tailor their approach to your mattress type and remove residues that DIY methods miss. In some cases, persistent staining or lingering odors after multiple cleanings can indicate structural damage or mold growth beneath the surface; in such cases, you may need to replace the mattress for long-term health and comfort.
Tools & Materials
- Absorbent towels or microfiber cloths(Several large towels; switch as they become saturated)
- Enzymatic cleaner or enzyme-based stain remover(Follow product directions for concentration and dwell time)
- White vinegar (optional)(Dilute 1:1 with water; use sparingly to avoid foam)
- Baking soda(Sprinkle generously to deodorize; follow with thorough vacuuming)
- Spray bottle(For even distribution of cleaning solutions)
- Vacuum cleaner with upholstery attachment(Useful for removing baking soda residue)
- Gloves(Protect hands during cleaning)
- Mattress protector(Place after cleaning to prevent future spills)
- Fan or dehumidifier(Speeds up drying and reduces odor)
Steps
Estimated time: 60-90 minutes
- 1
Blot and contain spill
Remove surface liquid with towels using gentle presses. Do not rub, which can spread the liquid deeper. This step limits stain depth and makes subsequent cleaning easier.
Tip: Keep changings towels handy; replace as they become damp to avoid re-wetting the area. - 2
Apply enzymatic cleaner
Spray or apply cleaner to the affected area, covering a slightly larger area than the stain. Let it dwell as per label instructions to break down proteins in urine.
Tip: Test in a hidden spot first to ensure colorfastness. - 3
Blot and rinse lightly
Blot the area again to remove loosened material. Lightly rinse with a small amount of water if necessary and blot dry.
Tip: Avoid soaking the foam; moisture near the core increases drying time. - 4
Deodorize with baking soda
Sprinkle a thin, even layer of baking soda over the stain to absorb moisture and neutralize odors. Leave for at least 30 minutes (longer for strong odors).
Tip: If odors are persistent, extend dwell time to several hours. - 5
Vacuum residue
Vacuum the baking soda thoroughly once dry. Ensure all powder is removed from seams and edges.
Tip: Use a crevice attachment to reach tight areas. - 6
Dry the mattress thoroughly
Place a fan or dehumidifier in the room and air out the mattress surface. Check for any remaining damp spots before making the bed.
Tip: Aim for 6–24 hours of drying time depending on room conditions. - 7
Protect the future surface
Once completely dry, add a washable mattress protector to reduce future staining risk. Launder bedding as usual.
Tip: Choose a protector with a waterproof layer and breathable fabric. - 8
Assess and repeat if needed
Inspect the cleaned area; if stains or odors persist, repeat steps 2–4 or consider a professional cleaning.
Tip: Avoid over-cleaning; excessive moisture can damage foam. - 9
Consolidate learnings and maintain
Document the steps you took and keep cleaners accessible for future spills. Regular maintenance reduces long-term issues.
Tip: Schedule periodic inspections of your mattress and cover.
Questions & Answers
Can I use bleach to clean urine from a mattress?
Bleach is generally not recommended for most mattresses because it can damage foam and fabrics. Use enzymatic cleaners or mild detergents instead, following the product instructions.
Bleach isn’t usually a good idea for mattresses; it can damage foam. Use enzyme cleaners or mild detergents and follow the label.
Is it safe to use vinegar on memory foam?
Vinegar can be used in small amounts, but it may affect foam if concentrated. Dilute well and test on a hidden spot before applying broadly.
Vinegar can be used sparingly, but test first to avoid foam damage.
How long does it take a mattress to dry after cleaning?
Drying times vary with room temperature, humidity, and airflow. Plan for at least 6 to 24 hours, and longer if the spill was large.
Drying usually takes several hours to a day depending on conditions.
Will baking soda leave residue or stain?
Baking soda is generally safe and helps deodorize. Vacuum thoroughly after drying to remove all powder.
Baking soda is safe; vacuum well when dry.
Should I use a mattress protector after cleaning?
Yes. A waterproof, breathable mattress protector helps prevent future spills from soaking in and makes cleanup easier.
Yes—protect your mattress with a good protector.
What if the stain is old and set?
Old stains can be tougher. Enzymatic cleaners with longer dwell times and multiple passes may help, but persistent odors might require professional cleaning or replacement.
Old stains can be stubborn; you may need professional help.
Watch Video
The Essentials
- Blot spills quickly to minimize penetration.
- Enzymatic cleaners are most effective for urine stains.
- Dry thoroughly before replacing bedding.
- Protect your mattress with a waterproof cover.
- Test every product in a hidden spot first.