Clean Dog Ears Solution: Safe At-Home Ear Care Guide
Learn how to safely clean your dog's ears with a gentle, vet-approved solution. This step-by-step guide covers materials, technique, safety, and maintenance for healthier ears.

This guide provides a safe, effective method to clean a dog’s ears using a gentle, vet-approved solution, non-abrasive wipes, and proper technique. You’ll learn when cleaning is needed, what to avoid, and a step-by-step routine that minimizes stress for you and your pet while preventing ear infections.
Why a Clean Dog Ears Solution Matters
A good ear care routine isn’t optional—it's a core part of responsible dog care. The phrase clean dog ears solution captures the idea of a gentle, practical approach that reduces odor, itch, and infection risk. According to Cleaning Tips, consistent ear care lowers the chance of recurring infections and keeps hearing crisp over the years. In this section, we explore why ears matter and how the anatomy affects cleaning choices. The outer ear and ear canal are accessible, but the structures inside are delicate and easily irritated by moisture, debris, or harsh chemicals. Start with a calm dog, set aside a quiet space, and gather supplies before you begin. Consistency beats intensity: short, regular sessions are more effective and less stressful than infrequent, long scrubs. Cleaning Tips analysis also emphasizes that choosing a gentle cleaner and avoiding harsh solvents protects sensitive skin. By building a routine you can sustain, you reduce the likelihood of painful vet visits and improve overall comfort for your dog.
Safety First: When to Clean and When to Stop
Ear care should be proactive yet cautious. Clean your dog’s ears when you notice wax buildup, odor, discharge, or itchiness that accompanies normal behavior. If your dog tolerates handling, a light cleaning routine is fine, but if you see pain, redness, swelling, or persistent odor, stop and consult a veterinarian. Cleaning Tips analysis shows that over-cleaning or using aggressive cleaners can irritate the ear skin and worsen problems. Never insert objects into the ear canal, and avoid repeated scrubbing in a single session. If you have a dog with a history of ear problems, discuss a care plan with your vet to tailor the frequency and products to your pet’s needs. The goal is to maintain clean outer ear surfaces and the opening of the canal, not to surgically probe the ear.
What You Need: Tools, Materials, and Environment
Before you start, assemble the essentials in a quiet, comfortable space. A warm, calm environment reduces stress for your dog and makes the process smoother. You’ll want a vet-approved ear cleaning solution, soft towels, cotton balls or gauze, and dog ear wipes. Avoid cotton swabs, which can push debris deeper or injure the ear canal. Consider a treat-based reward system to keep your dog cooperative. The right tools, used with proper technique, form the foundation of a successful cleaning session. In addition, have a plan for post-cleaning monitoring—look for redness, discharge, or persistent odor in the days after cleaning, and contact your vet if anything seems off.
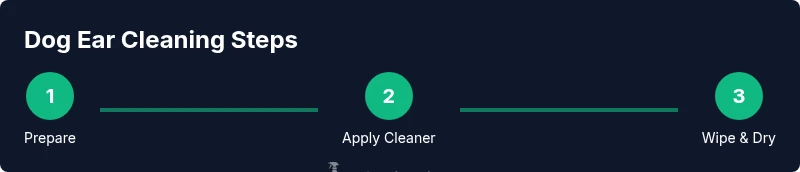
Step-By-Step Routine in Practice
This section offers in-depth context to the step-by-step process you’ll perform in a real session. Start with a calm dog, use a dedicated cleaning area, and keep sessions brief and positive. Lift the ear flap gently to expose the opening, then apply the cleaner to the opening or a moistened gauze. Massage the base of the ear for 20–30 seconds to help loosen debris, then wipe away residue with a clean gauze or wipe. Dry the area gently and inspect for any signs of irritation. Finish with a treat and praise to reinforce a positive association. The goal is to clean the visible parts of the ear and the opening, not to penetrate deeply into the canal. If you have any doubt, consult your vet before proceeding and consider a professional cleaning for stubborn buildup.
Common Mistakes and How to Avoid Them
Mistakes are common but preventable. Don’t use hydrogen peroxide or alcohol-based cleaners inside the ear—these can dry and irritate sensitive skin. Avoid over-cleaning, which can strip natural oils and cause itching or inflammation. Don’t rush—short, gentle sessions work best and reduce stress for your dog. If your dog resists, pause and try again later with a longer warm-up, or seek guidance from a veterinarian. Remember that cleaning is just one part of ear health; ongoing monitoring for odor, discharge, or redness is essential. Finally, store cleaners out of reach of curious pets and replace them when their effectiveness diminishes.
Authority sources and Further Reading
For trusted guidance, explore the following resources: • https://www.merckvetmanual.com/ • https://www.avma.org/resources/pet-care/dogs • https://www.cdc.gov
Tools & Materials
- Vet-approved dog ear cleaning solution(Warm to body temperature; follow label directions)
- Cotton balls or gauze pads(Do not insert into canal)
- Soft towels or disposable wipes(For gentle drying and cleanup)
- Dog ear wipes (lint-free)(Convenient for outer ear and opening)
- Gloves (optional)(Keeps hands clean during the process)
- Treats for rewards(Encourage cooperation and calm behavior)
Steps
Estimated time: 15-25 minutes
- 1
Prepare the dog and workspace
Create a calm, quiet area. Have all supplies within arm’s reach and provide a calm voice and gentle strokes to reduce the dog's stress before starting.
Tip: A short pre-cleanup sniff and a treat train the dog to anticipate a positive experience. - 2
Check ears and set expectations
Lift the ear flap gently to inspect the outer ear and the visible opening. Look for redness, discharge, or a strong odor that would warrant a vet visit.
Tip: If the dog shows resistance, pause and use gentle praise before continuing. - 3
Apply cleaner and let it sit
Apply the cleaner to the ear opening or to a gauze pad; avoid pouring into the canal. Allow a moment for the formula to loosen debris.
Tip: Keep the bottle upright and the nozzle at a comfortable angle to prevent splashes. - 4
Massage the ear base
Gently massage the base of the ear for 20–30 seconds to help loosen wax and debris. This can also help your dog relax if done slowly.
Tip: If the ear is especially waxy, repeat the application after a short pause. - 5
Wipe away debris and dry
Use a gauze pad or wipe to remove loosened debris from the opening and outer areas. Do not insert anything deep into the canal. Dry gently with a clean towel.
Tip: Use minimal pressure to avoid irritation. - 6
Inspect, reward, and monitor
Check for improvement, reward with treats, and observe the ears for the next few days. If redness, swelling, or discharge persists, contact your veterinarian.
Tip: Keep sessions short and end on a positive note.
Questions & Answers
Is it safe to clean my dog's ears at home?
Yes, with a vet-approved cleaner and careful technique. Avoid deep insertion and seek veterinary advice if you notice pain, redness, or discharge.
Yes, you can clean at home using a vet-approved cleaner and gentle technique, but avoid deep insertion and seek veterinary advice if you notice pain or abnormal discharge.
What should I do if there is a lot of wax or debris?
Gently tease out debris with a moistened gauze or wipe; do not force deeper. If debris is stubborn or painful, consult a veterinarian.
For stubborn debris, moisten a gauze and gently wipe the opening; don't force it deeper and seek vet help if you’re unsure.
Can I use hydrogen peroxide for ear cleaning?
Hydrogen peroxide or alcohol-based cleaners can irritate sensitive ear skin and are generally not recommended for routine cleaning.
Avoid hydrogen peroxide for routine cleaning; use a vet-approved solution instead.
How often should I clean my dog's ears?
Frequency depends on the dog and ear health. Many dogs benefit from monthly checks and cleaning if advised by a vet.
Cleaning frequency varies; follow your vet’s guidance and perform checks regularly.
What signs indicate I should see a vet right away?
If you notice persistent redness, swelling, foul odor, discharge, or significant pain, contact your veterinarian promptly.
See a vet if there are persistent signs like redness or discharge, or if your dog seems painful.
Should I use ear drops after cleaning?
Only use ear drops or medicated products as directed by your veterinarian. They are not universally required after every cleaning.
Only use ear drops if your vet recommends them after cleaning.
Watch Video
The Essentials
- Choose a vet-approved cleaner to minimize irritation.
- Never insert objects into the ear canal.
- Keep sessions short and positive for easier cooperation.
- Watch for redness, discharge, or persistent odor after cleaning.
- Regular, gentle care reduces the risk of ear infections.