How to Clean Dogs Ears: Safe At-Home Care Guide for 2026
Learn to clean dogs ears safely at home with step-by-step guidance, warnings, and vet-approved tips from Cleaning Tips. This guide covers when to clean, what solutions to use, and how to monitor for ear problems.

This guide shows you how to clean dogs ears safely at home and keep them healthy, including when to clean, what supplies to use, and how to inspect for signs of trouble. It also covers safe techniques, drying afterward, and how to recognize symptoms that require veterinary care. If you notice pain, bleeding, or a strong odor, consult your veterinarian promptly.
Understanding canine ear anatomy and common issues
Dogs have a complex ear structure with a vertical canal that can trap wax and moisture, creating a favorable environment for irritation when not cared for properly. In many breeds, long ears or hair around the ear flap increases moisture retention, elevating risk of infections. According to Cleaning Tips, regular, gentle ear care forms part of a healthy grooming routine and can prevent common problems before they escalate. This section explains anatomy in simple terms and highlights typical issues like wax buildup, yeast infections, and parasites that warrant veterinary attention. By understanding what goes wrong, you can tailor your cleaning routine to your dog's needs and minimize stress during care.
Why ear care matters and how it benefits health
Healthy ears contribute to overall comfort and activity, especially for dogs that swim, run in dusty areas, or have predispositions toward ear problems. Cleaning Tips analysis, 2026, emphasizes that routine ear checks help you catch early signs of trouble and reduce the likelihood of painful infections. Regular cleaning also reduces odor and prevents debris from causing itchiness or discomfort that might lead to scratching and secondary injuries. This section covers the why behind care – not just the how – and introduces the concept of ear health as part of comprehensive grooming.
When to clean dogs ears
Ear cleaning is not a daily ritual for most dogs. You should check the ears weekly and clean only when there is wax buildup, redness, or a noticeable odor. Avoid cleaning if your dog shows signs of pain, if the ear is injured, or if there is discharge that suggests an infection. In those cases, skip cleaning and consult a veterinarian promptly. Normal seasonal changes or activity like swimming might necessitate more frequent checks.
Choosing the right cleaning solution
Select a dog-safe ear cleaner formulated for canine use. Avoid hydrogen peroxide, alcohol, or solutions that cause burning sensations. Read the label to ensure the product is appropriate for your dog's breed and ear type, especially if your dog has floppy ears or excessive hair around the canal. If in doubt, ask your veterinarian for a recommended formula. Using the wrong cleaner can irritate the ear canal and worsen conditions.
How to inspect ears for trouble without stressing your dog
Begin by softly lifting the ear flap to examine the outer ear and canal opening. Look for redness, swelling, discharge, or a strong odor. Use a flashlight to get a clear view of the canal entrance, but never insert tools deep into the ear canal. If you notice inflammation or pain, stop and consult your veterinarian. Regular inspection helps you catch issues early and reduces anxiety during cleaning.
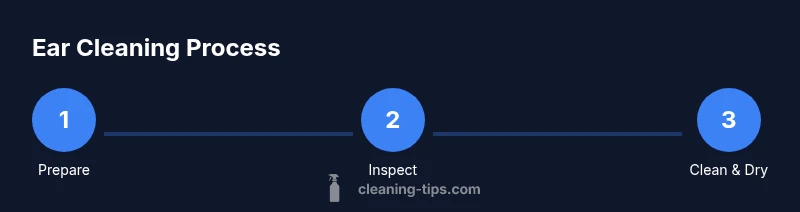
Step-by-step overview of the cleaning process
A safe cleaning session follows a simple sequence: prepare, inspect, apply cleaner, loosen debris with a gentle massage, wipe away buildup from the outer ear, dry the area, and reward your dog. This overview sets the stage for the more detailed step-by-step instructions below and helps you stay calm during the process.
Troubleshooting common issues during cleaning
If your dog pulls away, yelps, or scratches at the ear, pause the session. Check for signs of pain, swelling, or a reaction to the solution. A sudden head shake can indicate discomfort in the ear canal. In such cases, discontinue cleaning, flush with water only if advised by a veterinarian, and seek guidance. For dogs that refuse cleaning, try shorter sessions on separate days and reward progress with praise and treats.
Aftercare, drying, and ongoing monitoring
Moisture inside the ear can promote infections, so drying is crucial. Use a clean towel to pat the outer ear dry and allow the ear to air-dry before returning to normal activity. Monitor for redness, odor, or discharge for the next 24-48 hours. If symptoms persist or worsen, contact your veterinarian promptly. Keeping ears dry after swimming or baths helps maintain long-term health.
Safety considerations and what to avoid
Never insert cotton swabs or anything deep into the ear canal. This can push debris further in or damage the eardrum. Use only products designed for canine ears and follow label directions. If your dog has a history of ear disease or a perforated eardrum, seek veterinary supervision before attempting any cleaning.
How to maintain long-term ear health
Establish a routine that fits your dog’s risk level: weekly checks for high-risk breeds, monthly deeper cleanings for others, and more frequent care after swimming or baths. Regular grooming around the ears helps reduce hair and debris that trap moisture. Consider using a moisture-absorbing towel or microfiber cloth during baths to minimize dampness.
When to see a veterinarian
If you notice persistent redness, swelling, discharge with a foul odor, bleeding, or if your dog shows persistent pain during handling, contact your veterinarian. Chronic ear issues can signal allergies, infections, or anatomical concerns that require professional evaluation. Early veterinary consultation can prevent more serious complications from developing.
Tools & Materials
- Dog-safe ear cleaning solution(Choose a product labeled for canine use; avoid home remedies without veterinary guidance.)
- Cotton balls or gauze pads(Use only for outer ear cleaning; never insert into the ear canal.)
- Towel or absorbent mat(Place under the dog to catch spills and help keep the area dry.)
- Disposable gloves(Optional but helpful to keep hands clean and avoid contamination.)
- Soft brush or comb(Useful for brushing around the ears and calming the dog before cleaning.)
- Flashlight or phone light(Helpful for inspecting the ear canal without forcing the dog to sit still for long.)
- Treats for positive reinforcement(Encourages cooperation and makes the process easier for nervous dogs.)
- Pet-safe drying cloths(For quick moisture removal after cleaning or swimming. )
Steps
Estimated time: 15-25 minutes
- 1
Prepare workspace and secure your dog
Set up a calm area with good lighting. Place a towel on the table or floor and have treats ready. If your dog is large or wiggly, have a helper gently hold or secure them to reduce movement. This step keeps both you and your dog safe during cleaning.
Tip: Use a leash and a calm command to help your dog stay still. - 2
Inspect ears for health
Gently lift the ear flap and look for redness, swelling, discharge, or odor. Check both ears even if only one seems affected. If you notice concerning signs, plan a vet visit rather than proceeding with cleaning.
Tip: Taking a quick photo can help you show your vet if needed. - 3
Apply ear-cleaning solution
Apply the cleaner as directed on the label near the ear opening, not deep into the canal. Keep the dog’s head still while you dispense a small amount. If the dog shakes, pause and recheck alignment before continuing.
Tip: Only a small amount is needed; more can irritate the ear canal. - 4
Massage the base of the ear
With the head inclined slightly, gently massage the base of the ear for 20-30 seconds to loosen debris. This helps the solution reach buildup without aggressive probing. Do not press hard against the canal.
Tip: A gentle, circular motion works best for most dogs. - 5
Wipe away debris from the outer ear
Use a cotton ball or gauze to wipe the outer ear and folds. Avoid inserting anything into the canal. Repeat with a fresh wipe until the outer area looks clean. Never force debris out; if it resists, stop and re-evaluate.
Tip: Wipe from the opening outward and use a fresh section of cloth each pass. - 6
Dry and recheck
Gently pat the outer ear dry with a towel. Recheck the ear for moisture, redness, or lingering odor. If you observe persistent issues, consult a veterinarian rather than continuing to clean.
Tip: Warm towels feel more comfortable and reduce stress during drying. - 7
Reward and monitor
Offer a treat and praise to reinforce a positive experience. Monitor the ears for 24-48 hours for changes in behavior or new signs of irritation. Log any patterns to guide future cleanings and discuss with your vet if needed.
Tip: Keep a simple cleaning log to track frequency and reactions.
Questions & Answers
Is it safe to clean my dog's ears at home?
Yes, for healthy dogs with proper technique and dog-safe cleaners. Do not clean if the dog is in pain, has an injury, or shows persistent discharge. When in doubt, consult a vet before proceeding.
Yes, you can clean at home if your dog is healthy and you follow the right steps. If you see pain or discharge, contact a veterinarian.
What products should I use to clean my dog's ears?
Use products specifically formulated for dogs. Avoid hydrogen peroxide, alcohol, or home remedies that may irritate the ear canal. Always follow the product label and consult your veterinarian if you’re unsure.
Choose dog-safe cleaners and avoid harsh formulas; follow the label or ask your vet if you’re unsure.
Can I use cotton swabs to clean the ear canal?
No. Insertions into the ear canal can cause damage or push debris deeper. Clean the outer ear only and use recommended methods for the canal opening.
No, never use cotton swabs inside the ear canal.
How can I tell if my dog has an ear infection?
Watch for persistent redness, swelling, odor, discharge, or frequent head shaking and pawing at the ears. If any of these occur, schedule a veterinary evaluation promptly.
Look for redness, discharge, or odor, and see your vet if these signs persist.
What should I do if there is discharge after cleaning?
Discontinue cleaning and contact a veterinarian. Note color, smell, and amount of discharge to share with your vet.
If discharge appears after cleaning, stop and consult your vet with details.
How often should I clean my dog's ears?
Frequency depends on breed, ear shape, and activity. Check weekly and clean as needed, typically not more than every 1-2 weeks unless advised by a vet.
Check weekly and clean as needed, but don’t over-clean without veterinary guidance.
Watch Video
The Essentials
- Always use canine-safe cleaners and avoid deep canal insertion.
- Inspect ears before and after cleaning for signs of trouble.
- Dry ears thoroughly to prevent moisture-related issues.
- Consult a vet if signs of infection or pain appear.
- Track cleaning frequency and progress for better ear health.