Best Way to Clean a Gas Grill Grate
Learn a thorough, safe method to clean your gas grill grate. This step-by-step guide covers prep, soaking, scrubbing, and maintenance to extend grate life and improve grilling results.

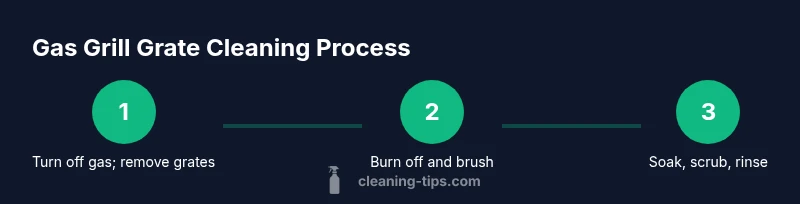
The best way to clean a gas grill grate starts with safety: turn off gas, remove the grates, and heat the grill briefly to loosen residue. Scrape with a stiff brush, soak in warm soapy water, scrub with a non-abrasive pad, rinse, dry, and oil lightly before reassembling. This routine minimizes flare-ups and keeps grates performing well.
Why Regular Cleaning Transforms Grilling
A clean gas grill grate not only looks better but also cooks more evenly and safely. Residue from previous cooks can cause hotspots, flare-ups, and uneven heating. By establishing a consistent cleaning routine, you reduce buildup that can affect heat transfer and create acrid drippings that burn. The Cleaning Tips team emphasizes the link between well-maintained grates and delicious, safer meals. Regular cleaning also extends the life of your grate by preventing rust and surface damage that can occur from ignored grease and char.
Safety First: Prep and Precautions
Before you touch any hot surfaces, turn off the gas supply and use insulated gloves to protect your hands. Wait for the grill to cool enough to handle safely, but you can start with removing the grates while you prep. Keep a spray bottle of water handy to manage flare-ups and have a bucket or large sink ready for soaking. Never attempt to clean burning-hot metal; wait until it’s safe to handle. Following these safety steps reduces the risk of burns and gas-related accidents.
Material Considerations: Stainless Steel vs. Porcelain-Coated Grates
Grates come in different materials, with stainless steel and porcelain-coated options being the most common. Stainless steel tolerates aggressive scrubbing but can show fine scratches if you use abrasive pads. Porcelain-coated grates resist sticking and are easier to clean but can chip if scrubbed harshly. For either type, avoid metal brushes with loose bristles that can shed into food. Use a non-metal scrubber or a stiff-bristle brush suitable for the coating.
Pre-Clean Prep: Quick Burn-Off and Loose Debris Removal
Start by turning the burners off, then heat the grill on high with the lid closed for about 10-15 minutes to burn off stuck-on residue. This burn-off loosens grease and char, making it easier to scrub later. After the burn-off, use a grill brush to scrape each grate surface while it’s still warm but safe to handle. Removing detachable parts like warming racks saves time and prevents debris from hiding in hard-to-reach spots.
Soak and Scrub: The Deep-Clean Method
Soaking grates in warm soapy water is a powerful way to soften grease. A soak of 15-30 minutes is often enough to loosen stubborn buildup. After soaking, scrub with a non-abrasive pad or sponge. For heavy grease, a paste of baking soda and water can act as a gentle abrasive without scratching. Rinse thoroughly with clean water to remove all soap and residue.
Degreasing Alternatives and Safe Cleaners
If soapy water isn’t enough, consider a degreasing spray designed for grills. Always test a small area first to ensure compatibility with your grate material. For those preferring natural options, a mixture of vinegar and water can help cut grease, but avoid applying straight vinegar to aluminum-coated surfaces for extended periods. Rinse well after any chemical application to prevent residue transfer to food.
Rinse, Dry, and Re-season
After cleaning, rinse all surfaces with warm water and dry completely to prevent rust. Use a clean towel or air-dry on a rack. Lightly oil the grates with a neutral oil (like canola) or spray to protect against rust and to help prevent sticking for the next cook. Reassemble the grill only after all parts are fully dry. Reheating briefly with the lid closed before your first cook helps reseal the surface.
Maintenance Habits That Save Time
Establish a routine: quick brush after each use and a deeper clean every 1-3 grilling sessions, depending on how often you grill and the foods you cook. A quick wipe-down with a damp cloth during the warm-up phase keeps surfaces tidy between deep cleans. Track your cleaning schedule so you don’t skip essential steps, and replace worn components promptly to maintain performance.
Authoritative Guidance and Practical Tips
For safety and best practices, refer to authoritative sources such as the USDA’s food safety guidelines and reputable food-cleaning resources. These sources emphasize safe handling, proper cleaning, and the importance of hot surface sanitization when applicable. The following external references provide helpful context for maintaining grill cleanliness and food safety.
Tools & Materials
- Gas grill brush (stiff-bristle or non-metalbristle)(Choose a brush compatible with your grate material; replace if bristles are worn.)
- Bucket or large sink(For soaking grates after removal.)
- Warm water(To soak and rinse; avoid hottest water on cold metal.)
- Mild dish soap(Gentle soap helps lift grease without harsh residues.)
- Non-abrasive scrub pad or sponge(Use on coated grates to avoid scratching.)
- Baking soda(Optional abrasive paste for heavy grease.)
- White vinegar(Optional degreasing rinse; dilute 1:1 with water.)
- Vegetable oil or high-heat grill spray(Lightly oil grates after cleaning to prevent sticking.)
- Dish towel or microfiber cloth(Dry thoroughly to prevent rust.)
- Gloves (heat-resistant)(Protect hands during cleaning.)
Steps
Estimated time: 30-45 minutes
- 1
Power down and remove grates
Turn off the gas and allow the grill to cool enough to handle safely. Remove the grates and place them on a stable surface for inspection. This step reduces the risk of accidents and gives you clear access to all cleaning surfaces.
Tip: Use gloves during removal to protect from hot metal and sharp edges. - 2
Burn off loose residue
Preheat the grill on high with the lid closed for 10-15 minutes to burn away surface grease. This makes subsequent scrubbing much easier and reduces the amount of physical scrubbing required.
Tip: Keep a spray bottle of water nearby to manage flare-ups if any ash slips onto hot surfaces. - 3
Scrape and brush while warm
Use a sturdy grill brush to remove loosened debris from each grate surface while they are still warm. Scrape in all directions to cover both sides. This step minimizes grease that stubbornly sticks after soaking.
Tip: Avoid forcing bristles into crevices; a light touch prevents scratching and damage. - 4
Soak the grates
Fill the bucket with warm, soapy water and submerge the grates for 15-30 minutes. Soaking helps loosen grease and char, enabling deeper cleaning without harsh scrubbing.
Tip: If the grease is extremely thick, reheat briefly and re-scrape before soaking. - 5
Scrub with non-abrasive tools
After soaking, scrub the grates with a non-abrasive pad or sponge. For heavy buildup, a baking soda paste can provide gentle abrasion without scratching porcelain or coated surfaces.
Tip: Rinse a small area first to ensure the pad won't damage delicate coatings. - 6
Rinse thoroughly and dry
Rinse each grate with clean water to remove all soap and residue. Dry completely with a towel or air-dry on a rack to prevent rust.
Tip: Patting dry and allowing air circulation reduces moisture-induced rust. - 7
Oil lightly and reassemble
Lightly oil the grates to form a protective layer and help prevent sticking for future cooks. Reinstall the grates once dry, and ensure the gas supply is securely connected before lighting.
Tip: Use a neutral oil with a high smoke point and apply sparingly. - 8
Test fire and adjust
Light the grill and bring to cooking temperature to verify even heat distribution after cleaning. If hotspots appear, run a quick brush and reseed oil lightly before cooking.
Tip: A quick heat-up helps reseason the grate surface and verify clearance.
Questions & Answers
What is the best cleaner for grill grates?
A mild dish soap with warm water works for most grates. For heavy grease, a degreaser designed for grills or a baking-soda paste can help. Always rinse thoroughly to remove any cleaner residue before cooking.
Most grates clean well with warm soapy water; for heavy grease, use a grill-safe degreaser and rinse thoroughly.
Can I use oven cleaner on grill grates?
Avoid using standard oven cleaners on grill grates, especially on coated or cast iron types. These chemicals can leave residues and fumes that aren’t safe for food contact. Stick to grill-safe cleaners or mild soap and water.
Oven cleaner is not recommended on grill grates due to residue and safety concerns.
Is it safe to use vinegar on stainless steel grill grates?
Diluted vinegar can help cut grease on stainless steel grates, but avoid prolonged exposure and always rinse well. Vinegar is generally safe in moderation and can be part of a natural cleaning approach.
Yes, diluted vinegar can help with grease, but rinse well after use.
How often should I clean grill grates?
Clean after every use with a quick brush, and perform a deeper clean every 1-3 grilling sessions depending on frequency and food types. Frequent maintenance reduces buildup and preserves heat distribution.
Clean after each use; do a deeper clean every few runs depending on use.
Should I remove burners before cleaning?
Usually you don’t need to remove burners for grate cleaning. Focus on the grates and interior surfaces; consult your grill’s manual if you suspect burner access is required for safety.
Typically no; remove only if your manual says so and you know how to do it safely.
What if the grate is rusting or pitted?
Light rust can be scrubbed, but extensive rust or deep pitting means the grate may need replacement. Regular oiling and avoiding prolonged moisture help slow rust formation.
Light rust may be scrubbed out; replacement is often best for severe rust.
Watch Video
The Essentials
- Turn off gas and cool before handling grates.
- Burn off debris to minimize aggressive scrubbing.
- Soak when grease is heavy; scrub with non-abrasive tools.
- Rinse, dry, and oil to prevent rust and sticking.
- Maintain a regular cleaning schedule for best results.