How to Clean a Flat Grill: A Complete Step-by-Step Guide
Discover how to clean a flat grill safely and effectively with our comprehensive, step-by-step guide. It covers the right tools, technique, and timing to prevent stubborn buildup for a pristine cooking surface.

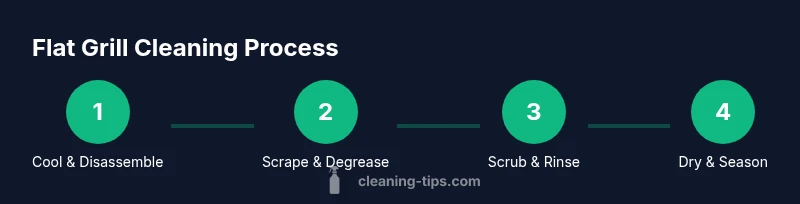
According to Cleaning Tips, you can clean a flat grill by cooling it, removing loose debris, scrubbing with a non-abrasive pad, and applying a degreaser. Rinse thoroughly, dry well, and re-season with a light oil. If applicable, unplug or switch off the unit before starting, then reassemble once dry. This simple routine protects the surface and extends grill life.
Why Cleaning a Flat Grill Matters
A flat grill provides a wide, even surface for pancakes, sandwiches, and quick seared dishes. Regular cleaning removes grease, burnt-on bits, and food residues that can affect flavor, heat distribution, and overall performance. Over time, buildup can cause uneven heating and possible smoke or flare-ups. Knowing how to clean a flat grill helps you maintain consistent results, extend the appliance’s lifespan, and keep your kitchen smelling fresh. The Cleaning Tips team emphasizes that a simple, routine cleaning after each use prevents stubborn deposits and keeps your cooking surface healthy for families and guests alike.
By making cleaning part of your cooking routine, you reduce the effort required on busy weeknights. A little preparation and the right tools make the task faster and safer. If you’re new to grill cleaning, start with a basic clean after every use and schedule a deeper clean every few weeks, depending on how often you cook high-fat meals.
Safety First: Prep and Protective Gear
Safety matters when cleaning any hot cooking surface. Always unplug or switch off the grill and allow it to cool completely before you touch it. Wear heat-resistant gloves, an apron, and eye protection if you anticipate splashes from degreasers. Work in a well-ventilated area to avoid inhaling fumes from cleaners or hot steam. Keep a dedicated sponge or pad for grill use to prevent cross-contamination with other kitchen surfaces. A clean workspace reduces accidents and speeds up the process.
Tools and Materials You Need
Having the right tools speeds up the job and prevents damage to delicate grill surfaces. Before you begin, gather a non-abrasive scrubbing pad, a nylon brush, a metal scraper (for stubborn debris only if the surface permits), a spray bottle with a mild degreaser or dish soap, warm water, a sponge, clean towels, and a light cooking oil or spray for reseasoning. Optional items include aluminum foil for a quick cover, heat-resistant gloves, and a small bucket for rinsing. Keeping everything handy minimizes trips to the pantry and ensures a smooth cleaning flow.
Preparing Your Grill: Cooling, Disassembly, and Inspection
Start by turning off the heat source and letting the grill cool fully. Remove any removable parts such as grates or drip trays and set them aside for cleaning separately. Inspect the surface for pitting, rust, or signs of wear. If you find damaged areas, address them before reassembling to prevent further issues. This stage is your chance to spot potential maintenance needs and plan your cleaning steps accordingly.
Step-by-Step Cleaning Process Overview
A structured approach keeps the grill clean without missing steps. Begin with the basics (cooling and disassembly), then move to debris removal, degreasing, scrubbing, rinsing, and drying. Finally, reassemble and season the surface to restore a non-stick barrier. This section gives you a high-level roadmap before you dive into the detailed steps that follow.
Pro tip: work in sections so you don’t miss tough spots, especially around corners and edges where grease accumulates.
Deep Cleaning for Heavy Buildup
Heavy buildup requires a slightly more aggressive but still safe approach. Soak detachable parts in warm, soapy water to loosen sticky residue. For stubborn areas, use the grill-specific scraper gently to avoid scratching the coating. A second round of degreaser with a longer dwell time (5–10 minutes) can help dissolve baked-on grease. After soaking, scrub again, rinse thoroughly, and dry completely before reassembling. Regular deep cleans prevent thick layers from forming and keep heat distribution even.
Post-Clean Maintenance: Seasoning and Protection
After a thorough cleaning, season the grill surface to enhance non-stick properties and protect against rust. Lightly coat the griddle with a high-heat cooking oil and bake or heat according to your model’s instructions. Wipe away excess oil to avoid sticky surfaces. Establish a maintenance routine: quick wipe-down after each use and a deeper clean every 1–2 months, depending on usage. Regular seasoning improves performance and prolongs the life of your flat grill.
Common Issues and Troubleshooting
If you notice uneven heating, excessive smoking, or lingering odors, reassess your cleaning routine. Uneven heat may indicate leftover grease in hard-to-reach areas; re-clean those zones with a fresh pad and degreaser. Smoke is often caused by highly fatty foods or a partially blocked vent; check vents and clean them if needed. Persistent odors can be addressed with a quick wipe-down of the interior and a light seasoning. If rust appears, address it promptly with appropriate rust-removal methods and reseason the surface afterward.
Quick Maintenance Schedule for Busy Homes
For many households, a 15–20 minute post-cook wipe-down and a monthly deep clean works best. After each use, scrape loose debris, wipe with soapy water, rinse, and dry. Every 4–6 weeks, perform a deeper clean with degreaser and a thorough scrub, focusing on corners and edges. Keep a simple cleaning log to remind yourself when the next deep clean is due. Consistency is the key to keeping your flat grill performing at its best.
Tools & Materials
- Non-abrasive scrubbing pad(Soft pad to avoid scratching the surface)
- Nylon grill brush(For scraping without scratching porcelain or metal coatings)
- Plastic or metal spatula/scraper(Only use on safe areas; avoid non-stick coatings)
- Mild degreaser or dish soap(Choose a degreaser suitable for cooking surfaces)
- Warm water(For rinsing and cleaning solution)
- Sponge and clean towels(Dry surface thoroughly after cleaning)
- High-heat cooking oil or spray(Used to season the surface after cleaning)
- Gloves and eye protection(Optional but recommended for chemical exposure and heat)
- Aluminum foil (optional)(Can help shield surrounding surfaces during scrubbing)
Steps
Estimated time: 45-60 minutes
- 1
Power off and cool the grill
If electric, unplug the unit and allow the surface to cool completely before handling. This reduces the risk of burns and ensures degreasers don’t evaporate too quickly. A cool surface is also easier to handle and safer for precise scrubbing.
Tip: Never rush cooling; hot metal can warp or burn cleaners and hands. - 2
Remove grates and loose parts
Withdraw grates, drip trays, and any removable components. Place them on a protected surface for cleaning. This step exposes hidden grease so you can address it directly.
Tip: Organize parts so you remember where each piece goes during reassembly. - 3
Scrape loose debris
Use a plastic or metal scraper to lift burnt-on food from the grilling surface. Work in steady, overlapping strokes to avoid gouging the coating. This step greatly reduces the needed scrubbing later.
Tip: Avoid aggressive scrapes that could scratch sensitive coatings. - 4
Apply degreaser and let sit
Spray or apply a mild degreaser or dish soap solution. Let it dwell for 3–5 minutes to loosen stubborn grease before scrubbing again. The dwell time helps dissolve oils that bake onto the surface.
Tip: Do not let cleaner dry on the surface; keep it damp for effective cleaning. - 5
Scrub surfaces with pad and brush
Scrub the grill surface with a non-abrasive pad and use a nylon brush for hard-to-reach spots. Rinse frequently to remove loosened grease and debris. Revisit tough areas until they lift cleanly.
Tip: Switch to a fresh pad if residue keeps building up. - 6
Rinse and wipe down
Rinse all surfaces with warm water or wipe with a damp sponge. Ensure all soap and degreaser residues are removed. Wipe dry with a clean cloth to prevent water spots and rust.
Tip: Double-check corners and edges where grease hides. - 7
Dry thoroughly and inspect
Dry every component completely — grates, surfaces, and trays. Inspect for rust or pitting. If you see damage, note it for potential maintenance before the next use.
Tip: A dry surface reduces chance of mold or odors forming later. - 8
Reassemble and season
Reinstall grates and trays. Apply a small amount of high-heat oil to the cooking surface and heat briefly to seal. Wipe away excess oil and let the grill cool before use.
Tip: Seasoning enhances non-stick performance and protects against rust. - 9
Test grill and clean up
Turn the grill to a medium heat and run it for a few minutes to ensure it’s working evenly. After testing, do a final wipe-down to keep the surface pristine for your next meal.
Tip: Keep a routine to avoid surprise buildup before cooking.
Questions & Answers
How often should I clean a flat grill?
Clean after each use with a quick wipe-down and routine deep cleans every 1–2 months, depending on how often you cook and what you cook. This helps maintain heat distribution and flavor.
Clean after each use and do a deeper clean every month or two, depending on use.
Can I use steel wool on stainless steel flat grill surfaces?
Avoid steel wool on stainless surfaces; it can scratch and dull the finish. Use a non-abrasive pad or nylon brush instead.
Don’t use steel wool on stainless steel surfaces; choose a non-abrasive pad.
Is it safe to use water on a hot grill?
No. Let the grill cool completely before cleaning. Spraying water on a hot surface can cause warping and dangerous steam.
Wait for cooling before cleaning; using water while hot can be dangerous.
What if heavy carbon buildup won’t come off?
Soak detachable parts in warm, soapy water and reapply a degreaser with a longer dwell time. If needed, repeat cleaning or consult your grill’s manual for manufacturer-safe methods.
If buildup sticks, soak parts and reapply cleaner; repeat as needed.
Should I season the grill after cleaning?
Yes. A light coat of high-heat oil helps protect the surface and improves non-stick performance for future cooks.
Season after cleaning to protect the surface and keep food from sticking.
Can I use household cleaners other than degreasers?
Use cleaners labeled safe for cooking surfaces. Avoid bleach or ammonia on food-contact areas, and always rinse thoroughly.
Choose cleaners safe for cooking surfaces and rinse well.
Watch Video
The Essentials
- Always power off and cool the grill before cleaning.
- Remove all detachable parts to access hidden debris.
- Use non-abrasive tools and mild degreasers to protect coatings.
- Dry surfaces completely and reseason for best performance.
- Schedule regular cleans to prevent heavy buildup.