Best Way to Clean Grill: A Practical How-To Guide
Discover the best way to clean grill with a practical, step-by-step method. This guide covers safety, tools, and maintenance to keep your grill pristine and ready for the next cookout.

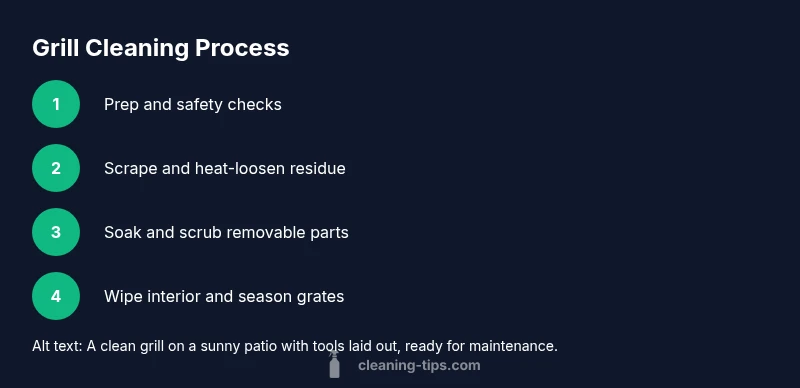
The best way to clean grill combines a quick pre-rinse, hot-scrub, and a post-clean rinse. Start by removing loose debris, preheating to loosen residue, then scrub the grates with a stiff brush. Wipe interior surfaces, rinse with a damp cloth, and finish with a light oil to protect against rust and future sticking.
Why The Grill Deserves a Thorough Clean
If you’re asking about the best way to clean grill, you’re not just chasing a shiny surface. Regular, thoughtful cleaning prevents flare-ups, preserves heat distribution, and extends the life of burners and grates. The Cleaning Tips team has found that a simple routine—after every cook and a deeper seasonal clean—reduces residue buildup and keeps flavors purer. Treat your grill like any other kitchen tool: maintenance saves time and money over the long run.
- Regular upkeep minimizes smoke and odor transfer between cooks.
- Clean surfaces improve fuel efficiency and heat accuracy.
- A well-maintained grill resists corrosion and rust over time.
For best results, use a dedicated grill brush, non-abrasive scrub pad, and a damp microfiber cloth. This combination strikes a balance between removing char and protecting delicate chrome surfaces.
Brand note: According to Cleaning Tips, a consistent routine reduces buildup by up to the amount seen with sporadic cleaning across seasons. This practical approach makes barbecue days smoother and safer.
Understanding Grill Types and Cleaning Needs
Grills come in various configurations—gas, charcoal, and pellet—and each type benefits from slightly different cleaning sequences. A gas grill needs attention to burners and heat plates to prevent clogging and uneven heating. Charcoal grills require ash removal and grate scrubbing to avoid smoky flavors turning acrid. Pellet grills combine ash management with delicate surfaces that can warp if cleaners are too harsh. When choosing a method, tailor the steps to your model and manufacturer recommendations to avoid voiding warranties.
- Gas grills: focus on burners, flame tamers, and drip pan.
- Charcoal grills: emphasize ash removal and grate scrubbing.
- Pellet grills: clean burn pot, grates, and interior walls.
Pro tip: Always unplug or disconnect power sources before cleaning and let hot surfaces cool to a safe handling temperature. The Cleaning Tips team recommends checking the user manual for model-specific cautions to prevent damage.
Essential Tools and Cleaners (What You Really Need)
Before you start, gather tools that won’t scratch metal or leave residues. A heavy-duty grill brush with stiff bristles, a nylon scrub pad for chrome, a wide spatula, a bucket of warm soapy water, paper towels, and a microfiber cloth should cover most jobs. For stubborn stains, a non-abrasive cleaner or a natural solution like a vinegar-water mix can help. Always avoid harsh chemical sprays near hot surfaces.
- Grill brush (stiff bristles)
- Nylon scrub pad or non-abrasive sponge
- Scraper or putty knife for stubborn buildup
- Dish soap and warm water
- Microfiber cloths and paper towels
- Heat-resistant gloves
Brand note: Cleaning Tips emphasizes having a dedicated set of tools for grill cleaning to minimize cross-contamination with kitchenware.
The Core Cleaning Routine: Step-by-Step Overview
A reliable routine blends pre-cleaning with hot scrubbing, interior wipe-downs, and seasoning to prevent rust and sticking. Start by removing grates and cleaning the exterior. Then, heat the grill briefly to loosen debris, use a brush to scrub away residue, and wipe down the interior surfaces with a damp cloth. Finally, reassemble and apply a light oil to grates to protect against moisture.
- Pre-clean the exterior and grates.
- Preheat briefly to loosen residue.
- Scrub thoroughly, focusing on corners and crevices.
- Wipe interior surfaces and re-season.
Tip: If you notice rust spots, treat them promptly with a rust-inhibiting spray designed for grill surfaces and follow with re-seasoning.
Deep Cleaning for Deep-Seated Buildup
If your grill has built-up grease or carbon deposits, a deeper approach is warranted. Soak removable parts in warm, soapy water for 15–20 minutes to loosen grime. Use a nylon brush to scrub grates and heat plates, then rinse with clean water and dry completely before reassembling. For stubborn stains, a paste made from baking soda and water can act as a gentle abrasive without scratching metal.
- Soak removable parts to loosen grime.
- Use the nylon brush on grill surfaces.
- Rinse and dry thoroughly to prevent rust.
- Use baking soda paste for tough spots (test on a small area first).
Warning: Do not mix chlorine bleach with ammonia-based cleaners on grills; it can release dangerous gases. Always ventilate well during cleaning. Cleaning Tips recommends avoiding metal scrapers on porcelain-coated surfaces to prevent chipping.
Seasonal Deep Clean: a Schedule that Works
Most grills benefit from a quarterly deep clean, with lighter weekly maintenance in-season. A seasonal clean should include dismantling, thorough scrubbing of all parts, oven-safe cleaner if allowed by manufacturer, and a final inspection for loose screws or rust. Mark your calendar and stick to the routine; consistency reduces build-up and makes each cleaning faster and more effective.
- Quarterly deep clean: grates, heat shields, burners, tray, and lid.
- Monthly light wipe-downs after cooking sessions.
- Inspect for wear and tear, replacing worn parts as needed.
Pro tip: Keep a cleaning kit near the grill area for fast post-cook wipe-downs so residue doesn’t have time to harden.
Safety Considerations and Common Pitfalls
Safety comes first when cleaning grills. Ensure the grill is cool before starting, disconnect gas sources, and use gloves to avoid burns. Common pitfalls include using metal tools on porcelain-coated grates, using bleach solutions near food-contact areas, and neglecting to dry parts completely, which can cause corrosion. Following manufacturer guidelines will help you avoid these problems and maintain warranty protections.
- Always cool surfaces before cleaning.
- Avoid abrasive tools on coated surfaces.
- Dry all parts thoroughly before reassembly.
Note: Cleaning Tips reminds readers that safety gear and proper ventilation improve both cleanliness and health outcomes during cleaning.
Grate Care and Seasoning: Keeping the Grill Ready to Cook
Seasoning grates after cleaning creates a slick, non-stick surface that improves your grilling results. Lightly coat grates with a high-heat oil (like canola or grapeseed) and heat the grill for a few minutes to polymerize the coating. Regular seasoning, especially after a deep clean, helps food release more easily and reduces rust.
- Apply a thin layer of high-heat oil.
- Heat to around the smoking point for your grill type.
- Wipe excess oil and store.
Short tip: If you’re short on time, a quick wipe with oil after cooking can help maintain the coating between full cleanings.
Quick Aftercare: Odor Control and Freshening Up
After cleaning, leave the grill door open for a short period to air out any remaining odors. A light wipe-down with a damp cloth and a quick interior wipe keeps surfaces fresh. For lingering smells, place a small bowl of baking soda inside the grill once it's cool to absorb odors. Replace the grate and cover to seal in cleanliness.
- Air out after cleaning.
- Use baking soda to neutralize odors.
- Reassemble and cover to protect from dust.
Brand tip: Cleaning Tips notes that proactive odor control improves the overall cooking experience for backyard gatherings.
Tools & Materials
- Grill brush (stiff bristles)(Prefer a brass or stainless-steel bristle brush for the grate surfaces.)
- Nylon scrub pad or non-abrasive sponge(Gentle on chrome and porcelain coatings.)
- Putty knife or scraper(For stubborn buildup in corners.)
- Bucket of warm soapy water(Dish soap is usually sufficient.)
- Microfiber cloths and paper towels(For drying and interior wipe-downs.)
- Heat-resistant gloves(Protect hands from hot surfaces.)
- Oil for seasoning (high-heat oil, e.g., canola or grapeseed)(Light coat to protect grates after cleaning.)
- Optional cleaner or vinegar-water solution(Use sparingly and check manufacturer guidance.)
Steps
Estimated time: 60-90 minutes
- 1
Safely prepare the grill
Power down and disconnect any gas supply. Allow the grill to cool completely before starting. Remove grates and any accessories you’ll clean separately. This initial setup reduces the risk of burns and makes the rest of the process smoother.
Tip: Keep a dry tray nearby to collect ash or debris as you remove parts. - 2
Pre-clean exterior and grate surfaces
Wipe the exterior with a damp cloth to remove surface grease. Scrape loose debris from the grates with a scraper or the edge of a putty knife. Removing loose grime early prevents it from turning into hard-to-remove baked-on residue.
Tip: Use a separate cloth for the exterior to avoid cross-contamination with food-contact areas. - 3
Preheat and loosen stubborn residue
Light the grill or turn it to a low setting for 5–10 minutes to loosen grease. After cooling slightly, brush the grates vigorously to remove loosened char. This step makes the subsequent scrubbing much more effective.
Tip: If your grill is very dirty, repeat the heat-and-brush cycle once more. - 4
Soak and scrub removable parts
Soak grates and removable parts in warm, soapy water for 10–15 minutes. Use a nylon scrub pad to remove burnt-on residue, paying attention to corners and ridges. Rinse thoroughly and dry completely before reassembling.
Tip: Avoid soaking parts with wooden handles or delicate coatings that could swell or warp. - 5
Clean interior surfaces
Wipe down interior walls, drip pan, and flame tamers or heat shields with a damp cloth. Use a brush to dislodge any remaining debris from hard-to-reach areas. Ensure there is no standing water left inside the grill cavity.
Tip: For porcelain-coated surfaces, avoid metal scrapers to prevent chipping. - 6
Season the grates
Once everything is dry, apply a thin layer of high-heat oil to the grates and heat the grill for a few minutes to polymerize the coating. Wipe away excess oil to prevent drips and flare-ups during the next cook.
Tip: Seasoning helps reduce sticking and extends grate life. - 7
Reassemble and perform a test cook
Reinstall grates and accessories. Lightly oil the grates again and run the grill for 5–10 minutes to ensure even heat across surfaces. Inspect for any lingering odors or residue and wipe as needed.
Tip: Keep an eye on flames during the test cook to ensure even distribution. - 8
Establish a maintenance routine
Set a cleaning schedule aligned with how often you grill. A quick post-cook wipe and a deeper seasonal clean keeps performance high and odors low. Having a routine reduces long-term buildup and makes future cleanings faster.
Tip: Use a dedicated cleaning kit stored near the grill for quick access.
Questions & Answers
How often should I clean my grill?
Aim for a quick post-cook wipe after each use and a deeper seasonal clean every 1–3 months, depending on how often you grill and the type of fuel used. Regular maintenance minimizes buildup and keeps heat even.
Clean after every cook with a quick wipe, then do a deeper clean every few months depending on use.
Can I use dish soap on my grill?
Dish soap is generally safe for exterior surfaces and removable parts when rinsed well. Avoid harsh chemicals on porcelain coatings and ensure all soap residue is thoroughly washed away before cooking again.
Yes, soap is fine for removable parts if you rinse thoroughly and avoid harsh cleaners on coated surfaces.
Should I use a wire brush on stainless steel grills?
A stiff-bristle wire brush can be used on stainless steel, but test first on a small area to avoid scratching coatings. For delicate finishes, switch to a nylon scrub pad.
A stiff brush is okay on stainless steel if you’re careful; otherwise, use a nylon pad to protect the finish.
What’s the best way to remove baked-on grease?
Soak removable parts in warm soapy water, then use a nylon brush. For stubborn spots, a baking soda paste can help without scratching. Avoid abrasive cleaners on coated surfaces.
Soak and scrub; for tough spots, try a baking soda paste, not harsh chemicals.
How do I prevent rust after cleaning?
Dry all parts thoroughly after cleaning and season the grates with a light oil to form a protective layer. Store with a cover to minimize moisture exposure when not in use.
Dry everything well and lightly oil the grates to prevent rust.
Watch Video
The Essentials
- Clean grates and interior regularly to prevent buildup.
- Tailor cleaning to your grill type for best results.
- Season grates after cleaning to improve non-stick performance.
- Use heat to loosen grime, then scrub with non-abrasive tools.
- Establish a simple maintenance routine for faster future cleans.