How to Clean a Pool Filter: A Complete Step-by-Step Guide
Learn how to clean a pool filter with a clear, step-by-step approach. This guide covers filter types, tools, safety, troubleshooting, and maintenance tips from Cleaning Tips to keep your pool water sparkling all season.

By the end of this guide you will know how to clean a pool filter to restore water clarity and efficient circulation. Gather basic tools, a hose, and the correct filter type, then follow the step-by-step process. Start by turning off the pump, removing the filter, and inspecting for wear or damage before cleaning. Finish with a thorough rinse and a test run.
Why a clean pool filter matters
According to Cleaning Tips, a clean pool filter is essential for clear water, balanced chemistry, and efficient circulation. A dirty or clogged filter can reduce suction, increase energy use, and put extra strain on your pump. Regular cleaning helps debris stay trapped where it belongs, minimizes chemical demand, and extends the life of filter media. In this section, you’ll see how filtration works and why keeping the media in good condition matters for the whole pool system. The better your filter performs, the fewer problems you’ll face with cloudy water, algae growth, and nuisance odors. With a routine that fits your pool and climate, you’ll enjoy cleaner water with less effort. Remember: consistency beats intensity when it comes to filter maintenance, and small, regular cleanings add up over a season.
Filter types: cartridge, sand, and DE
Most residential pools rely on one of three filter types: cartridge, sand, or DE. Cartridge filters trap dirt in pleated paper or polyester cartridges; they’re easy to clean on-site but may require replacement of cartridges over time. Sand filters use silica-based sand to capture particles; you backwash to flush out debris. DE filters coat grids with diatomaceous earth for extremely fine filtration but require careful handling of the DE powder and backwashing to refresh the DE coating. Understanding your filter type helps tailor cleaning steps, rinsing techniques, and cleaning agents. Clean a pool filter with the correct approach to prevent damage to seals and gaskets. Always consult the manufacturer’s manual for your exact model before starting.
Inspecting your filter before cleaning
Before you start, inspect the filter media and housing for signs of wear, cracks, swelling, or misalignment. Check the O-rings and seals for dryness or cracking. If you notice persistent leaks or damaged seals, plan to replace them rather than forcing a cleaner through. Take note of the current pressure gauge or manometer reading if your system uses one; this baseline helps you decide when cleaning is needed. Observing these details saves you from unnecessary disassembly and protects the pump from air leaks or loss of prime. A thorough pre-check sets the stage for a safer, more effective cleaning session.
Tools and safety before you start
Gather the tools you’ll need and review safety steps. Wear chemical-resistant gloves and eye protection to shield your skin and eyes from cleaning solutions. Have a bucket and towels ready for spills, and keep a garden hose at hand for rinsing debris from the media. If you’re working with DE, a dust mask helps reduce inhalation risk. Ensure the power to the pump is off at the breaker and that you’ve locked the switch if others access the area. Read the manufacturer instructions for any model-specific cautions. With these precautions, you’ll clean with confidence and minimize accidents.
Cartridge filter cleaning process
Cartridge filters require a different approach than sand or DE. Remove the cartridge assemblies carefully, keeping track of orientation for reassembly. Rinse the cartridge thoroughly from the clean side to remove surface debris; gentle brushing helps dislodge trapped dirt. For a deeper clean, soak cartridges in a mild cleaning solution or a vinegar-water mix for a short period, then rinse again until the water runs clear. Drying the cartridge completely before reinstalling is often advised to prevent mold growth. Re-slot the cartridge, inspect the seals, and proceed to reassemble the housing.
Sand and DE filter cleaning processes
Sand and DE filters require backwashing to flush out captured debris and then a rinse to clear fines. For sand, backwash until the water runs clear and the pressure returns to normal range; for DE, backwash to remove spent DE and then refresh the coating according to the manufacturer’s guidance. After backwashing, a final rinse helps the bed settle and improves flow. Handle DE with care, following local disposal guidelines for the spent material. When done, inspect the backwash valve and O-rings and prepare to reassemble the filter.
Backwashing and rinsing efficiently
Backwashing is a quick way to reset a filter, but doing it efficiently saves water and time. Start backwashing with the system in a steady state, watch the gauge if present, and stop when you see a noticeable color change in the return water. After backwashing, perform a rinse cycle to settle the bed and remove residual debris. For cartridge filters, ensure all media is clean and free of tears before returning to service. A prompt rinse helps prevent redebris from entering the pool.
Reassembly and priming the pump
With media clean or replaced, carefully reassemble the filter housing and reseat all seals. Reconnect the plumbing, ensure clamps are tight, then prime the pump if required by your model. Open the air-relief valve slowly to release trapped air and listen for a steady hiss before closing. Power up the pump and observe for leaks or unusual noises. A proper reassembly reduces air pockets and helps the system reach optimum flow quickly.
Testing, monitoring, and when to replace
Return the filter to service and watch the pressure gauge or flow indicators as the system operates. If the readings are stable and the water looks clear, you’ve achieved a successful cleaning. If flow remains weak or pressure stays high after cleaning, there may be an issue with the media, seals, or piping that requires further attention. Keep a simple maintenance log and schedule regular checks, so you don’t miss signs that replacement is needed.
Maintenance schedule and pro tips
Create a straightforward maintenance routine that fits your pool usage. Clean or backwash on a regular schedule and record the dates for reference. Regularly inspect the seals, O-rings, and clamps for signs of wear, and replace components as needed. Use a mild cleaning solution rather than harsh chemicals that could degrade media or seals. Finally, store cleaning supplies safely away from children and pets and recycle spent media according to local guidelines.
Troubleshooting common issues
Sometimes, even with proper cleaning, filters can underperform. If you notice persistent cloudy water, check the return lines and sight leaks. If backwash water remains dirty, repeat the cleaning steps or consider media replacement. If the pump keeps losing prime, verify the O-rings, lid seals, and air-relief valve for leaks. When in doubt, consult the model manual or reach out to a pool professional for guidance.
Environmental and disposal considerations
Dispose of used filter media and cleaning fluids responsibly. Follow local regulations for disposal of spent media and chemical residues. Use eco-friendly cleaners whenever possible and minimize water waste by targeting only the necessary cleaning cycles. Cleaning Tips emphasizes environmentally conscious maintenance practices as part of a healthy pool routine.
Tools & Materials
- Gloves (chemical-resistant)(Protect hands from cleaning chemicals and debris)
- Garden hose(Rinse media and flush debris from the housing)
- Soft brush or sponge(Gentle scrubbing to release grime without tearing media)
- Bucket(Soak cartridges or hold spent media for disposal)
- Replacement O-rings/seals(Carry spares for a secure, leak-free fit)
- Safety goggles(Eye protection when handling chemicals or pressurized water)
- Towels or rags(Clean spills and dry components during reassembly)
Steps
Estimated time: 60-90 minutes
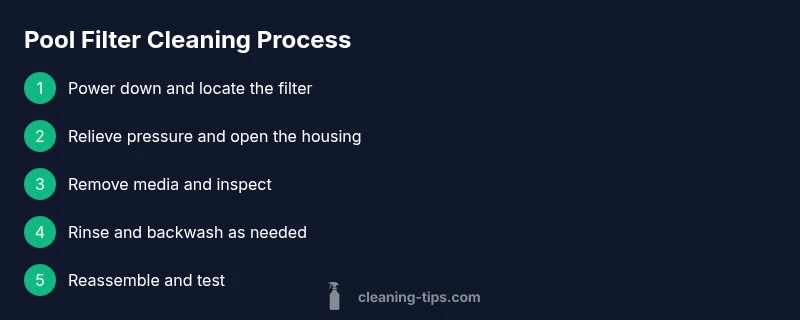
- 1
Power down and locate the filter
Turn off the pool pump at the breaker and confirm there is no electrical power going to the system. Locate the filter housing and identify whether you have a cartridge, sand, or DE filter to tailor the cleaning method.
Tip: Use a lockout tag if others might restart equipment. - 2
Relieve pressure and remove the lid
Open the filter housing carefully. If your model uses a pressure relief valve, engage it to release any built-up pressure before touching media.
Tip: Keep hands away from release valves to avoid a spray of water. - 3
Extract the filter media
Carefully remove the cartridge stacks or media bed. Note how components are assembled so you can reassemble correctly after cleaning.
Tip: Place media in a bucket or trough to prevent debris from spreading. - 4
Rinse the media
Rinse cartridges from the clean side using a steady, low-pressure jet to avoid tearing the media. For sand and DE, skip this step and prepare for backwashing.
Tip: Avoid high-pressure jets that can damage cartridge folds. - 5
Soak and scrub (cartridge only)
If cleaning a cartridge, soak in a mild cleaning solution or vinegar-water mix for a short period, then scrub away stubborn grime with a soft brush.
Tip: Rinse thoroughly until the rinse water runs clear. - 6
Backwash (sand/DE filters)
Backwash the sand or DE media according to the manufacturer’s guidance until the effluent appears clear or reaches normal pressure.
Tip: Do not backwash beyond the recommended time; excessive backwashing wastes water. - 7
Reassemble the media
Return the cleaned or new media to the housing in the correct orientation. Re-seat O-rings and seals for a tight fit.
Tip: Keep seals aligned and avoid pinching during reassembly. - 8
Prime and restart the pump
Reconnect hoses, replace the lid, and slowly restore power. If your system has an air-relief valve, open it briefly to purge trapped air.
Tip: Listen for steady operation and watch for leaks during initial start-up. - 9
Test and monitor
Run the system and observe water clarity and pressure. Compare to baseline readings and adjust cleaning frequency based on pool usage.
Tip: Keep a simple maintenance log for future reference.
Questions & Answers
When should I clean my pool filter?
Clean the filter when you notice reduced flow or unusual pressure, or on a regular schedule based on pool use and water quality.
Clean the filter when you notice reduced flow or unusual pressure, or on a regular maintenance schedule based on your pool use.
Can I clean a pool filter without backwashing?
Cartridge filters can be cleaned by soaking and rinsing. Sand and DE filters usually require backwashing to restore flow.
Cartridge filters can be soaked and rinsed; sand or DE filters typically need backwashing to restore flow.
How often should I replace filter media?
Media replacement depends on filter type and wear; inspect seals, cracks, and performance to decide if replacement is needed.
Inspect seals and media for wear; replace when cleaning no longer restores flow.
Is vinegar safe for cleaning pool filters?
Mild cleaners like white vinegar can be used cautiously on certain cartridge filters; always follow manufacturer guidelines.
Yes, mild cleaners like vinegar can be used on some cartridges if recommended by the manufacturer.
What safety steps should I take?
Wear gloves and eye protection, disconnect power, and handle chemicals according to label directions to prevent injuries.
Wear gloves and eye protection, disconnect power, and follow chemical labels carefully.
How do I dispose of used filter media?
Dispose of used media according to local guidelines; check with your waste authority for disposal options.
Disposal should follow local guidelines; contact your waste authority if unsure.
Watch Video
The Essentials
- Power down the system before any work.
- Match cleaning method to filter type for best results.
- Rinse and scrub thoroughly to remove trapped debris.
- Backwash only as needed to conserve water.
- Test the system after reassembly and monitor performance.