How to Clean a Hot Tub Filter: A Step-by-Step Guide
Learn how to clean a hot tub filter safely and effectively with Cleaning Tips. This step-by-step guide covers tools, techniques, and maintenance tips for clear spa water.

With this guide, you’ll learn how to clean a hot tub filter effectively, including when to rinse, how to soak, and how to dry and reinstall for crystal-clear water. You’ll choose the right cleaning method for your filter type, avoid common mistakes, and establish a simple maintenance routine that protects your spa's equipment.
Why clean hot tub filter matters
Regularly cleaning a hot tub filter is essential for maintaining water clarity, proper flow, and overall spa health. When a filter becomes dirty, flow is restricted, the heater works harder, and mineral buildup can occur on the filter surface. The result is cloudy water, higher chemical demand, and shorter filter life. According to Cleaning Tips, neglecting filter maintenance can increase the risk of bacterial growth and odors in your hot tub. A clean filter traps debris and organics before they reach the heater, jets, and surfaces, helping you maintain balanced water chemistry with fewer chemical swings. In short, a clean hot tub filter is the backbone of consistent, safe spa experiences.
For homeowners and renters, the payoff is immediate: clearer water, gentler operation, and less downtime for maintenance. When the filter is clean, you can run the spa at a lower circulation rate and still achieve effective filtration. This reduces energy use and extends the life of the pump. A well-maintained filter also minimizes strain on the circulation system, which helps protect seals and fittings from premature wear. Regular cleaning helps you catch tears or deteriorating gaskets early, saving costly repairs later. The right approach also reduces the need for aggressive chemical dosing, which is better for skin, eyes, and the spa’s plastic components. Keeping your filter clean is a simple habit with big long-term benefits.
Establishing a routine matters. Schedule a quick inspection every week during peak use and a deep clean every 2–4 weeks, depending on water quality and bather load. If you notice rapid water clouding after a cleaning, your filter may need replacement or a more thorough soak. Remember: a clean hot tub filter supports not only water clarity but overall spa health and energy efficiency.
Types of cleaning agents and filters can influence results
Filters come in several designs, but the most common is the cartridge filter. Cartridge filters are pleated and hold debris efficiently, but they can clog quickly if not cleaned regularly. Some spa owners also encounter microfiber or pleated disk designs depending on the model. The cleaning approach should match the filter type. For many cartridge filters, a simple rinse with a garden hose can remove loose debris. When deeper cleaning is needed, a dedicated filter cleaner or a mild cleaning solution works best. It’s important to avoid harsh household cleaners, abrasive tools, or chlorine bleach on most cartridge filters, as these can degrade the pleats or degrade gaskets over time. If you’re unsure of your filter’s material, consult the manufacturer’s guidelines. Cleaning Tips recommends sticking to manufacturer-recommended cleaners and avoiding strong solvents that can break down filtration media. Regular cleaning keeps the surface area open and ensures efficient filtration, which in turn maintains balanced water chemistry and reduces the burden on the spa’s pump and heater.
If you have a different filter type, such as a sand or diatomaceous earth (DE) filter, the approach will differ. Sand and DE systems require professional servicing for deep cleaning or media replacement, as their cleaning needs are more specialized. In most home spas, cartridge filters are the most practical option and the one you’ll most often clean. Always check your model’s instruction manual for specific directions on cleaning cycles, soaking times, and maximum usage limits. A correctly cleaned filter can extend the life of your spa equipment and improve water quality noticeably.
Tools and prep: essential gear and setup
Before you start, assemble the essentials to make the process smooth and safe. A few key items ensure you can clean effectively without creating a mess or risking injury. Gather a garden hose with a spray nozzle, a clean bucket, gloves, and a mild filter cleaning solution or a vinegar-based soak as a safer alternative. Have a spare replacement cartridge on hand in case you discover a tear or significant wear. A soft brush or old toothbrush helps remove debris from stubborn pleats. If you plan to soak, ensure you have a container or tub large enough for the filter. Set up a dedicated area where you can place the filter after removal to dry. Protect nearby surfaces with towels and wear gloves to shield your hands from hot water and cleaning agents. For safety, disconnect power to the spa to prevent accidental activation during filter removal and cleaning. When you’re ready, turn your focus to inspection: look for tears, cracks, or missing gasket rings. A damaged filter should be replaced rather than cleaned to avoid contaminated water circulating through the spa.
Pro tip: a dedicated bucket for filter cleaning makes the process cleaner and faster, and labeling it helps prevent cross-contamination with other cleaning tasks. If your spa is outdoors, consider weatherproof covers and a slip-resistant mat to keep the workspace safe. Taking a few minutes to prepare properly saves time and reduces the risk of mistakes during the cleaning sequence.
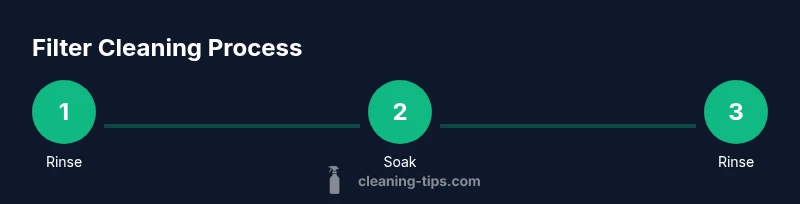
Step-by-step overview: a practical approach to cleaning
A practical approach combines rinsing, soaking, and thorough rinsing again to restore filtration efficiency. Start with a baseline rinse to remove loose debris and loose mineral buildup. Then, soak the filter in a cleaner solution or a vinegar-based soak to dissolve oils and trapped organics. Finish with a final rinse to flush out loosened grime and inspect the pleats for any remaining buildup. After cleaning, allow the filter to dry completely before reinstalling to prevent moisture-related mold growth. Once reinstalled, run the spa for a short period to confirm proper water flow and verify that there are no leaks around the filter housing. Regular inspection after reinstall helps catch issues quickly, allowing you to address them before they affect water quality. The combination of rinsing, soaking, and drying is the backbone of a successful cleaning cycle. If you encounter persistent odors or cloudy water after cleaning, it may indicate that the filter is past its prime and needs replacement, or that the water chemistry requires adjustment.
Cleaning Tips recommends documenting each cleaning session, including soak times and any cleaner used, so you can fine-tune the routine over time for best results.
Common mistakes to avoid and safety reminders
Avoid using aggressive bleach-based cleaners on cartridge filters, as these can degrade the filtration media and the gasket seals. Do not exceed soaking times beyond the manufacturer’s guidelines; over-soaking can cause the media to begin breaking down. Never reinstall a wet filter; moisture promotes mold and bacteria growth. Be cautious with hot tubs: high water temperatures can accelerate bacterial activity if filters are not clean, so always rinse and inspect thoroughly. If you see tears, cracks, or permanent deformation in the pleats, replace the filter rather than attempting a patch. Finally, maintain balanced water chemistry; even a clean filter cannot compensate for consistently imbalanced pH or sanitizer levels, which can cause corrosion or scale buildup. If in doubt, consult your spa manual or contact the manufacturer for model-specific instructions. Keeping notes on your cleaning cycle helps you avoid over-cleaning or under-cleaning and ensures you maintain a healthy spa environment.
Maintenance schedule and long-term care
Create a practical maintenance calendar that aligns with your spa usage. High-use homes may benefit from a weekly quick rinse and a deeper clean every 2–3 weeks, while lighter use can stretch to every 4 weeks. Mark dates to inspect the filter housing for cracks or worn gaskets and replace components as needed. Pair filter maintenance with water chemistry checks: test strips and sanitizer levels weekly, and adjust as necessary after a filter cleaning. If you notice persistent cloudiness after a cleaning, you might need to replace the cartridge rather than continue cleaning the same unit. Always store spare filters in a clean, dry area to protect them from moisture and contaminants. A well-planned maintenance routine keeps your spa water crystal clear, extends equipment life, and reduces the overall time you spend on maintenance.
Tools & Materials
- Filter cartridge(Essential filter type; have the correct size for your spa model)
- Garden hose with spray nozzle(For initial rinse and debris removal)
- Bucket or mixing tub(Large enough to fully submerge the filter)
- Filter cleaning solution or white vinegar(Use manufacturer-approved cleaner if possible)
- Gloves(Protect hands from cleaning agents and debris)
- Soft brush or old toothbrush(Gentle scrubbing for stubborn grit)
- Replacement gasket/extra filter on hand(Have spares in case of damage)
- Towels or mat(Protect surfaces and absorb spills)
Steps
Estimated time: 30-45 minutes
- 1
Power down and remove filter
Turn off the spa and unplug if possible. Open the filter housing and carefully remove the cartridge, avoiding force that could tear seals. Inspect the seal and housing for damage.
Tip: Handle the cartridge by the end caps to avoid bending the pleats. - 2
Rinse the filter thoroughly
Rinse with a strong, steady spray from the hose to remove loose debris from the pleats. Hold the filter at an angle to allow water to flow through all sections.
Tip: Rinse from both sides to dislodge embedded oils. - 3
Soak in cleaner solution
Prepare the cleaner or vinegar soak in a bucket according to product directions. Submerge the filter completely and soak for the recommended time to dissolve oils and organics.
Tip: Avoid soaking too long if the manufacturer advises a maximum soak time. - 4
Rinse again and inspect
Remove the filter and give it a final rinse. Inspect the pleats for deep staining or tears and ensure there is no debris trapped in the folds.
Tip: If staining persists, consider a second shorter soak or replacement. - 5
Dry and reinstall
Shake off excess water and let the filter dry completely in a sunny or well-ventilated area. Reinstall the dry cartridge, ensuring the seals are seated properly.
Tip: A damp filter can harbor mold; drying is essential. - 6
Test spa and verify water quality
Power up the spa, run the circulation, and check for proper flow. Test water chemistry and adjust as needed after the cleaning cycle.
Tip: If flow is weak after cleaning, re-check the O-ring/gasket seat.
Questions & Answers
How often should I clean a hot tub filter?
Clean your filter every 1-2 weeks during heavy use and perform a deep clean every 2-4 weeks, depending on water quality and bather load. Regular cleaning prevents buildup that reduces filtration efficiency.
Clean the filter weekly during heavy use, and do a deeper clean every two to four weeks based on how dirty the water looks.
Can I use vinegar to clean my hot tub filter?
Yes, a mild vinegar soak can dissolve oils and minerals without harsh chemicals. Rinse well afterward and ensure compatibility with your filter model. Use vinegar only as a supplementary option if the manufacturer allows it.
A mild vinegar soak can help, but always rinse well and follow manufacturer guidelines.
Is it okay to put the filter in the dishwasher?
Most spa filters are not dishwasher-safe. High heat and detergents can warp the media. Stick to manual rinses and purpose-made cleaner unless the manufacturer explicitly approves dishwasher use.
Dishwashers aren’t usually recommended for spa filters; use manual cleaning unless the manual says otherwise.
How can I tell if my filter needs replacement?
If the pleats are torn, the filter is deformed, or water flow remains poor after cleaning, replacement is recommended. Colorful staining that doesn’t come out after soak may also indicate a worn filter.
If you see tears or deformation, or if flow stays weak after cleaning, replace the filter.
Should I clean the filter while the spa is hot?
Avoid cleaning while the spa is active. Turn off power and let the system cool before removing the filter. Hot water and active circulation can cause injury and complicate cleaning.
No. Turn off the spa and wait for it to cool before removing and cleaning the filter.
How long should I soak a filter for best results?
Soak times vary by cleaner. Follow the cleaner’s instructions; typically a soak of 15-60 minutes suffices for olive or mineral oils, then rinse thoroughly.
Follow the cleaner’s directions; usually 15 to 60 minutes works well.
Watch Video
The Essentials
- Inspect filters regularly for tears or wear
- Rinse, soak, rinse again to restore filtration efficiency
- Avoid harsh cleaners on cartridges
- Dry filters completely before reinstall
- Maintain a consistent cleaning schedule