Clean Air Conditioner: Step-by-Step Cleaning Guide
Learn how to clean and maintain your air conditioner for healthier indoor air. This practical, step-by-step guide covers filters, coils, and exterior surfaces to boost efficiency and overall air quality in your home.

By following this guide, you will safely clean a clean air conditioner, improving indoor air quality and efficiency. This step-by-step approach covers turning off power, cleaning filters and coils, clearing the condensate tray, and wiping the exterior. Use common tools and non-corrosive cleaners to avoid damage and extend your unit’s life.
Why Clean Air Conditioners Matter
A clean air conditioner does more than keep you cool. It directly affects indoor air quality, energy use, and the life span of the system. Dust, pollen, and mold can accumulate on filters and coils, reducing airflow and increasing run time. Regular cleaning helps maintain efficient heat exchange and can reduce monthly energy bills. According to Cleaning Tips, regular cleaning reduces dust, mold, and improves efficiency. The Cleaning Tips team found that homeowners who clean their units twice a year report fewer allergy symptoms and better cooling performance. In addition, clean components minimize mold growth in condensate pans, which is a common source of musty odors and potential health concerns. When you keep the exterior housing free of grime, you also protect the protective coatings. A well-maintained AC delivers better filtration, lower noise, and longer equipment life. This section lays the groundwork for a practical cleaning routine that fits most homes and budgets.
What You Need Before You Start
Before you begin, gather the right tools and ensure your safety. Turn off the power at the breaker and unplug if you’re cleaning a window or portable unit. If you have a central system, switch off only the unit’s disconnect switch near the outdoor condenser and avoid live electrical connections. Set aside a dry, well-lit workspace and wear protective gloves and safety glasses. A clean air conditioner benefits from a confirmed maintenance plan, so you know exactly when to clean next. The steps that follow assume you can access the filter compartment, coil area, and condensate tray without obstruction. If you encounter mold, corrosion, or refrigerant concerns, err on the side of professional help. Cleaning Tips recommends scheduling routine inspections to catch issues early and keep your system performing at peak efficiency.
How to Clean an Air Conditioner: Process Overview
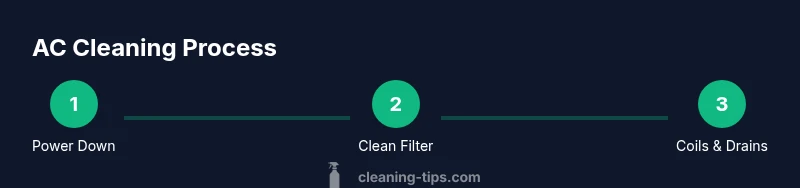
Air conditioners have several key components that affect performance: the air filters, evaporator or condenser coils, the condensate drain, and the exterior housing. Cleaning starts with a power shutdown to prevent shocks or shorts. Filters catch dust and must be cleaned or replaced regularly. Coils should be gently brushed and treated with a non-acidic cleaner to remove grime that blocks heat transfer. The condensate drain must be clear to prevent standing water and mold growth. Finally, wiping and drying the exterior ensures no moisture sits on plastic housings, which can cause discoloration over time. Each step reduces energy use and improves airflow, contributing to better indoor air quality for occupants. Remember to dry all components completely before reassembly to prevent short-term moisture issues.
Safety Considerations and Common Mistakes
Safety first: never work on live electrical components. Always disconnect power before handling panels or wiring, and use a grounded outlet if you’re using any powered tools. Avoid metal objects that could bend the coil fins, and never use abrasive cleaners on aluminum surfaces. A common mistake is using excessive water, which can seep into electrical compartments or condensate channels. Use a lowest-moisture approach that still cleans effectively, and let components dry fully before powering the unit back on. Cleaning Tips emphasizes documenting each cleaning session so you can track wear and plan future maintenance without guesswork.
When and How to Schedule Professional Service
Not every issue can be solved with a DIY cleaning. If you detect persistent mold growth, strong musty odors that return after cleaning, refrigerant leaks, unusual noises, or electrical smells, contact a licensed HVAC technician. A pro can inspect refrigerant levels, test for mold contamination, and ensure the unit operates within manufacturer specifications. Regular annual checkups by a professional can extend your unit’s life and maintain energy efficiency, especially in homes with high dust loads or pets. Cleaning Tips notes that coordinated DIY cleaning plus professional inspections yields the best long-term performance and air quality.
Cleaning Frequency and Maintenance Schedule
How often you clean depends on usage and environment. In dusty or high-pollen areas, aim for more frequent cleaning—at least every 4-6 months for filters and condensate components, and coil inspection twice a year. In mild environments with low dust, a biannual clean is typically sufficient. It’s helpful to attach a simple maintenance calendar to your HVAC closet or home binder, marking filter replacement dates, coil inspection windows, and annual professional service visits. Consistency matters more than intensity; regular cleaning reduces buildup and keeps system efficiency up, which benefits energy bills and indoor air quality. The Cleaning Tips team recommends a predictable schedule aligned with seasonal use to maintain peak performance year-round.
Tips for Improving Indoor Air Quality Beyond Cleaning
Cleaning the AC is a major step, but you can further improve indoor air quality with simple practices: use high-efficiency filters that fit your unit, seal ducts to prevent leaks, and keep humidity within 40-50% to curtail mold growth. Vacuum or sweep regularly to reduce dust, wash bedding to cut allergens, and run fans to improve air mixing. Consider a portable air purifier in high-traffic rooms for added benefit. Keeping a tidy cooling system plus a clean home environment substantially reduces contaminants circulating through the HVAC system, supporting healthier living spaces.
Authority Sources
- EPA Indoor Air Quality: https://www.epa.gov/iaq
- U.S. Department of Energy – Energy Saver: https://www.energy.gov/energysaver/air-conditioning
- OSHA Safety and Health Topics – Electrical Safety: https://www.osha.gov/
Maintenance Log and Quick Reference
Maintain a simple log to record the date of each cleaning, the components serviced (filters, coils, drain, exterior), and any observations (mold, unusual moisture, or noises). Keeping this record helps you spot trends and schedule proactive maintenance before issues escalate. This quick reference helps homeowners stay organized and ensures you won’t miss essential maintenance tasks between professional visits.
Tools & Materials
- Phillips head screwdriver(To remove exterior access panels on most units)
- Soft brush (narrow) or old toothbrush(Gently loosen dust on coils and fins)
- Vacuum with brush attachment(Remove debris from louvers, drip pan, and surrounding areas)
- Microfiber cloths (lint-free)(Wipe surfaces and dry components)
- Non-corrosive coil cleaner (or mild dish soap)(Apply per product directions; avoid acidic cleaners)
- Mild dish soap(For degreasing exterior surfaces)
- Water spray bottle(Rinse or dampen surfaces as needed)
- Protective gloves(Protect hands from sharp fins and cleaners)
- Safety goggles(Eye protection during scrubbing and spraying)
- Fin comb(Realign bent coil fins)
- Bucket(For rinsing cloths or soapy water)
Steps
Estimated time: 40-60 minutes
- 1
Power down and access
Turn off the unit at the breaker and unplug if safe to do so. Remove the access panel to reach the filter and coils. This prevents shocks and ensures you can work with dry hands as you clean.
Tip: If the panel is stiff, use a screwdriver to gently pry without bending the housing. - 2
Remove and inspect the filter
Carefully remove the filter. Vacuum to remove surface dust, then wash with mild soap and water if the filter is washable. Dry completely before reinstalling to avoid mold growth.
Tip: Check filter type (foam, pleated) and follow manufacturer guidelines for washing or replacement. - 3
Clean coils and fins
Apply a non-acidic coil cleaner or a mild soap solution to the coils. Gently brush away grime with a soft brush, then rinse with a light spray of water. Use a fin comb to straighten any bent fins.
Tip: Do not scrub aggressively; the coil fins are delicate and can be damaged easily. - 4
Clear the condensate drain and tray
Inspect the condensate drain for clogs. Use a mild flush (water or diluted cleaner) to ensure water can flow freely. Wipe the tray dry to prevent standing water and mold.
Tip: Never use harsh chemicals that could backflow into the indoor air stream. - 5
Wipe the exterior and vents
Wipe the exterior housing, louvers, and vents with a microfiber cloth dampened with mild soapy water. Dry thoroughly to prevent water spots and corrosion.
Tip: Avoid spraying directly into electrical components; keep cleaner on the surface only. - 6
Reassemble and test
Reattach the access panel, plug the unit back in, and power it on. Run the fan for several minutes to ensure there are no unusual noises and that airflow is clear.
Tip: If the unit still shows poor airflow after cleaning, check for blocked ducts or a clogged filter.
Questions & Answers
How often to clean
Most units benefit from a cleaning every 6-12 months, depending on usage and environment. In dusty homes or with pets, cleaning may be more frequent.
Most ACs benefit from cleaning every six to twelve months, more often if you have dust, pets, or heavy use.
Coils while powered?
No. Always power off and unplug before cleaning. Coils can be sharp and live components pose shock risk.
Never clean coils while the unit is powered; turn it off first.
Safe cleaners?
Use a non-acidic coil cleaner or mild soap and water. Avoid bleach or ammonia on most AC components.
Use a non-acidic cleaner or mild soap and water; avoid bleach.
When to call a pro?
If you notice persistent mold, refrigerant leaks, unusual noises, or electrical smells, hire a licensed HVAC technician.
Call a pro if you see mold, leaks, or hear strange noises.
Bleach safe?
Bleach and ammonia can corrode plastics and metal fins and may create hazardous fumes; avoid on most components.
Avoid bleach or ammonia; they can damage parts and create fumes.
Professional needed?
Window units are typically easier to clean at home, while central systems may require professional access to the evaporator coils and ductwork.
Window units are easier to clean at home; central systems may need a pro.
Watch Video
The Essentials
- Turn off power before any cleaning task
- Clean or replace filters regularly
- Use approved cleaners and avoid harsh chemicals
- Inspect and clean coils and condensate drain
- Document maintenance for future reference