How to Clean HVAC Condenser Coils: A Practical Guide
Learn to safely clean hvac condenser coils to boost efficiency, extend equipment life, and improve airflow. Step-by-step guidance, tools, and maintenance tips from Cleaning Tips.

This guide teaches homeowners how to clean hvac condenser coils safely and effectively, improving airflow, efficiency and reducing energy usage. You'll learn essential safety steps, the right tools, and a step-by-step method. This article, from Cleaning Tips, also covers common mistakes and when to call a professional.
Understanding condenser coils and why they collect debris
Condenser coils sit in the outdoor unit of your AC or heat pump. Their job is to reject heat from inside your home to the outdoor air. When dust, pollen, leaves, and grime accumulate on the fins and in the crevices, airflow is restricted and heat exchange slows. This means the system runs longer to reach the same cooling, increasing energy use and shortening component life. Cleaning hvac condenser coils isn’t just about looks—it restores proper heat transfer and helps your system perform as intended. According to Cleaning Tips, regular, gentle maintenance is accessible to most homeowners and renters and fits into a practical seasonal routine. In this guide, you’ll learn safe methods that work for most residential outdoor coils, plus tips for tricky access areas and varying weather conditions.
Why cleaning condenser coils matters for energy and comfort
When coils are dirty, the air conditioner cannot release heat efficiently. The result is higher compressor workloads, more energy use, and potential hotspots that degrade comfort. Clean condenser coils improve airflow, enable better heat transfer, and reduce cycles that waste electricity. Beyond energy savings, a clean coil set minimizes strain on the compressor, potentially extending equipment life and reducing repair costs over time. The Cleaning Tips team emphasizes that the payoff is strongest in hot climates or when units are located near trees or dusty environments. While the exact savings depend on unit design and home layout, keeping coils clean supports consistent cooling, quieter operation, and more reliable performance across seasons.
Safety first: power, PPE, and safe access
Always start any coil cleaning by turning off power at the main breaker and at the outdoor disconnect if present. This prevents energizing the fan or condenser fins during cleaning. Wear safety glasses and non-slip nitrile gloves to protect eyes from spray and debris. Keep pets and children away from the unit during cleaning and never spray water into electrical components or control panels. If your coil is encased by a tight grate or is mounted on high or awkward terrain, seek professional help or use a proper ladder and stable footing. Cleaning hvac condenser coils with the right precautions reduces the risk of shock, burns, and damage to the coil fins.
Environmental considerations and choosing cleaners
You can use water and a soft brush for a light cleaning or opt for a non-caustic coil cleaner if heavy grime persists. Always follow the product directions and never mix cleaners with bleach. Use a spray bottle or low-pressure nozzle to apply cleaner from the outside edges inward, allowing a short dwell time before rinsing. Reserve harsher chemicals for metal-only parts or non-alkaline coil types, and never apply cleaner directly to exposed electrical components. If you prefer a DIY approach, a simple mixture of water and a small amount of gentle detergent can work for light soiling. Cleaning Tips recommends avoiding abrasive pads that can bend fins, and to test cleaner on a small area first to prevent discoloration.
Common mistakes and how to avoid them
Rushing through the job or using high-pressure water can bend aluminum fins and damage coil integrity. Using household brushes with stiff bristles can also gouge the surface; opt for a soft brush or coil brush instead. Ignoring outdoor wiring or drain lines can create electrical or water damage. Not letting the coil dry before restoring power may cause short-term electrical issues or corrosion at the contact points. Finally, neglecting seasonal maintenance means you’ll face similar grime buildup next year, negating any efficiency gains.
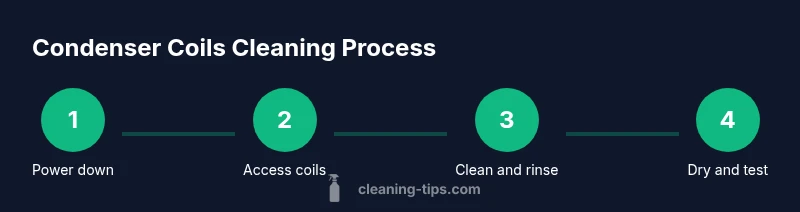
Step-by-step overview (quick reference for DIY)
This section provides a concise overview to complement the formal STEP-BY-STEP instructions elsewhere in the article. Start by shutting off power, then carefully remove the outer cover to access the coils. Gently remove loose debris with a brush, apply a coil cleaner if needed, and rinse with a low-pressure spray from the outside in. Allow coils to dry fully before reassembling and powering back on the system. Always verify proper airflow and listen for unusual noises after startup.
Long-term maintenance plan for clean condenser coils
Create a simple seasonal checklist that includes visual inspections, debris removal around the outdoor unit, and a reminder to check the drain pan and lines for blockages. Position plants and debris away from the unit to minimize debris buildup. Record dates of maintenance and any notes about coil condition or performance, so you can monitor trends over time. Regular maintenance reduces energy use, minimizes risks of coil damage, and improves indoor comfort year-round. If you notice persistent grime, reduced airflow, or overheating, consider scheduling a professional evaluation to ensure optimal performance and avoid warranty issues. The Cleaning Tips team also recommends documenting maintenance history to track improvements over time.
Tools & Materials
- Safety gloves (nitrile)(Non-slip; chemical resistant)
- Safety glasses(Eye protection against splashes)
- Garden hose with spray nozzle(Low-pressure setting to avoid damage)
- Soft brush or coil brush(Gentle bristles; avoid metal)
- Fin comb(Useful for bent fins after cleaning)
- Non-caustic condenser coil cleaner (optional)(Follow product instructions)
- Screwdriver or access panel tool(For removing panel if needed)
- Microfiber cloth or towel(Drying and wipe-down)
Steps
Estimated time: 45-60 minutes
- 1
Power down and access the coils
Turn off the outdoor unit at the breaker and disconnect the power to the thermostat/compressor if applicable. Remove the outer cover or access panel following the manufacturer’s instructions. This step prevents accidental shock and gives you clear access to the coils.
Tip: Double-check that the unit is completely de-energized before touching any components. - 2
Inspect coils for damage and debris
Take a close look at the fins for bends or broken areas and note areas with heavy grime. Check nearby wiring and drain lines for blockages or signs of moisture, which can indicate leaks or improper drainage.
Tip: Use a flashlight to spot debris lodged between fins before you start brushing. - 3
Gently remove loose debris
Use a soft brush to lift and remove loose dust, hair, and leaves from the coil surface. Work from the outer edges toward the center to avoid pushing debris further inside.
Tip: Avoid scrubbing with aggressive brushes that can bend fins. - 4
Apply cleaner and dwell (if using)
If you’re using a coil cleaner, apply it according to the product directions, targeting the fin surface and debris-prone zones. Allow the cleaner to dwell for the recommended time, typically a few minutes, to loosen grime.
Tip: Never mix cleaners with bleach or ammonia. - 5
Rinse with low-pressure water
Rinse from the outside edges toward the center using a low-pressure spray. Avoid high-pressure streams that can bend fins and push debris deeper into the coil. Let water drain away from electrical components.
Tip: Keep water away from the fan motor and electrical connections. - 6
Dry, reassemble, and test
Wipe down surface moisture with a microfiber cloth and reattach the panel. Restore power and run the unit to listen for unusual noises and verify proper airflow. Check that condensate drains freely.
Tip: If you reused a panel gasket, ensure it seats properly to prevent moisture ingress.
Questions & Answers
How often should condenser coils be cleaned?
Clean coils as part of seasonal maintenance, especially in dusty or leafy areas. If you notice reduced airflow or longer cooling cycles, clean sooner.
Clean coils as part of seasonal maintenance, especially if you’re in a dusty area. If airflow slows, do it sooner.
Can I clean coils with water only?
Yes for light grime using a gentle brush and low-pressure spray. For heavy buildup, a coil cleaner that’s safe for your unit’s materials may be needed.
Yes, water and a soft brush work for light grime; for heavy grime, consider a safe coil cleaner.
Is it safe to spray water directly into the outdoor unit?
Avoid directing water toward electrical components or the fan motor. Use a low-pressure spray and work from the outer edges inward.
Don’t spray into electrical parts. Use a gentle, angled spray from the outside edges.
What cleaning products are safe to use?
Use non-caustic, non-acidic cleaners and always follow the product directions. Never mix cleaners with bleach or ammonia.
Choose non-caustic cleaners and follow the directions; never mix with bleach.
What are signs the coils need replacement?
Persistent grime, reduced cooling performance, unusual noises, or frequent compressor cycling may indicate the coil is compromised or the unit needs professional attention.
If grime won’t come off, cooling drops, or you hear odd noises, call a pro.
When should I hire a professional?
If access is difficult, the coils are severely damaged, or you’re unsure about the electrical connections, it’s safer to hire a trained HVAC technician.
If access is tough or you’re unsure about electrical parts, hire a professional.
Watch Video
The Essentials
- Prioritize safety and power off before starting
- Use non-abrasive tools to protect fins
- Apply cleaners per instructions and avoid mixing with bleach
- Rinse gently with low pressure and avoid water on electrical parts
- Establish a seasonal maintenance habit to sustain efficiency