How to Clean an Air Filter: Step-by-Step Guide for Clean Air
Learn how to clean a clean air filter with a practical, step-by-step method. Tools, methods for different filter types, safety tips, and a simple maintenance routine to improve airflow and indoor air quality.

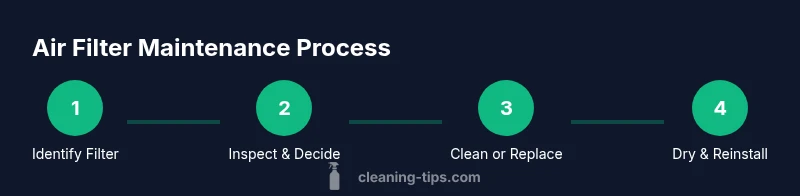
With this guide you will learn how to clean a clean air filter safely and effectively, restoring airflow and improving indoor air quality. You’ll identify your filter type, gather the right tools, and follow a simple step-by-step routine to remove debris, inspect for wear, and reinstall or replace as needed. Basic safety tips include powering off equipment and wearing a mask.
What is a clean air filter and why it matters
A clean air filter is a small but essential component that traps dust, pollen, pet dander, and other particles before air circulates through your home or equipment. A clogged or dirty filter forces your HVAC system, range hood, or appliance to work harder, which reduces efficiency, raises energy use, and can shorten equipment life. The Cleaning Tips team emphasizes that routine filter care is not cosmetic; it's a fundamental step toward healthier indoor air and lower utility bills. When a filter is clean, your air handling runs more smoothly, moisture buildup is limited, and odors are less likely to linger.
Different environments demand different clean air filter standards. A filter designed for an HVAC system may have different MERV ratings than a filter used in a kitchen hood. Understanding your filter’s rating, size, and replacement schedule is the first step in effective maintenance. Cleaning tips and guidelines from Cleaning Tips Analysis, 2026 suggest that a well-maintained filter helps improve airflow, protects seals, and reduces dust circulation in living spaces. Always follow the manufacturer’s instructions, as improper cleaning can damage the filter media or device.
In this guide you’ll learn how to identify your filter type, decide when cleaning is appropriate, and perform a safe, effective cleaning routine that extends filter life and maintains air quality.
Filter types and cleaning implications
Filters fall into broad categories: disposable (one-time use) and reusable. Disposable filters are manufactured for a single use; once clogged, they should be replaced rather than cleaned. Reusable filters are designed to withstand cleaning, sometimes multiple times, but they still require careful handling. The main implication for cleaning is to avoid damaging the filter media or reducing filtration efficiency. For example, many disposable filters cannot tolerate water; washing them can distort the media, void warranties, and require replacement. Reusable filters, on the other hand, may be washable with water and mild soap, but some rely on air or oil-based processes to reclaim performance.
Always check the filter frame and gasket for integrity before cleaning. A cracked frame can bypass filtration and cause dust leakage. If you’re unsure whether your filter is disposable or reusable, consult the manufacturer’s documentation or ask a professional. In the Cleaning Tips analysis, 2026, homeowners report better outcomes when they identify the correct category from the start and avoid attempting to salvage non-washable filters. When purchasing replacements, note the exact size (width x height x depth) and ensure compatibility with your unit. A wrong size creates poor seal and leaks dust into your living space.
How to inspect your filter for wear before cleaning
Before you reach for cleaning tools, inspect the filter for wear and damage. A filter that is torn, warped, or heavily clogged should be replaced, not cleaned. Look for visible signs: tears in the media, bent edges, excessive dust buildup at corners, and discoloration from moisture exposure. Check the frame integrity; warped frames can fail to seal, letting unfiltered air bypass the filter. If you use a reusable metal or plastic frame, ensure there are no cracks or corrosion. For paper-based filters, color changes can indicate moisture damage, which weakens filtration.
Another cue is airflow performance. If you notice reduced airflow or strange odors after a light cleaning, stop and assess. Cleaning Tips’s guidelines advise that a filter that cannot restore adequate airflow after cleaning is likely past its service life. Keep a simple log of when you cleaned or replaced filters to help track performance over seasons. If you maintain a home with multiple air paths (HVAC, range hood, bathroom exhaust), keep separate logs for each path to avoid cross-use of incompatible filters.
Step-by-step cleaning methods by filter type
Follow these steps based on whether your filter is disposable or reusable. For disposable filters, the proper action is typically replacement rather than cleaning; if you must clean, use manufacturer-approved methods only.
- Step 1: Power down and locate the filter compartment. Access should be easy without tools. Why: avoiding accidental contact with hot elements or moving parts.
- Step 2: Remove the filter carefully. For filters with tabs, handle by the edges to prevent damage to the media.
- Step 3: Clean or replace. If reusable, gently brush away loose dust with a soft brush, then rinse under lukewarm water. Avoid aggressive scrubbing that can tear the media. If the filter is easily crumbling or has a built-in coating, stop and replace. For non-washable reusable filters or metal screens, a light rinse followed by air-drying may be sufficient.
- Step 4: Dry completely before reinsertion. Hold the filter in a warm, dry area, but avoid direct heat or sun that can warp materials. Do not reinstall a damp filter as this promotes mold growth.
- Step 5: Reinstall and reseal. Make sure the gasket sits flush and the air path is unobstructed. Turn the unit on and listen for abnormal sounds or air leaks. If you cannot achieve a proper seal, remove and re-check the frame.
Tips: Use a mild detergent for washable filters, but never use bleach or solvents that could degrade media. Do not soak disposable filters.
Estimated time: About 40-60 minutes for thorough inspection and cleaning of multiple units.
Drying, reinstalling, and testing airflow
Drying is the often overlooked step that determines whether your filter will perform well after reinstallation. Reusable filters should be air-dried completely, which may take several hours depending on humidity and airflow in your space. Avoid direct heat sources like a hair dryer or outdoor sun on plastics, as heat can warp or degrade media. Once dry, reinsert the filter and reseal the housing. When the unit resumes operation, listen for obvious changes in the airflow; a healthy system should produce steady, comfortable air without noticeable whistling or rumbling. If you notice reduced airflow after reinstallation, double-check the seal and ensure the filter sits squarely within its frame. Cleaning Tips recommends maintaining a simple checklist for periodic cleaning and replacement that aligns with the filter’s rating and your usage patterns.
Finally, monitor indoor air quality after maintenance. If odors persist or you observe more dust settling on surfaces, you may need to revisit the replacement schedule or consider upgrading to a higher-quality filter with a better MERV rating.
Troubleshooting and maintenance schedule
Establishing a regular maintenance cadence helps prevent performance dips and extends filter life. Start by creating a simple calendar aligned with your seasonal usage. For example, HVAC filters in heating-dominated months may require more frequent checks, while lighter ventilation periods may allow longer intervals between maintenance. If you have pets, residents with allergies, or high dust levels, increase the frequency accordingly. Keep spare filters of the correct size on hand to minimize downtime when replacements are needed. When in doubt, follow the manufacturer’s guidance and Cleaning Tips Analysis, 2026 for practical timelines and best practices. A consistent approach reduces the chance of skipping maintenance and helps you breathe easier year-round.
Safety, disposal, and eco-friendly practices
Always power down the unit and unplug it before inspecting or cleaning filters to prevent accidental starts. Wear a dust mask or respirator if you are handling heavily soiled filters to minimize inhalation of fine particles. Dispose of disposable filters according to local waste guidelines; many municipalities allow a standard household trash disposal, but some regions have specific disposal rules for filters containing hazardous materials. If you can, choose reusable filters and clean them according to the manufacturer’s instructions to minimize waste. For eco-conscious homeowners, combining washable filters with proper drying and reusing safeguards air quality without excessive resource use.
Tools & Materials
- Vacuum cleaner with brush attachment(For loose dust and debris)
- Soft brush or microfiber cloth(Gently dislodge dust without tearing media)
- Mild dish soap or detergent(Only for washable reusable filters)
- Lukewarm water(For rinsing washable filters)
- Gloves(To keep hands clean and protected)
- Replacement disposable filter (on hand)(If your filter is not reusable)
- Drying rack or clean towel(Air-dry reusable filters completely)
- Mask or respirator(If dust levels are high)
Steps
Estimated time: 30-60 minutes
- 1
Power down and locate the filter
Turn off the equipment and unplug if possible. Open the access panel to locate the filter housing so you can assess the correct path for removal.
Tip: This prevents accidental starts and protects you from moving parts. - 2
Remove the filter carefully
Grasp the filter by its edges or tabs and lift straight out to avoid damage. Note how it sits to ensure proper reinstallation.
Tip: Handle filters gently to prevent tearing or bending the frame. - 3
Decide cleaning vs. replacement
Check the filter type. If disposable, replace. If reusable, decide whether washing or air-drying is appropriate based on media and manufacturer guidance.
Tip: Never force a non-washable filter into the housing. - 4
Clean the reusable filter
Gently remove dust with a brush, then rinse with lukewarm water and mild soap if approved. Avoid aggressive scrubbing that can tear media.
Tip: Use mild soap and a gentle rinse for best results. - 5
Dry the filter completely
Place the filter on a drying rack or clean towel in a warm, dry area away from direct heat until fully dry.
Tip: Do not reinsert a damp filter; moisture promotes mold growth. - 6
Reinstall and seal
Return the filter to its housing, ensure the gasket sits flush, and verify there are no gaps for unfiltered air to bypass the filter.
Tip: A loose seal can defeat the filtration system. - 7
Test airflow and monitor
Power the unit back on and listen for smooth operation. Check for odd noises or reduced airflow, which may indicate a misfit or obstruction.
Tip: Keep a simple maintenance log to track cleaning intervals.
Questions & Answers
Can I clean a disposable air filter and reuse it?
Most disposable filters should be replaced, not cleaned. Cleaning can compromise filtration and void warranties. If in doubt, check the manufacturer’s guidance and opt for a replacement.
Most disposable filters should be replaced, not cleaned. Check manufacturer guidance and choose a replacement when in doubt.
How often should I check or replace the air filter?
Frequency depends on usage, environment, and filter type. In dusty homes or with pets, check monthly and replace as needed. Use manufacturer recommendations as a baseline.
Check monthly in dusty homes or with pets, and replace according to the manufacturer’s schedule.
Is it safe to wash a reusable filter with soap?
Yes, if the filter spec allows washing with mild soap and lukewarm water. Rinse thoroughly and ensure complete drying before reuse.
Yes, if the filter is rated for washing with mild soap and warm water; dry completely before reuse.
What should I do with a damaged filter?
If a filter is torn, warped, or heavily discolored, replace it. Damaged media cannot effectively trap particles and can release dust back into the air.
Replace a torn, warped, or heavily discolored filter rather than trying to clean it.
Can cleaning filters improve indoor air quality immediately?
Cleaning or replacing filters as part of a planned maintenance routine can improve airflow and air quality over time, but it’s not a quick fix for existing indoor air problems.
Maintenance improves airflow and air quality gradually, not instantly.
Are there safety risks with cleaning filters?
Always power down equipment, wear a mask if dust is heavy, and avoid disturbing dusty conditions to prevent airborne particles.
Power down, wear a mask if dust is heavy, and be careful to avoid stirring up dust.
Watch Video
The Essentials
- Inspect twice, replace when damaged
- Follow manufacturer guidance for washability
- Allow full drying before reinstall
- Maintain a regular replacement schedule