How to Clean a Flame Sensor Furnace
A practical, safety-focused guide to cleaning a flame sensor on your furnace, with tools, steps, and maintenance tips from Cleaning Tips.

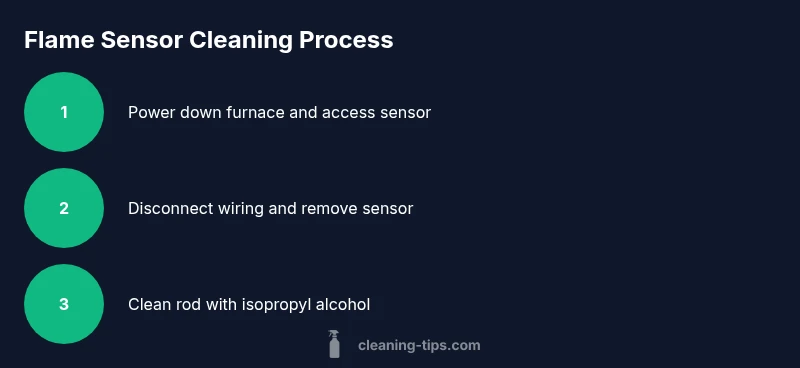
This guide shows you how to safely clean a flame sensor on a furnace. You’ll verify power is off, disconnect electrical supply, and shut gas if needed; remove the sensor, gently clean the rod with isopropyl alcohol, reinsert it, and run a test cycle. If you smell gas, stop and call emergency services. According to Cleaning Tips, avoid touching the sensor with bare hands or oils.
Why the flame sensor matters
A flame sensor is a critical safety component in most gas furnaces. It helps confirm that a healthy flame is present before gas continues to flow, preventing gas buildup and the risk of a dangerous outage. When the sensor is dirty or faulty, the furnace may shut down unexpectedly or fail to ignite, leaving you in the cold. Regular maintenance of the flame sensor, including cleaning when needed, reduces nuisance lockouts and extends blower life. For homeowners and renters, a clean flame sensor furnace means reliable heat and lower energy waste. According to Cleaning Tips, small deposits from dust and cooking byproducts can obscure the sensor’s view, leading to false shutdowns. Keeping the sensor clean is a simple, safe step that pays off with smoother operation and better overall efficiency. This section explains why the flame sensor matters, what it looks like when it’s dirty, and how proper cleaning fits into a proactive maintenance routine.
How a flame sensor works
A flame sensor in most modern furnaces is a relatively simple device that confirms the presence of a flame so the gas valve remains open. There are several sensor designs, but the goal is the same: detect heat from the flame and signal the control board that ignition is successful. When the sensor detects flame, the sequence continues and the furnace remains running. If the sensor fails to detect flame within a short window, the system will shut off gas to prevent unburned fuel from accumulating. Understanding this helps homeowners appreciate why a clean flame sensor is essential for safe and efficient operation. Remember, never bypass or defeat the sensor to restart a furnace; consult the manual or a professional if issues persist.
Common signs of a dirty or faulty flame sensor
A dirty flame sensor can lead to frequent ignition failures, gas shutoffs, or inconsistent heat. You might notice a delayed ignition, a flickering or yellow-tinted flame, or the furnace cycling on and off abnormally. Some models display error codes indicating a sensor fault. Dust, oil residues, or mineral deposits can impair detection, causing false negatives. Cleaning the sensor often resolves these symptoms, but if problems persist, it may indicate wiring issues or a failing control board. Cleaning Tips analysis shows that many nuisance shutdowns originate from sensor contamination, reinforcing the value of regular inspection and cleaning as part of home maintenance.
Tools, safety, and prep
Before touching any furnace components, assemble the right tools and review safety steps. You’ll typically need a screwdriver, isopropyl alcohol, lint-free cloth, a soft brush, nitrile gloves, safety glasses, and a flashlight. Ensure the area is well-ventilated and dry. If you’re unsure about gas shutoff procedures or you smell gas, stop and call your gas provider or emergency services. Keeping a clean work area helps prevent dropped screws or debris from entering the burner. This prep phase sets the tone for a careful, respectful approach to working on home heating equipment.
Step-by-step overview
This section provides a high-level view of the steps you will follow to clean the flame sensor, without duplicating the detailed steps below. You’ll start by powering down the furnace and gaining panel access, then remove and clean the sensor, and finally reassemble and test. For the exact instructions, see the dedicated STEP-BY-STEP section. The goal is to perform a thorough cleaning while preserving sensor alignment and electrical connections. A clean flame sensor furnace will generally restart smoothly and maintain consistent heat delivery.
Post-cleaning checks and maintenance
After cleaning, recheck all connections and reseat the sensor securely in its mounting. Restore power and run a brief test cycle to confirm the flame is detected correctly and the furnace continues to operate without abnormal cycling. Keep a simple maintenance routine: inspect the sensor at the start of the heating season, wipe away dust, and look for signs of wear or corrosion. Regular, light maintenance reduces the likelihood of unexpected outages and keeps your furnace efficient. The Cleaning Tips team recommends recording your maintenance date and noting any recurring symptoms to spot trends early.
Tools & Materials
- Screwdriver set(Phillips #2 for most access panels)
- Isopropyl alcohol (at least 70%)(Rubbing alcohol works; avoid stronger solvents)
- Lint-free cloth or microfiber cloth(Soft and non-linty)
- Soft-bristle brush(For gentle brushing of deposits)
- Nitrile gloves(Protection for hands)
- Safety glasses(Eye protection)
- Flashlight(Inspect sensor area clearly)
- Voltage tester or multimeter(Optional for verifying power isolation)
- Owner’s manual(Model-specific guidance)
Steps
Estimated time: 25-40 minutes
- 1
Power down and secure the furnace
Begin by turning off the furnace at the thermostat and the service panel. If you have a gas furnace, close the gas supply valve as an extra safety step. Use a lockout/tagout if available and wear protective gear. This prevents accidental ignition or electrical shocks during inspection.
Tip: Double-check that the furnace is not warm and that the area is dry. - 2
Open access panel and locate flame sensor
Remove the access panel to expose the burner area and the flame sensor, which is a small metal rod protruding from the burner housing. Use a flashlight to locate it if visibility is poor. Photograph the sensor’s orientation before removing anything so you can reassemble correctly.
Tip: Keep track of screws and note where each goes. - 3
Disconnect sensor wiring
Gently disconnect the sensor’s electrical connector from the control board or wiring harness. Do not pull on the wires themselves; use the connector. If you’re unsure, use a multimeter to confirm the circuit is open.
Tip: Work slowly to avoid bending the sensor or damaging connectors. - 4
Remove the sensor from its mounting
Loosen the mounting screws and carefully lift the flame sensor out of its bracket. Handle the sensor by the body, not the sensor tip. If the sensor sits in a bracket with a spring clip, release the clip gently.
Tip: Do not force the sensor; if it resists, recheck mounting screws. - 5
Clean the flame sensor rod
Moisten a lint-free cloth with isopropyl alcohol and wipe the sensor rod gently. Use a soft brush to remove stubborn soot or mineral buildup from the sensor face. Avoid soaking the sensor and never use abrasive cleaners.
Tip: Keep all cleaning to the sensor face only; avoid other components. - 6
Reinstall sensor and reconnect wiring
Place the sensor back in its bracket, ensuring it sits flush and straight. Reconnect the wiring harness securely and verify all connections are clean and snug. Reinsert the access panel and secure it.
Tip: Before closing up, do a quick visual check for any loose parts. - 7
Test the furnace and verify flame pickup
Restore power and run a test cycle. Observe whether the flame sensor detects flame and allows ignition without hesitation. If the flame appears unstable or the furnace locks out again, stop and call a qualified technician.
Tip: If you see abnormal flame color, shut down and inspect venting and fuel supply.
Questions & Answers
What is a flame sensor?
A flame sensor detects the presence of a flame to confirm ignition. If no flame is detected, the furnace will shut off fuel flow to prevent gas buildup. It’s a safety component that should be kept clean and properly aligned.
A flame sensor confirms ignition and helps prevent dangerous gas buildup by shutting off fuel if no flame is detected.
DIY or hire a professional for sensor cleaning?
Cleaning a flame sensor can be a straightforward DIY task for many homeowners, provided you follow safety steps and disconnect power. If you encounter gas smells, hard-to-reach wiring, or unusual sensor readings, contact a licensed technician.
You can do it yourself if you follow safety steps, but call a pro for gas smells or persistent issues.
What safety precautions should I take before cleaning?
Turn off power at the thermostat and service panel, and close the gas valve if applicable. Wear gloves and eye protection, and work on a dry surface. If unsure at any point, stop and seek professional help.
Always power down and wear protection; stop if you’re unsure.
What causes a flame sensor to fail?
Dust, oil residues, mineral deposits, or misalignment can cause a sensor to fail to detect flame. Wiring wear or a faulty control board can also trigger sensor faults. Regular cleaning and inspection help prevent these issues.
Dust or misalignment often causes sensor faults; cleaning and checking helps.
How often should I inspect or clean the flame sensor?
Inspect and clean the flame sensor at the start of each heating season or whenever you notice ignition issues. If your furnace runs in dusty or cooking-heavy environments, more frequent checks may help.
Check at the start of each heating season, or if ignition issues appear.
Watch Video
The Essentials
- Power down safely before handling furnace components
- Gently clean the sensor with isopropyl alcohol
- Reconnect wiring firmly and reseat the sensor correctly
- Run a test cycle to confirm proper flame detection
- Establish a routine inspection to prevent future issues