How to Clean Vents: A Practical Step-by-Step Guide
Step-by-step guide to clean vents safely, including HVAC registers, bathroom fans, and dryer vents. Learn prep, tools, and best practices for healthier airflow and reduced dust.

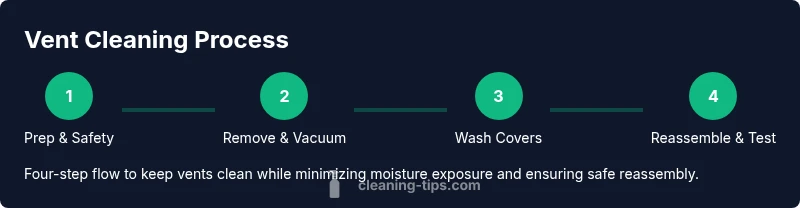
This guide shows you how to clean vents safely and effectively, covering HVAC registers, bathroom exhausts, and dryer vents. You’ll learn how to remove covers, vacuum dust, wash the covers, and inspect for blockages, then reassemble and test airflow. Following these steps helps improve air quality and reduce household dust.
Why clean vents matter
Dust, allergens, and moisture can accumulate in vents and ducts over time, circulating through the home each time you turn on a fan or the HVAC. Cleaning vents helps reduce that dust, improves airflow, and supports healthier indoor air quality. According to Cleaning Tips, regular vent cleaning correlates with reduced visible dust and a clearer sense of a cleaner home. The Cleaning Tips team found that addressing dust buildup around vents can also help heating and cooling systems run more efficiently, potentially lowering energy use. In this section we explore the essential reasons to clean vents: improving air quality, preventing pest intrusion, and extending vent component life. We’ll cover HVAC registers, bathroom exhaust vents, and clothes dryer ducts so you know what to clean and what not to attempt with DIY tools. Throughout, you’ll see the phrase clean vents used as shorthand for the broader maintenance routine that helps create a healthier living environment.
Types of vents and cleaning goals
Vents come in several common forms, each with its own cleaning approach. HVAC registers (the grilles on walls, ceilings, or floors) primarily require surface dust removal and occasional deep cleaning of accessible ducts. Bathroom exhaust vents are smaller and often share a shallow housing; they benefit from regular wipe-downs to reduce moisture and odors. Clothes dryer vents and their external ducts are larger and more limited by lint buildup and potential blockages that can affect performance. For all vent types, the goal is to reduce dust and moisture buildup, maintain good airflow, and prevent mold growth or pest ingress. When you clean vents, you’re not just cleaning a cover—you’re reducing the path dust takes as it travels through your home. A consistent approach ensures you remove dust at the source and don’t simply push it deeper into the system.
Safety and prep before you start
Vent cleaning can stir up dust and expose you to surfaces that harbor allergens. Always start with safety in mind. Turn off or set to a low speed any connected systems to minimize dust circulation. Wear a dust mask and gloves, and keep pets and kids away from the workspace. Use a sturdy ladder or step stool if you need height access, and ensure you have stable footing. If any vent covers are secured with screws, have the appropriate screwdriver ready. Also, determine whether you’ll need to clean only the covers or also the accessible parts of the duct system. For stubborn debris, plan for extra time and a more thorough approach. Remember, moisture can cause mold growth; never saturate interior ducts or insulated cavities. This preparation makes the actual cleaning safer and more effective.
Cleaning HVAC registers and easy-to-reach ducts (in-depth)
HVAC registers are the most visible vents and a good starting point. Remove the grill carefully, then use a vacuum with a brush attachment to lift loose dust from the airstream and the surrounding housing. Wipe the interior with a microfiber cloth; for recessed areas, a small brush or a damp cloth can help. If you have accessible duct sections, a light pass with a vacuum can reduce embedded dust, but avoid pushing moisture into the ducts. Clean the grill in warm, soapy water, rinse, and dry thoroughly before reattaching. Reinstall the grill and run a short test cycle to check for even airflow. Throughout, keep the room well-ventilated to minimize airborne dust. This careful approach improves system efficiency and reduces irritants in the air you breathe.
Cleaning bathroom exhaust vents and dryer vents
Bathroom exhaust vents are important for moisture control. Remove the cover and clean with warm soap and water, then dry completely before reattachment. Cleaning these vents regularly can prevent musty odors and reduce potential mold growth. For dryer vents, disconnect and inspect the exterior vent cap, remove lint with a vacuum or lint brush, and ensure the external vent is unobstructed. Dryer vents require careful attention to avoid fire hazards; never use water in the dryer duct, and always ensure the system is completely dry before use. If you detect persistent lint buildup, consider a professional cleaning service to handle deeper ductwork safely.
Maintenance habits to prevent buildup
Prevention is easier than remediation. Establish a simple maintenance rhythm: wipe vent covers monthly, vacuum accessible ducts quarterly, and schedule professional duct cleaning every 1–2 years depending on usage and environment. Use high-quality filters and replace them according to the manufacturer’s recommendations to reduce debris entering the ducts. Keep humidity levels in check to deter mold, and address moisture sources promptly. Regular inspections help you catch issues early, such as bent louvers or loose covers, which can impact airflow and safety. By keeping vents clean, you’ll maintain better air quality and more consistent heating and cooling performance.
Troubleshooting signs that you might need help
If you notice persistent musty odors, visible mold on vent components, unusual odd noises when the system runs, or a sudden drop in airflow that you cannot fix with a thorough cleaning, it’s time to call a professional. Some issues involve hidden mold growth behind walls or within ducts, or dangerous blockages that require specialized equipment. Don’t ignore warning signs that air quality is declining. Regular checks and timely professional assessments help ensure safe operation and protect your home from longer-term damage.
Tools & Materials
- vacuum with hose attachment(Choose a vacuum with a long hose and a fine nozzle to reach vents.)
- microfiber cloths(Use dry cloths for dust and damp cloths for residues.)
- bucket or basin(For soaking vent covers if needed.)
- mild dish soap or gentle cleaner(For washing vent covers.)
- soft brush or old toothbrush(Loosen stubborn dust in crevices.)
- screwdrivers (flathead and Phillips)(Remove vent covers that are screwed in.)
- gloves(Protect hands from dust and sharp edges.)
- mask or respirator(Reduce inhalation of dust and spores.)
- ladder or step stool(Needed for high or hard-to-reach vents.)
- vinegar or mild cleaning solution (optional)(For extra deodorizing power on covers.)
- replacement vent covers (optional)(Have on hand if covers are damaged.)
Steps
Estimated time: 60-90 minutes
- 1
Power down and prepare
Turn off the HVAC system or unplug the affected appliances to prevent dust circulation. Put on your mask and gloves, and set up your work area with towels to catch dust. This ensures safety and minimizes spread of dust during cleaning.
Tip: Visually inspect for moisture or mold before you begin; address any obvious issues first. - 2
Remove vent covers
Using the appropriate screwdriver, remove vent covers. If covers are stuck, gently pry with a flat tool, taking care not to bend the frame. Place screws in a labeled container to avoid misplacement.
Tip: Label each screw and its corresponding vent for easier reinstallation. - 3
Vacuum the vent opening
Attach the vacuum hose and run it along the vent interior and surrounding housing to pull out loose dust. Move slowly to avoid scattering dust into the room. If needed, use a microfiber cloth to wipe stubborn dust from the interior.
Tip: A narrow nozzle helps reach tight corners without displacing debris elsewhere. - 4
Wash vent covers
Fill a basin with warm water and a small amount of mild soap. Soak the covers, scrub gently with a soft brush, rinse, and dry completely before reattaching. For heavy grime, a second wash may be necessary.
Tip: Dry covers completely to prevent rust and mold growth after reinstallation. - 5
Wipe interior surfaces
Wipe accessible interior surfaces around the vent with a damp microfiber cloth to pick up residual dust. Avoid soaking or introducing moisture into ducts; moisture can encourage mold growth if introduced into non-vented spaces.
Tip: Do not spray cleaners directly into ducts; spray onto cloth instead. - 6
Dry and inspect
Allow all components to dry fully before reassembly. Inspect louvers and frames for damage and correct alignment to ensure even airflow after reattachment.
Tip: Look for bent blades or loose screws that could impact airflow. - 7
Reassemble and test airflow
Reattach vent covers, secure screws, and turn the system back on. Check for even airflow and listen for unusual noises. If airflow remains restricted, revisit the steps or consider a professional assessment.
Tip: Run a short cycle and observe from multiple rooms to confirm consistency.
Questions & Answers
Do I need to hire a professional to clean vents?
Basic vent cleaning is doable for accessible registers and covers. Deeper duct cleaning or inside ductwork should usually be performed by trained professionals with specialized equipment.
You can clean accessible vent covers yourself, but for inside ducts consider a pro.
How often should vents be cleaned?
Frequency depends on usage, household conditions, and whether you smoke or have pets. Many homes benefit from cleaning registers every 6-12 months and dryer vents annually.
Clean registers every 6 to 12 months and check dryer vents yearly.
Is it safe to use water on vent covers?
Yes for metal or plastic covers after removal, but ensure they are completely dry before reattachment. Do not let moisture enter the ductwork.
Water is okay on the covers as long as they dry completely before reinstalling.
What are signs vents need cleaning?
Dust buildup on covers, musty odors, reduced airflow, or visible lint around vents indicate cleaning is needed.
If you see dust on covers, or airflow drops, it’s time to check the vents.
What’s the difference between vent cleaning and duct cleaning?
Vent cleaning focuses on accessible registers and covers. Duct cleaning targets the interior of the ductwork, typically requiring professional equipment.
Vent cleaning is for the covers; duct cleaning goes deeper into the ducts and is usually done by pros.
Are there safety concerns with cleaning dryer vents?
Yes. Blocked dryer vents are a fire hazard. Clean the exterior vent, remove lint, and ensure a clear path. If unsure, hire a professional.
Dryer vents need careful cleaning to prevent fires; if you’re unsure, call a pro.
Watch Video
The Essentials
- Power down systems and wear protection before starting.
- Remove, clean, dry, and reinstall vent covers for safe operation.
- Vacuum and wipe accessible vent interiors to reduce dust.
- Dry thoroughly to prevent mold and corrosion.
- Schedule regular maintenance to keep air quality high.