Vent Clean: How to Safely Clean Your Vents for Better Air Quality
Learn how to safely perform a vent clean, improve airflow, reduce fire risk, and extend HVAC life with our comprehensive, step-by-step guide for dryer vents, bathroom and HVAC ducts.

Vent clean is a practical home maintenance task that removes lint, dust, and debris from vents and ducts to improve airflow, indoor air quality, and safety. This guide provides a clear, step-by-step approach for dryer vents and HVAC ducts, including safety checks, tool needs, and testing airflow.
What is vent cleaning and why it matters
Vent cleaning, or vent clean, refers to the process of removing dust, lint, and debris from vent covers, accessible ducts, and the pathways that connect to HVAC systems, clothes dryers, and bathroom exhausts. Over time, lint buildup in dryer vents can restrict airflow, increase drying times, and raise fire risk. Similarly, dirt and mold can accumulate in HVAC ducts, reducing efficiency and compromising indoor air quality. A regular vent clean helps maintain optimal airflow, improve energy efficiency, and create a safer home environment. As a general guideline, dryer vents are inspected and cleaned more frequently than main HVAC ducts, with frequency tailored to usage, pet dander, and local climate. The Cleaning Tips team notes that proactive vent maintenance aligns with broader indoor air quality practices and safety standards.
In practice, vent clean means removing lint and debris from vent covers, ducts, and accessible runs, then reassembling with proper seals. It also involves checking for obstructions at exterior intake points, ensuring exterior vents are clear, and validating that airflow returns to normal after cleaning. The goal is to restore efficient airflow while preventing buildup that could lead to moisture issues or fire hazards. Always prioritize safety, and when in doubt about insulation or structural concerns, consult a professional.
Types of vents you'll clean
Vents come in several forms, each with its own cleaning considerations. Dryer vents channel warm, moist air from the dryer to the outside; lint buildup is common and can pose a fire risk if allowed to accumulate. HVAC ducts distribute conditioned air through the home and may require thorough brushing and vacuuming to remove settled dust, debris, and potential mold spores. Bathroom exhaust vents, typically mounted in ceilings or walls, remove humidity and odors but can collect dust and grease over time. When planning a vent clean, distinguish between these types: dryer vent, HVAC duct, and bathroom exhaust vent. Each type benefits from different tools and techniques, but the overarching goal remains the same—improve airflow, reduce contaminants, and keep your system running efficiently. The Cleaning Tips approach emphasizes tailoring methods to the vent type and ensuring exterior intake points are unobstructed for safe operation.
Safety first: risks and precautions
Vent cleaning involves exposure to dust, lint particles, and potentially mold or worn insulation. Always start by turning off power to any fans or dryers and wearing protective gloves, a mask, and eye protection. Work in a well-ventilated area and avoid using water or harsh cleaners inside electrical components or tight ducts. For high ceilings or awkward access points, use a stable ladder or step stool and never lean over an open vent. If you encounter signs of mold, pest activity, or damaged ductwork, pause the task and consult a licensed professional. By treating vent clean as a safety-conscious task, you reduce the risk of injury and ensure a more effective, thorough cleaning.
When to clean: signs your vent needs attention
Recognizing when to clean vents helps prevent airflow problems and potential hazards. Signs include longer drying times for clothes, a burning odor or visible lint around the exterior vent, unusually warm or hot dryer surfaces, musty indoor air, or reduced airflow from ceiling or wall vents. In HVAC systems, notice decreased comfort, cold spots, or higher energy bills. If you see mold, realize moisture in the ducts, or hear unusual noises, stop and seek professional help. Regular inspections after busy seasons (like winter heating or summer cooling) are a smart practice to catch buildup early and keep your home comfortable and safe.
Prepare: plan and schedule a vent clean
Before starting, map out the vent routes you will inspect: exterior dryer vents, interior access points, and main duct runs. Gather the recommended tools and protective gear, then clear the area around vents to create a safe work space. If you have pets or small children, arrange for temporary containment to minimize exposure to dust. Create a simple checklist to document each vent, its condition, and any signs of damage or heavy buildup. Scheduling a vent clean during milder weather can reduce the impact on daily life, as some tasks involve extended access to crawl spaces or attic areas. The goal is a smooth workflow with minimal disruption and maximum safety.
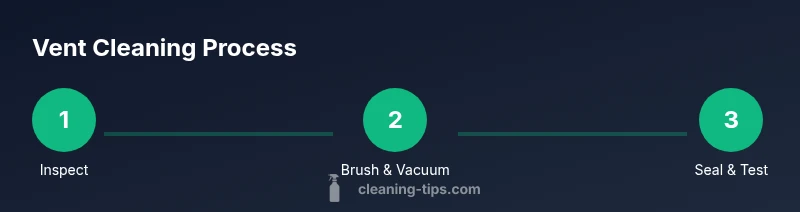
Step-by-step overview: a concise path to a clean vent system
A vent clean comprises accessing each vent run, removing covers, vacuuming out lint, brushing the interior walls, resealing joints, and testing airflow. Start from the exterior intake or access point and work inward toward the main duct or appliance. For dryer vents, pay particular attention to lint traps and elbows; for HVAC ducts, use long-handled brushes designed for rigid or semi-rigid ducts. Finally, reattach all covers securely, run the system briefly, and verify air movement. This overview sets the stage for the detailed, step-by-step instructions that follow in the dedicated section.
Cleaning techniques: dryer vent vs HVAC duct
Dryer vent cleaning focuses on lint removal along the duct path and elbow joints. A dryer vent brush or flexible rod is driven through the pipe, followed by a vacuum to collect loosened lint. HVAC duct cleaning involves a combination of brushing and vacuuming to remove settled dust and debris without damaging delicate insulation. Access points are sealed after cleaning to prevent air leaks. For bathrooms, cleaning the exhaust vent requires removing the cover and clearing any accumulated dust near the fan blades. Remember to check exterior louvers and ensure they open freely to allow proper venting.
Post-cleaning checks: airflow, seals, and safety
After cleaning, reassemble vent covers and seal joints with metal foil tape or appropriate duct sealant. Power on the system and observe airflow at each vent; if airflow remains weak, investigate potential kinks, collapsed ducts, or hidden blockages. Inspect exterior vents for obstructions like leaves or bird nests. If a strong odor or dampness appears near the duct, further inspection may be required. Finally, document the work, noting which vents were cleaned, what tools were used, and any recommendations for future maintenance. Regular checks help you stay ahead of buildup and keep air fresh and safe.
Maintenance plan to keep vents clean
Establish a simple maintenance cadence to keep vents clean over time. Schedule dryer vent inspections at least once per year, and HVAC ducts every few years depending on usage, environment, and household factors such as pets or smoke. Seasonal reminders work well: check exterior vents before winter to prevent moisture intrusion, and inspect attic or crawlspace ducts after peak usage periods. Keeping a log of findings, cleaning dates, and replacement needs makes it easier to track performance and plan proactive maintenance.
Tools & Materials
- HEPA vacuum with hose attachment(Essential for lint and dust removal without recirculating particles)
- Flexible duct brushes (dryer vent and HVAC)(Choose brushes sized for your duct diameters)
- Long-handled brush or probing tool(Reaches deep runs; avoid damaging insulation)
- Screwdrivers (Phillips and flathead)(Remove vent covers and access panels)
- Putty knife or removal tool(Helpful for stubborn covers)
- Ladder or stable step stool(Safety first for high-access vents)
- Work gloves and dust mask(Protect hands and lungs from dust)
- Safety goggles(Eye protection during brushing and manipulation)
- Foil tape or duct sealant(Seal joints after cleaning)
- Flashlight or headlamp(Improve visibility inside ducts)
Steps
Estimated time: 2-3 hours
- 1
Prepare the area and power down
Clear the space around each vent and remove any objects that could get in the way. Turn off power to the dryer or HVAC system to prevent accidental activation during cleaning. Wear PPE and set up a safe workspace with adequate lighting.
Tip: Double-check that exterior vents are accessible and not blocked by debris. - 2
Access vent covers
Use the appropriate screwdriver to remove vent covers on the exterior and interior access points. Keep screws organized and note where each cover belongs for easy reassembly. Inspect covers for cracks or corrosion.
Tip: Take a quick photo of each cover position before removal to aid reassembly. - 3
Vacuum loose lint from the run
Insert the vacuum nozzle into the vent opening and gently work it along the duct, pulling out loose lint and debris. Work from the exterior toward the interior to prevent pushing debris deeper into the system.
Tip: Use a long, flexible attachment to reach tight bends without damaging the duct. - 4
Brush the interior walls
Feed the duct brush through the run in small sections, scrubbing the interior walls to dislodge stubborn buildup. Rotate the brush as you go to cover more surface area and prevent tangling.
Tip: Avoid excessive force that could damage insulation or bend the duct; take your time on tight corners. - 5
Clean exterior vent caps and louvers
Remove any exterior debris, wash the cap, and ensure louvers open freely. A blocked exterior vent limits airflow even after inner cleaning and can cause moisture issues.
Tip: Check for signs of pest intrusion and seal gaps if you find them. - 6
Seal joints and reassemble
Reattach vent covers and seal joints with foil tape or duct sealant as needed. Ensure all connections are snug to prevent leaks and energy loss.
Tip: Avoid over-tightening screws, which can warp covers or damage fittings. - 7
Test airflow and inspect
Power the system back on and observe airflow at all vents. Look for even distribution and note any persistent weak spots. If airflow is not restored, inspect for blockages or damaged ducts.
Tip: A simple smoke pencil can help visualize flow for testing in a controlled area. - 8
Document and plan next maintenance
Record which vents were cleaned, the methods used, and any parts that required service. Set a reminder for the next vent clean based on usage and season.
Tip: Create a simple maintenance log to simplify future cleanings. - 9
Final safety check
Ensure there are no loose tools, pets or children are away from the workspace, and all access points are closed and secured. Confirm no lingering dust or moisture around the area.
Tip: Keep a small dust mask handy for future crumbs or dust during reassembly.
Questions & Answers
Why should I perform a vent clean?
Vent cleaning removes lint, dust, and debris that can impede airflow, waste energy, and create fire hazards in dryer vents and HVAC ducts. Regular cleaning helps maintain efficiency and indoor air quality.
Vent cleaning removes lint and dust that block airflow and can cause fires, helping your system run safely and efficiently.
How often should vents be cleaned?
As a general guideline, dryer vents should be inspected annually and cleaned as needed, while HVAC ducts can be evaluated every few years depending on usage and environment. Local conditions and household factors influence frequency.
Dryer vents typically need annual checks; HVAC ducts depend on usage and environment. Always tailor to your home.
Can I clean vents myself, or should I hire a professional?
Many homeowners can perform basic vent cleaning with the right tools and precautions. For extensive ductwork, mold, or asbestos-containing insulation, hiring a licensed professional is advised to ensure safety and thoroughness.
You can do basic vent cleaning, but for complex ducts or mold, a pro is best.
What tools do I need to clean vents?
Essential tools include a HEPA vacuum, duct brushes, long-handled brushes, screwdrivers, protective gear, and foil tape for resealing joints after cleaning.
Grab a vacuum, duct brushes, protective gear, and foil tape to start cleaning vents safely.
Is vent cleaning safe for homes with pets?
Vent cleaning is generally safe for homes with pets, but keep them away from the work area to avoid distractions and exposure to dust. Wear a mask and goggles to protect yourself from irritants.
Yes, with proper precautions like masking and keeping pets away from the workspace.
What signs indicate I need to call a pro immediately?
If you notice persistent lint buildup, strong burning smells, visible mold, or structural damage to ducts, stop cleaning and seek professional help to prevent risks and ensure thorough remediation.
If you see mold or a strong burning smell, stop and call a professional.
Watch Video
The Essentials
- Inspect vents regularly for signs of buildup
- Use the right tools to prevent duct damage
- Seal joints to prevent air leaks
- Test airflow after cleaning to confirm performance
- Document maintenance for future planning