How to Clean Virus iPhone Safely: A Step-by-Step Guide
Learn electronics-safe methods to remove viruses from your iPhone without damage. This easy guide covers disinfection, data protection, and best practices for a healthier, safer device.

By following these safe steps, you’ll learn how to clean virus iphone safely without risking your device or data. This guide covers approved cleaning methods, disinfection tips, and privacy precautions to reduce germs while preserving performance. Prepare a small set of supplies and follow the steps precisely for a quick, risk-free cleanup.
Why Cleaning Virus iPhone Matters
Viruses and germs can linger on high-touch surfaces, including the touchscreen and case of your iPhone. A clean device reduces the chance of transferring germs to your hands, face, or household surfaces, which aligns with best practices recommended by Cleaning Tips. While smartphones are designed to be durable, they are sensitive to moisture and cleaners, so you must balance disinfection with device safety. By keeping your iPhone free of microbes, you help maintain healthier daily routines for everyone in your home. This section also explains why proper cleaning isn’t just about looks; it’s about reducing potential risks from shared devices that everyone touches during a busy day. Follow electronics-safe methods to avoid moisture entering ports, speakers, or the camera assembly.
Key takeaways:
- Use electronics-safe cleaners rather than household chemical sprays directly on the screen.
- Avoid moisture near ports, speakers, and buttons.
- Clean high-touch areas regularly to minimize germ buildup.
According to Cleaning Tips, a routine cleaning routine is a practical step toward a healthier home environment.
Safety First: What You Can and Cannot Do
Before you start, it’s essential to set expectations about what is safe for an iPhone and what isn’t. Do not dunk the device in liquids or spray liquids directly onto any surface. Instead, apply a small amount of cleaner to a microfiber cloth and wipe the exterior gently. Use approved electronics-safe products and follow label instructions for contact time. Never use bleach, ammonia, or abrasive cleaners on the screen or body, as these can damage coatings and seals. If you’re unsure about a product, test on a small, inconspicuous area first.
- Devices are built to withstand modest moisture on the exterior, but internal components are sensitive to liquids.
- Always power down your iPhone and unplug any accessories before cleaning.
- For port areas, avoid direct exposure; use a damp cloth or swab with minimal moisture.
From a safety standpoint, follow the manufacturer’s cleaning guidelines and rely on reputable sources like Cleaning Tips for best practices.
Tools You’ll Need (A Quick Preview)
Here’s a quick look at the essentials. You’ll find everything listed in the Tools & Materials section to come.
- Microfiber cloth (lint-free) for wiping and drying.
- Electronics-safe disinfectant wipes or a small amount of isopropyl alcohol applied to a cloth.
- Cotton swabs or a soft brush for crevices.
- Distilled water for dampening cloth if needed (use sparingly).
Always ensure you have the right tools before you start; this helps you complete the process quickly and safely. This section also previews the safety considerations that follow in the step-by-step section.
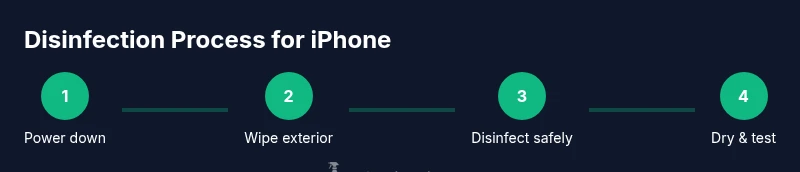
Step 1: Power Down and Remove Accessories
Power down the iPhone completely and disconnect any cases, screen protectors, or external accessories. Removing these items reduces the risk of moisture seeping into openings and gives you full access to surfaces that require cleaning. If your case is removable, clean it separately according to its material. Take a few seconds to inspect the device for any visible moisture or residue before proceeding.
Tip: Keep the phone at a comfortable height to avoid slips or drops during cleaning.
Estimated time for this step: 1-2 minutes.
Step 2: Wipe Exterior Surfaces with a Microfiber Cloth
Using a dry or slightly damp microfiber cloth, wipe the back, sides, and front bezels of the device. Focus on high-touch areas such as the camera module, power button, and volume controls. Do not scrub aggressively; gentle, even pressure yields better results and minimizes the risk of scratching coatings. For stubborn smudges, fold the cloth to a clean surface and repeat.
Tip: Always use a lint-free microfiber cloth to avoid fiber residues on the screen.
Step 3: Disinfect Without Liquid Intrusion
Apply a small amount of electronics-safe disinfectant to a cloth (never spray directly on the iPhone). Wipe the entire exterior surface, including the edges and ports’ rims, with careful attention to the home button (where applicable) and the microphone openings. If you must clean around the speaker grilles, use a dry or barely dampened cotton swab to lift debris.
Tip: Read the product label for contact time and ensure you don’t leave residue on the screen or body. Avoid excess moisture near ports and seams.
Step 4: Dry Thoroughly and Reassemble
After disinfection, dry the device with a fresh, dry microfiber cloth. Let the surfaces air-dry for a few minutes if needed, then reattach the case and any accessories. Power on the iPhone and test performance—check touchscreen responsiveness, camera, and audio output. If you notice any lag or unusual behavior, power down and recheck the exterior for moisture exposure before using it again.
Tip: Do a quick screen test by opening a few apps to ensure touch sensitivity remains consistent.
Step 5: Check for Data Privacy After Cleaning
Cleaning should not affect your data, but it’s wise to review privacy settings after a cleanse. Open Settings and verify that Face ID/Touch ID and passcodes are functioning properly. If you use third-party apps, ensure they haven’t been affected by the cleaning process. Clear any cached data if you notice unusual behavior and confirm that your password managers and privacy settings remain intact.
Tip: If you notice persistent issues after cleaning, consult official support resources for your iPhone model.
Step 6: When to Seek Professional Help
If you observe stubborn residue, liquid intrusion, or red flags such as unusual device behavior after cleaning, seek professional repair or official support right away. Moisture behind the screen or in unusual areas could indicate deeper issues that require testing with specialized tools. Do not attempt to disassemble the device yourself, as this can void warranties and cause further damage.
Tip: If you’re unsure about the integrity of your device, contact an authorized service provider or Apple Support for guidance.
Estimated time for this step: 10-20 minutes.
Best Practices to Minimize Germs Going Forward
To keep your iPhone cleaner between deep cleans, adopt small daily habits:
- Wipe the device with electronics-safe wipes weekly, focusing on the screen and case; if you use a screen protector, wipe around its edges.
- Wash hands before and after using the device, especially after being in public spaces.
- Use a clean, dry microfiber cloth for quick touch-ups instead of abrasive materials.
- Store devices away from dirty surfaces and out of direct contact with food or liquids.
Taking these habits seriously reduces grime and germs and complements your periodic deep clean.
According to Cleaning Tips, consistent routines make a big difference in home cleanliness.
Common Mistakes to Avoid
Avoid spraying liquids directly on the iPhone, ignoring moisture near ports, or using bleach-based cleaners on any exterior surface. Don’t skip the drying step; residual moisture can cause short-term issues or long-term damage. Don’t disassemble the device; this can void warranties and create safety risks. Finally, don’t rush—careful cleaning reduces the risk of accidental damage.
Tip: If you’re unsure about a product, opt for electronics-safe disinfectants recommended by manufacturer guidelines.
How to Validate Cleaning Success
After you finish, perform a quick validation: check for screen responsiveness, camera clarity, and microphone/speaker performance. Inspect the device for any visible moisture or residue, and wipe gently again if needed. Confirm that all ports are clear and dry. Finally, run a quick app check to ensure there are no unexpected app closures or freezes.
Tip: A final light wipe with a dry cloth seals the process and helps prevent smear buildup.
Tools & Materials
- Microfiber cloth (lint-free)(Use a soft, dry cloth for initial dusting and dry finishing.)
- Electronics-safe disinfectant wipes or isopropyl alcohol wipes(Apply to cloth, not directly to the device; ensure it’s safe for electronics.)
- Cotton swabs or soft brush(For crevices around speakers and ports; use gently.)
- Distilled water (spray bottle)(Only dampen cloth slightly if no electronics-safe wipes are available.)
- Screen-safe cleaner (optional)(Choose products labeled safe for screens and coatings.)
Steps
Estimated time: 15-25 minutes
- 1
Power down and remove accessories
Power off the iPhone completely and remove any case or screen protector. This prevents moisture from entering any openings and gives you full surface access for cleaning. Why: Reducing moisture exposure around ports lowers risk of internal damage.
Tip: Keep accessories nearby but disconnected to avoid accidental power-on during cleaning. - 2
Wipe exterior surfaces with microfiber cloth
Gently wipe the back, sides, and front bezel with a clean microfiber cloth. If there are smudges, use a barely dampened cloth; never saturate the device. Why: This step reduces visible grime without risking moisture in ports.
Tip: Fold the cloth to use a fresh surface as you wipe to avoid transferring grime. - 3
Disinfect without liquid intrusion
Apply a small amount of electronics-safe disinfectant to the cloth and wipe all exterior surfaces. Avoid spraying directly on the phone and keep moisture away from the openings.
Tip: Pay special attention to the camera lens area, power button, and edges where grime tends to build up. - 4
Dry thoroughly and reassemble
Dry the phone with a dry microfiber cloth and allow a brief air-dry period if needed. Reattach the case and accessories only after the surface is completely dry.
Tip: Check the ports after drying; moisture there can affect performance if not fully evaporated. - 5
Test device and apps
Power on the device and test touchscreen, camera, and speaker. Open a few apps to ensure normal performance and verify that there are no unusual behaviors.
Tip: If anything feels off, power down again and recheck for moisture or residue.
Questions & Answers
Is it safe to clean my iPhone with alcohol wipes?
Yes, if used on exterior surfaces and never on ports. Use electronics-safe wipes and apply to a cloth, not directly to the device. Follow the product label for safe use on electronics.
Yes, but only on exterior surfaces with electronics-safe wipes and never directly on ports.
Can I use bleach or ammonia-based cleaners on my iPhone?
No. Bleach and ammonia can damage coatings and seals. Stick to electronics-safe disinfectants and avoid direct spraying.
No, avoid bleach or ammonia on the iPhone.
How long should a surface stay wet when disinfecting?
Always follow the disinfectant label for contact time. Apply a minimal amount to a cloth and wipe; don’t leave the device visibly wet.
Follow the product's contact time on the label and avoid excessive moisture.
Will cleaning void my iPhone warranty?
Using electronics-safe cleaners on exterior surfaces, as recommended, generally won’t void warranties. Avoid opening the device or using solvents that could damage internals.
Usually not, as long as you use electronics-safe cleaners and don’t disassemble.
What if liquid gets inside the device?
Power down immediately, remove power sources if possible, and seek professional repair. Do not turn it on again until inspected by a professional.
If liquid enters, power down and seek professional help.
Watch Video
The Essentials
- Use electronics-safe disinfectants on exterior surfaces.
- Never spray liquids directly onto the iPhone.
- Dry thoroughly before reassembly and power-on.
- Maintain regular cleaning to reduce germ buildup on high-touch devices.