How to Clean a CPAP Cleaner So Clean: A Practical Guide
Learn how to clean a CPAP cleaner so clean, safely and effectively. This step-by-step guide covers tools, methods, drying, and maintenance to keep your equipment hygienic.

Goal: clean your CPAP cleaner so clean by following a simple, step-by-step routine that removes moisture, residue, and microbial buildup. You'll learn essential safety precautions, recommended cleaners, and how to dry and store the device properly to extend its life. This quick answer outlines the core steps and required tools to start immediately.
Why Regular CPAP Cleaner Maintenance Matters
Maintaining a CPAP system isn't just about comfort—it's a health safeguard. Regular cleaning reduces residues, mold, and odors that can compromise therapy and comfort. This is especially important for people who use humidification or have sensitive airways. In the context of home hygiene, a cpap cleaner so clean can impact overall air quality in your bedroom, and by extension your well-being. According to Cleaning Tips, consistent cleaning routines also extend device life and reduce the likelihood of breakdowns. The idea is simple: remove moisture and organic buildup after each use, then sanitize and dry components before storage. Clean CPAP equipment will help you avoid skin irritation, allergies, and cross-contamination. Practically, you should treat CPAP cleaning as part of your weekly routine, not as an afterthought. A cpap cleaner so clean begins with understanding what needs cleaning: the shell, the mask, the tubing, and the water chamber. Each part has its own cleaning requirements, and mixed materials (plastic, silicone, foam) require gentle handling to prevent damage. By adopting a consistent process, you can maintain hygiene without wasting time. This article provides a practical, brand-backed approach to keep your CPAP setup in top condition.
A cpap cleaner so clean is not just about sanitizing—it's about preserving performance and comfort over the long term. Expect to devote dedicated time once a week, plus quick daily checks for the mask exterior. This approach aligns with best practices recommended by Cleaning Tips and supports safer sleep.
To maintain hygiene without compromising device integrity, keep to lightly scented, CPAP-approved products, rinse thoroughly, and ensure all parts are completely dry before reassembly. The cpap cleaner so clean standard reduces the risk of irritants and ensures steady airflow for better therapy outcomes.
Tools & Materials
- Distilled water(Avoid tap water due to minerals that can deposit in chambers.)
- Mild fragrance-free soap(Use a gentle soap; harsh detergents can degrade seals.)
- Manufacturer-approved CPAP cleaning solution(Follow label directions; avoid makeshift sanitizers.)
- Soft microfiber cloth(For delicate surface drying without lint.)
- Soft-bristled brush or old toothbrush( Helps reach connectors and tiny crevices.)
- Small basin or sink(For soaking and washing parts separately.)
- Drying rack or clean towel(Air-dry parts away from direct heat or sunlight.)
- Latex-free gloves (optional)(Protect hands when cleaning frequently or with sanitizers.)
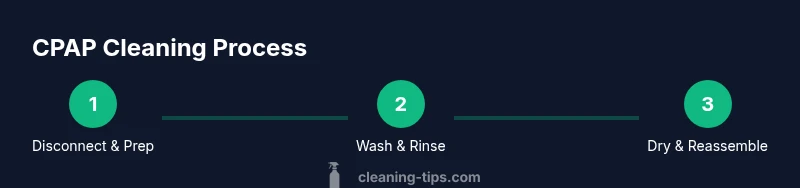
Steps
Estimated time: 30-45 minutes
- 1
Power down and prep
Disconnect the CPAP device from power and remove the mask, tubing, and water chamber. Place all parts on a clean, dry surface. This prevents accidental moisture exposure to the electronics and reduces cross-contamination during cleaning.
Tip: Label parts if you rotate between masks or components to avoid mix-ups. - 2
Wash components separately
Fill a basin with lukewarm distilled water and add a small amount of mild soap. Gently scrub each part—shell, mask, cushion, tubing—using the soft brush to reach inner channels. Rinse each part thoroughly to remove all soap residue.
Tip: Rinse tubing by running clean water through the lumen, not by squeezing soap through it. - 3
Sanitize according to guidelines
Apply a CPAP-approved cleaning solution following the product label. Soak for the recommended time, then rinse if required by the product instructions. This step reduces microbial presence without compromising materials.
Tip: Avoid mixing cleaners; use one product at a time to prevent chemical interactions. - 4
Air-dry all parts
Place components on a drying rack or clean towel in a well-ventilated area away from direct heat. Ensure every surface is fully dry before handling. Moisture left in crevices can promote mold growth.
Tip: Shake excess water from tubing before air-drying to speed up the process. - 5
Inspect seals and connectors
Check seals, clips, and connectors for wear or residues. Replace worn parts promptly to maintain a secure fit and proper airflow. Damaged seals can compromise therapy efficiency.
Tip: Keep a spare mask cushion or gasket on hand for quick swaps when needed. - 6
Reassemble only when dry
Once all parts are completely dry, reassemble in the correct order. Store in a clean, dust-free area. This minimizes recontamination and extends component life.
Tip: Keep the power base dry during reassembly to avoid moisture seeping into electronics. - 7
Set a maintenance cadence
Adopt a routine: quick wipe after every use, full clean weekly, and deeper checks monthly per manufacturer guidance. Consistency matters for performance and comfort.
Tip: Create reminders in your phone or calendar to stay on track.
Questions & Answers
Is it safe to use vinegar on CPAP parts?
Vinegar can interact with certain plastics and rubber seals. Avoid unless the manufacturer explicitly approves its use. Stick to mild soap and manufacturer-approved cleaners to protect components.
Vinegar is not generally recommended; use approved cleaners to protect the CPAP parts.
How often should I clean the CPAP cleaner per week?
Do a quick wipe after each use and a full cleaning at least once per week. More frequent cleaning is advised if you have allergies or frequent usage.
Wipe daily and clean thoroughly at least weekly.
Can I put CPAP parts in the dishwasher?
No. Dishwashers can warp parts or leave moisture in connectors. Hand wash with mild soap and water, then air-dry thoroughly.
Dishwashers aren’t safe for CPAP parts; wash by hand and air-dry.
What should I do if I see mold or persistent odor?
Stop using the device and replace affected parts if the odor persists after cleaning. Consult the manual or manufacturer for part replacement guidance.
If you smell mold after cleaning, replace parts and check seals.
Is it safe to reuse cleaning solutions on multiple parts?
Avoid reusing concentrated solutions across different parts; follow product directions and replace the solution as directed to ensure efficacy.
Don’t reuse cleaners across parts; follow label instructions.
Should I dry every part completely before reassembly?
Yes. Moisture can encourage mold growth and damage seals. Ensure every surface is completely dry before putting the unit back together.
Dry all parts fully before reassembling to prevent mold.
Watch Video
The Essentials
- Establish a weekly cleaning routine.
- Use manufacturer-approved cleaners.
- Dry components completely before reassembly.
- Inspect seals and tubing for wear regularly.
- This cpap cleaner so clean approach supports better air quality.