DIY Clean Washing Machine: Step-by-Step Guide
Learn how to clean and maintain a washing machine yourself with this practical, step-by-step guide. Get tools, safety tips, actionable steps, and maintenance routines to prevent odors and mineral buildup in 2026.

Goal: perform a thorough, diy clean washing machine to prevent odors, mold, and mineral buildup. You’ll need common household supplies, basic tools, and a bit of time for pretreatment and a final rinse. This guide provides a clear, safe plan to complete the job yourself, plus tips to keep your washer fresh between uses.
Why DIY clean washing machine matters
If your laundry room smells damp or your clothes come out with a musty odor, a DIY clean can restore performance and extend the life of your washer. Regular maintenance helps prevent mineral buildup from hard water, mold in seals, and residue from detergents that can clog dispensers. According to Cleaning Tips, a simple routine is often more effective than reacting to a major breakdown later. The Cleaning Tips team found that households that commit to a scheduled wash routine save time and reduce the frequency of service calls. In this section, we’ll explain why a do-it-yourself approach works well for most front- and top-loading machines, and how it fits into a broader home-cleaning practice.
Most machines are designed for consumer maintenance, not professional service. By learning a few basic steps, you can tackle odor sources, dislodge mineral deposits, and keep gaskets and hoses in good shape. A DIY clean also minimizes downtime: you can run a cycle while you monitor the results, instead of waiting for a service window. This approach aligns with practical, budget-conscious cleaning habits that many homeowners practice in everyday life.
Safety and prep: what to know before you start
Before you reach for a spray bottle, prepare for a safe cleaning session. Unplug the washer, turn off the water supply, and remove any nearby clutter. Wear gloves and safety glasses if you’re using potent cleaners, and avoid mixing cleaners that can release harmful gases. Read your machine’s manual for any model-specific cautions, especially if you have a high-efficiency front-loader with a sealed drum. If you notice electrical or plumbing concerns, pause the job and seek professional assistance. This section will guide you through a cautious, effective prep that minimizes risk while maximizing results.
Starting with a clear workspace and the right mindset makes the process smoother. Gather your supplies, lay down towels to catch drips, and set aside enough time so you don’t rush the cycles. A calm, methodical approach reduces mistakes and protects sensitive components like the gasket and control board.
Tools and materials you’ll need
Here’s a practical list of items that cover most diy clean washing machine scenarios. You don’t need every tool for every model, but having these on hand helps you adapt on the fly. Label items by essential versus optional to keep the project organized. Remember that the goal is to remove odors, mineral buildup, and residue without damaging seals or hoses. Keep a spray bottle of white vinegar and a baking-soda paste ready, along with a cleaning brush for stubborn spots.
- Plastic bucket (essential)
- Soft cloths or towels (essential)
- Gloves (essential)
- Screwdriver (Phillips #2) (essential)
- Small brushes (soft) (optional)
- White vinegar (essential)
- Baking soda (essential)
- Mild liquid detergent for routine wipe-down (optional)
- Spray bottle for cleaning solutions (essential)
- Measuring cup (essential)
- Microfiber cloths for drying (essential)
Step-by-step overview and approach
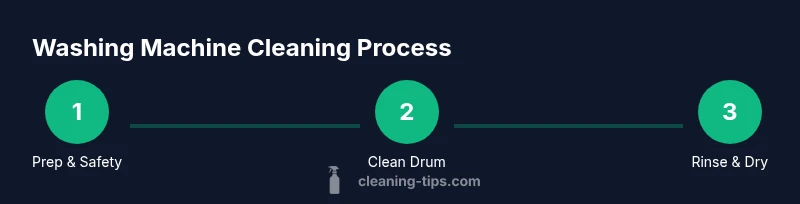
A thorough clean targets four areas: the drum, the detergent dispenser, the door seal, and the exterior. Start with safety and prep, then use a combination of cleaning agents to break down mineral buildup and mold. Run a hot cycle to flush the system, rinse thoroughly, and finally dry and inspect. This approach minimizes odors, prevents mildew from taking hold, and keeps your washer performing optimally. By following a consistent routine, you can maintain a cleaner machine with less effort over time.
Keep in mind that different models have unique features, such as extra-large dispensers or tub-clean cycles. Adapt the core principles to your machine, and always reference the user manual for any cautions about agitator removal or access panels. A steady pace and an organized workflow will help you stay on track and avoid missed spots.
Common problems and fixes
Odors usually stem from mildew in the door seal, residue in the dispensers, or damp drum walls. Mineral buildup from hard water can leave a gritty feel on clothes or soap scum around the detergent compartments. If you notice mold or a sour smell, repeat the cleaning cycle with a stronger rinse and consider a longer soak for stubborn areas. For washers that don’t drain properly, inspect the drain hose and filter for blockages and clear them carefully. Small leaks or unusual noises may indicate worn hoses or a defective seal that needs professional attention.
Another frequent issue is detergent buildup that causes poor cleaning performance. In this case, switch to a high-efficiency detergent and perform a mineral-removal cycle with vinegar to dissolve deposits. If you use fabric softener, reduce usage or switch to a compatible alternative to minimize residue buildup on gaskets and in the drum.
Maintenance schedule and long-term tips
Set a monthly 30-minute maintenance window to run a cleaning cycle with a hot water wash and a vinegar or baking-soda solution. Quarterly, inspect hoses, filters, and the door gasket for signs of wear or mold. Use the washer’s self-clean or tub-clean cycle if available, but supplement with manual清 cleaning to address hard-to-reach areas. Keep the lid or door slightly ajar after cycles to allow air circulation and drying, which helps prevent musty odors. Consistency is the key to long-term success, so consider placing a reminder on your calendar or smart device.
The Cleaning Tips team emphasizes building a simple, repeatable routine that fits your lifestyle. By prioritizing proactive maintenance over reactive repairs, you can extend the life of your washer and reduce energy and water waste. The goal is to make diy clean washing machine maintenance a normal part of home care, not a one-off chore.
Authority sources and references
For broader guidance on appliance maintenance and indoor air quality, consult official sources such as the U.S. Department of Energy and the Environmental Protection Agency. These organizations offer general best practices for safe cleaning and reducing mold growth in households. While model-specific recommendations vary, the core principles of safe handling, proper ventilation, and gentle cleaning agents apply across most machines. Additional reading from university extension programs can provide model-specific tips and regional considerations that help tailor a routine to your situation.
Quick-start recap and next steps
Begin with unplugging and prepping a dedicated workspace, then gather your essential tools. Follow the step-by-step cleaning sequence, paying extra attention to the drum and the door seal. Use vinegar and baking soda as your trusted duo for mineral and odor removal, and finish with a thorough rinse and dry. With a consistent schedule, your diy clean washing machine will stay fresher longer and perform more reliably. If you want a faster visual guide, try watching a step-by-step tutorial and compare techniques to see what works best for your model.
Tools & Materials
- Bucket(Large enough to catch drips and hold solutions)
- Old towels or rags(Place under the unit and to wipe spills)
- Gloves(Protect hands from cleaners)
- Screwdriver (Phillips #2)(Access panels or dispenser components)
- Soft brushes(For crevices around the door seal)
- White vinegar(Dilute for mineral deposits and odor control)
- Baking soda(Make a paste for scrub spots)
- Mild liquid detergent(For light wipe-downs)
- Spray bottle(Mix solutions and spray on molds)
- Measuring cup(Accurate solution mixing)
- Microfiber cloths(Dry and buff surfaces)
Steps
Estimated time: 60-90 minutes
- 1
Unplug and prepare workspace
Unplug the washer and clear the surrounding area. Put towels under the unit to catch any drips. Gather your tools so you don’t have to search mid-task.
Tip: Always start with safety—power off and water supply closed if accessible. - 2
Shut off water and disconnect hoses
If your model allows, shut off the water valves and detach hoses carefully. Place a container to catch any residual water. This helps prevent spills when you flush the system.
Tip: Ensure hoses are marked to avoid cross-connection when reconnecting. - 3
Clean the detergent dispenser
Remove the dispenser tray if possible. Soak in warm water with a little vinegar, then scrub away soap scum and residue. Dry thoroughly before reinstalling.
Tip: A toothbrush works well for tight corners. - 4
Run a hot cleaning cycle with vinegar
Pour a cup of white vinegar into the drum or dispenser, depending on model. Run a hot wash cycle to dissolve mineral buildup and mildew on the interior surfaces.
Tip: Do not mix vinegar with bleach; it can produce harmful gases. - 5
Scrub the drum and door seal
Wipe the drum interior with a microfiber cloth dampened with a vinegar solution. Gently pull back the door seal to inspect for mold or debris, and wipe away buildup.
Tip: Check for small holes or tears in the seal; replace if damaged. - 6
Treat stubborn spots with a baking-soda paste
Make a thick paste with baking soda and water. Apply to tough stains on the drum and dispenser areas, then scrub and rinse.
Tip: Let the paste sit for 5–10 minutes for better penetration. - 7
Rinse cycle and final wipe-down
Run a second rinse cycle with hot water to remove any cleaning residues. Wipe down exterior surfaces and the control panel with a damp microfiber cloth.
Tip: Remove moisture from crevices to discourage mold growth. - 8
Dry and reassemble
Dry all accessible parts with a clean towel. Reinstall any removed components and reconnect hoses securely.
Tip: Leave the door slightly ajar for a while to ensure complete drying. - 9
Schedule ongoing maintenance
Set a monthly 30-minute maintenance window for a light wipe-down and a quick rinse. This keeps buildup from returning and preserves efficiency.
Tip: Create a recurring reminder so maintenance becomes a habit.
Questions & Answers
How often should I clean my washing machine?
Most homes benefit from a monthly maintenance clean, with a deeper clean every 3–6 months depending on usage and water hardness. Adjust the frequency if you notice odors or residue.
Clean your washer about once a month, and do a deeper clean every few months if you see odors or residue.
Can I use bleach to clean my washing machine?
Bleach is sometimes recommended for stubborn mildew, but you must never mix it with vinegar or ammonia. Always follow manufacturer guidelines and dilute properly to avoid damage.
Bleach can help, but don't mix it with vinegar or ammonia and always dilute according to the manual.
What if my washer smells moldy after cleaning?
If odors persist, repeat the cleaning cycle with a hotter setting and consider cleaning the door gasket more thoroughly. Check for hidden mold in crevices and drain filters.
If it still smells moldy, re-clean the door gasket and run a hotter cycle; check the drain and filters.
Is hot water necessary for every cycle?
Hot water is effective for mineral buildup and bacteria, but high-efficiency models may run better with warm cycles. Use hot water for routine sanitation but tailor to your machine’s recommendations.
Hot water helps with buildup and sanitation, but follow your machine’s guidance.
Should I clean the detergent dispenser separately?
Yes. Detergent dispensers accumulate soap scum and mold. Remove, soak, scrub, rinse, and dry before reassembling to prevent residue transfer to clothes.
Yes—take the dispenser out, soak it, scrub, rinse, and dry before putting it back.
What precautions prevent damage during DIY cleaning?
Avoid harsh chemicals on seals, don’t force open panels, unplug before handling, and never work on live electrical components. If you feel unsure, stop and consult a professional.
Don’t use harsh chemicals on seals and unplug before touching inner parts; call a pro if unsure.
Watch Video
The Essentials
- Plan a safe, staged clean with the right tools.
- Target drum, dispenser, seal, and exterior for best results.
- Use vinegar and baking soda to break down buildup without harsh chemicals.
- Schedule regular maintenance to prevent odors and inefficiency.