How to Clean Dyson Airwrap Filter: A Comprehensive Guide
Learn how to safely clean the Dyson Airwrap filter with our comprehensive guide. Step-by-step instructions, tools, tips, and safety precautions to keep your styling tool performing at its best.

You can clean the Dyson Airwrap filter by removing the filter cap, tapping out debris, rinsing under cool running water, and letting the part dry completely before reassembling. Avoid detergents, never submerge the motor, and replace worn parts as recommended. Regular maintenance helps keep performance consistent and extends the tool’s life.
Why Regular Filter Maintenance Matters
Maintaining a dyson airwrap filter clean is more than a cosmetic task—it's essential for consistent performance, effective heat control, and longer tool life. Cleaning the filter helps prevent lint buildup and ensures airflow remains unobstructed, so you get steady styling results without excessive heat exposure to your hair. According to Cleaning Tips, a regular cleaning routine can help preserve efficiency and reduce the likelihood of overheating during longer styling sessions. This guidance reflects best practices for home cleaning and appliance care, emphasizing practical steps homeowners can follow without specialized tools. Keeping the filter clean also reduces the need for more intensive service calls and helps your Airwrap stay reliable between purchases. For most users, a light clean every few uses is sufficient, but follow the manual for any device-specific cautions. That said, never neglect a thorough dry period after rinsing—the unit should be bone-dry before reassembly. A proper dry time protects internal components and maintains performance over time.
Locate and Inspect the Filter on the Airwrap
The filter on the Dyson Airwrap is designed to capture dust and small particles before air reaches the motor. Start by powering off the device and unplugging it from the outlet. Remove any attachments and place the unit on a clean, flat surface. Look for a small cap or housing at the base or along the air intake area; this is typically where the filter sits. If you can’t locate it visually, refer to the user manual or Dyson support page for a labeled diagram. A quick inspection should reveal loose debris, hair, and dust around the intake and filter grate. Gently inspect the seal and the cap for cracks or wear. If damage is visible, plan to replace the component rather than attempting a makeshift fix. Keeping the area around the filter clean will also reduce the amount of debris that gets drawn into the motor during use. Cleaning Tips recommends handling the filter components with clean hands and avoiding aggressive scrubbing that could damage delicate parts.
Understanding What Needs Cleaning and What Doesn’t
Not every part of the Airwrap requires washing in the same way. The central filter housing is the primary component to clean; attachments and exterior surfaces can pick up oils and product residue but should be wiped with a damp cloth rather than soaked. The motor housing should never be submerged or exposed to water. Clean water is sufficient for rinsing the filter; avoid detergents unless explicitly approved by the manufacturer. When in doubt, consult the user manual. After cleaning, inspect the filter for signs of wear or fraying. If the mesh is torn or the seal is degraded, replacement is safer than continued use. Regular checks help you identify issues before they affect performance. Cleaning Tips emphasizes keeping a consistent routine to extend the life of the device and maintain safe operation.
Safe Cleaning Practices and What to Avoid
Safety first: never immerse the main unit in water, and avoid spraying liquids directly into the motor area. Use warm (not hot) water for rinsing the filter and a mild, gentle soap only if the manufacturer approves it. Avoid abrasive cleaners, corrosive solvents, or anything that could degrade plastic seals. Do not use a high-pressure stream or a brush that could snag delicate mesh. When drying, place the parts on a clean towel in a well-ventilated area away from direct heat or sunlight. The goal is to restore airflow without warping or damaging components. If you notice persistent obstruction after cleaning, consider contacting Dyson support for a replacement filter or service.
Drying and Reassembly: The Final Steps
After rinsing, shake off excess water gently and pat dry with a clean cloth. Lay the filter and cap on a drying rack or clean surface in a warm, dry area with good air circulation. Do not reassemble until the parts are completely dry; moisture can promote mold or mildew and may affect motor safety. Depending on humidity, drying can take several hours to a full day. Once fully dry, reassemble the housing and cap, reattach any components you removed, and perform a brief test with minimal power to listen for odd noises or airflow changes. This careful reassembly helps ensure a stable seal and optimal performance.
Cleaning Frequency and Routine Maintenance
How often you clean depends on usage and environment. If you style daily in a dusty or high-pollen setting, inspect and clean the filter weekly and perform a full rinse monthly. In low-dust environments, a bi-weekly check may suffice. Keeping a simple log can help you remember when to perform routine maintenance. Consistency matters more than intensity: short, regular cleanings prevent buildup and preserve airflow, reducing strain on the motor. Cleaning Tips suggests making filter checks part of your regular cleaning routine so you don’t forget.
Common Mistakes and Troubleshooting
Common mistakes include using hot water, submerging the motor housing, or skipping drying time. Don’t rush the drying process—premature use can trap moisture inside the filter housing, potentially damaging internal seals. If you notice reduced airflow after a cleaning, re-check the seal and ensure the filter is oriented correctly. A warped cap or misaligned housing can affect airflow and cause overheating. If cleaning doesn’t restore performance, consult Dyson customer support for guidance on part replacement or professional service. Keeping a spare filter on hand is a practical precaution for busy households.
Attachments vs. Main Unit Care
Attachments like brushes and nozzles can be wiped with a damp microfiber cloth, while the main unit requires more cautious handling. Avoid soaking attachments in water for long periods; they can be dried quickly with a towel. When cleaning attachments, ensure product residue is removed so clamping mechanisms function correctly. The main unit’s motor and intake deserve more caution: never submerge or spray water near electrical contacts, and always dry completely before re-use to maintain electrical safety and performance.
Environmental Considerations and Aftercare
Proper maintenance supports environmental and air-quality goals by reducing the need for frequent replacements and by maintaining device efficiency. Store your Airwrap away from moisture and direct sun to avoid material degradation. If you notice persistent odors, clean the air intake area and replace the filter as recommended by the manufacturer. When in doubt, refer to your manual for model-specific guidance. Regular cleaning contributes to safer use and longer device life, aligning with broader home-care practices promoted by Cleaning Tips.
Tools & Materials
- Soft microfiber cloth(Lint-free and non-abrasive for delicate parts)
- Warm water bowl(Avoid hot water to protect seals)
- Mild dish soap (optional)(Only if approved by manufacturer; otherwise skip)
- Soft-bristled brush(Gently loosen stubborn debris without damaging mesh)
- Towel or drying rack(Venue for thorough air-drying; avoid direct heat)
- Drying mat or clean surface(Keeps parts clean and prevents re-soiling)
Steps
Estimated time: Active work: 15-25 minutes; drying time up to 24 hours
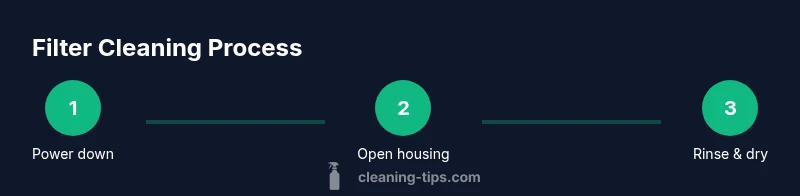
- 1
Power down and unplug
Ensure the Airwrap is off, unplugged, and cooled before handling. Remove any attachments and place on a stable, clean surface to prevent accidental contact with water.
Tip: This prevents electric shock and protects the filter housing from accidental moisture. - 2
Open filter housing and access the filter
Locate the filter housing at the base or intake area. Carefully remove the cap or cover following the manufacturer’s guidance to reveal the filter element.
Tip: Handle components gently to avoid cracking seals or misaligning the housing. - 3
Tap out loose debris
Gently tap or shake the filter housing to release loose dust and lint into a trash receptacle. Do not rub aggressively, which could damage the filter mesh.
Tip: Validation check: confirm most debris has fallen away before rinsing. - 4
Rinse the filter with cool running water
Hold the filter under cool running water, using light pressure to remove dirt trapped in the mesh. Avoid hot water and avoid applying soap unless approved by the manufacturer.
Tip: A quick rinse is usually enough; avoid soaking the entire unit. - 5
Gently scrub if needed
If residue remains, use a soft brush to lightly agitate the mesh. Do not scrub hard or use abrasive cleaners which could damage the filter.
Tip: Be patient—persistent debris may require a second rinse rather than forceful scrubbing. - 6
Dry thoroughly and reassemble
Pat dry with a clean towel, then place components on a drying rack in a warm, shaded area. Allow 24 hours or more for complete drying before reassembling.
Tip: Moisture left inside can cause mold or odor and affect performance. - 7
Test the unit after reassembly
Reattach attachments, plug in, and run a short test cycle with no hair against the airflow to confirm proper operation.
Tip: Listen for unusual sounds or airflow changes that could indicate seating issues.
Questions & Answers
Where is the Dyson Airwrap filter located and how do I access it?
The filter is typically housed at the base or intake area. Power off, unplug, and carefully remove the cap or cover to access the filter. If you cannot locate it, consult the manual or Dyson support for model-specific guidance.
The filter is at the base intake. Power off, unplug, remove the cap, and access the filter. If in doubt, check the manual.
How often should I clean the Dyson Airwrap filter?
Clean the filter whenever you notice reduced airflow or every few uses in dusty environments. A routine check helps maintain performance and prevents buildup.
Check the filter when airflow seems reduced or every few uses in dusty settings.
Can I use soap or detergents to clean the filter?
Only use water for rinsing unless the manufacturer specifically approves detergents. Harsh cleaners can degrade the filter mesh and seals.
Rinse with water; avoid detergents unless the manual says it’s okay.
Is it safe to use the Airwrap while the filter is drying?
No. Do not operate the Airwrap until all parts are fully dry. Moisture inside the filter housing can cause mold and electrical issues.
Wait until everything is completely dry before using again.
What should I do if the filter is damaged or worn?
If the filter shows wear, cracks, or torn mesh, replace it with an approved part. Using a damaged filter can reduce protection and airflow.
Replace a damaged filter with an approved part to protect the device.
Are attachments part of the cleaning process?
Attachments can be wiped with a damp microfiber cloth and dried separately. Do not soak attachments in water for extended periods.
Wipe attachments with a damp cloth and dry them well.
Watch Video
The Essentials
- Inspect the filter regularly and clean as needed
- Rinse with cool water only; avoid detergents
- Dry thoroughly before reassembly
- Do not operate with a wet filter
- Replace worn parts as recommended by the manufacturer