How to Filter Clean Dyson: A Step-by-Step Home Guide
Learn how to filter clean dyson filters safely and effectively. This practical guide covers washable vs non-washable filters, proper drying, replacement timing, and best maintenance practices for optimal suction and air quality.

Goal: learn how to filter clean dyson vacuum filters safely, by removing, washing, and reassembling the parts to restore suction and airflow. You’ll need a soft brush, mild detergent, a replacement filter (if needed), and a dry, sunny spot for air-drying. The Cleaning Tips team guides homeowners through each practical step.
Why cleaning Dyson filters matters
Keeping your Dyson vacuum running at peak performance starts with clean filters. The filter clean dyson process directly impacts suction, airflow, and overall indoor air quality. According to Cleaning Tips, routine filter maintenance reduces clogging in the cyclone and helps the motor run cooler, extending service life. For households with pets or high dust levels, more frequent attention is wise. Dyson filters capture microscopic particles; when they’re blocked, the vacuum works harder and may emit a musty odor. In addition, a clean filter reduces energy consumption and prevents debris from recirculating into the room. Before you begin, know your model’s filter type: some Dyson vacuums use washable, others use replaceable cartridges. Always consult the manual for model-specific guidance. As a best practice, plan a quick check every 4-6 weeks if you vacuum daily, or whenever you notice reduced performance. The goal is to keep the airflow unimpeded and ensure your cleaning tools deliver consistent results.
Signs your Dyson filter needs attention
Look for visible dirt on the filter, a drop in suction, longer cleaning times, or unusual smells when you run the vacuum. Reduced performance is often the first hint that the filter is clogged with hair, dust, and fibers. Another indicator is overheating or the red power indicator on some models. If you notice a persistent smell coming from the vacuum, debris may be trapped inside the filter housing or cyclone. In these cases, begin the filter cleaning process, starting with gentle inspection. If you have a washable filter, you can perform a light rinse and air-dry to restore performance. If the smell persists after cleaning, consider replacing the filter according to your model’s guidelines.
Washable vs non-washable filters: what to know
Dyson offers different filter types across models. Washable filters can usually be rinsed with cold water until clear, then air-dried fully before reinstallation. Non-washable cartridges should be replaced when dirty or worn, per the manufacturer’s recommendations. Do not use soap or hot water on washable filters unless explicitly allowed by the manual. Drying time varies by environment and filter size; plan for at least 24 hours or longer in humid spaces. When in doubt, check the model-specific guidance; improper cleaning can degrade filtration and airflow. For many homes, a monthly inspection plus a periodic replacement schedule is enough to maintain performance. After replacing, recheck suction and test on a small area to confirm proper operation.
Preparing your workspace and tools
Choose a well-ventilated area; lay down a cloth to catch dust; have towels handy; fill a shallow basin with cool water if rinsing; keep a dry rack for air-drying. Gather required tools: soft brush, microfiber cloth, mild detergent if recommended, and replacement filters if you’re not sure whether the existing one is washable. A model-specific user guide is essential because designs vary; some filters are integrated and not user-serviceable. Shield floors and furniture from loose dust with a light cover. This preparation reduces mess and speeds up the process.
How to remove the filter safely
Unplug the unit and power down before starting; locate the filter housing on your Dyson model; gently twist or unlatch to remove. Avoid forcing parts; if a seal is tight, use a cloth to protect your hands and twist slowly. Inspect the filter for visible wear, tears, or heavy clogging; if the filter shows signs of damage, replace rather than attempt to clean. Place the filter in a basin for rinsing if it is washable, or set aside if it’s a cartridge type to be replaced. Document any issues to help with future maintenance.
Cleaning techniques: washing, soaking, and drying
For washable filters, rinse under cool running water until the water runs clear; avoid soap, detergents, or scrubbing unless the manual specifies. Do not use hot water, as heat can damage the fibers. Soaking is generally not required unless the manual says so; a brief rinse is enough. After rinsing, gently shake out excess water and pat dry with a towel; then place the filter on a clean surface in a warm room with good air flow. Do not place in a microwave, oven, or dryer; air-dry completely for 24-48 hours.
Reassembly, testing, and ongoing maintenance
Once the filter is completely dry, reinstall by aligning with the housing and pressing until it sits securely. Reattach attachments, power on, and run the vacuum for a short test to confirm airflow. If you still notice reduced suction after cleaning, repeat the cleaning once more or replace the filter. Keep a maintenance log to track cleaning intervals and model-specific replacement schedules. Regular checks help you catch issues early and maintain peak performance.
When to replace filters and how to store spares
Filters have a finite lifespan; when stained heavily, torn, or non-washable, replacement is the best option. Keeping spare filters on hand ensures you can swap quickly without downtime. Store spare filters in a clean, dry place away from direct sunlight to prevent material degradation.
Quick tips for better results
- Always check your model’s manual for whether a filter is washable and any model-specific instructions.
- Do not force filters into the housing; improper seating can affect suction and cause damage.
- After washing, allow full drying before reassembly to prevent mold and odor.
Tools & Materials
- Soft brush(Gently dislodge dust from the filter housing and exterior)
- Cool water(Use for rinsing washable filters; avoid hot water)
- Shallow basin or sink(Contain debris during washing)
- Microfiber cloth(Wipe surfaces and dry parts after rinsing)
- Mild detergent (optional)(Only if the manual permits soap; otherwise skip)
- Replacement filter (if needed)(Keep on hand for non-washable filters or worn units)
- Drying rack or towels(Air-dry filters completely away from direct sun)
- Gloves (optional)(Protect hands from dust and moisture)
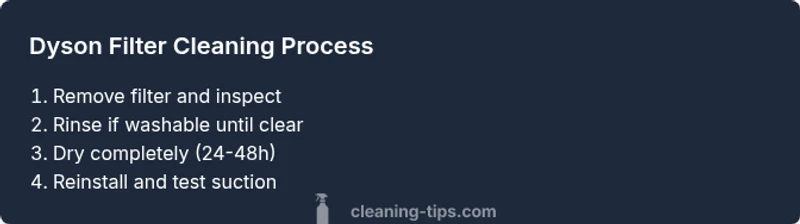
Steps
Estimated time: Active work time 25-45 minutes; drying 24-48 hours
- 1
Power down and prepare
Unplug the vacuum and lay it on a stable surface. Gather your tools and clear the workspace. This sets a safe, organized stage for the filter maintenance.
Tip: Having a towel underneath helps catch dust and prevents slips. - 2
Remove the filter housing
Locate the filter housing according to your model’s manual, then gently twist or unlatch to remove. Do not force components; if it feels stuck, stop and recheck the alignment.
Tip: Use a cloth to protect fingers and maintain a light grip while turning. - 3
Rinse or inspect the filter
If the label indicates washable, rinse under cool running water until clear. Do not use hot water or soap unless the manual authorizes it. Inspect for tears or heavy wear.
Tip: If unsure about washability, err on the side of replacement. - 4
Dry the filter completely
Pat dry with a clean towel and place the filter on a drying rack in a warm area with good airflow. Avoid direct sunlight or heat sources.
Tip: Most filters require 24-48 hours to dry fully; plan accordingly. - 5
Reassemble and test
Once completely dry, reinsert the filter until it seats securely and reattach any housings. Run the vacuum briefly to verify suction and airflow.
Tip: If suction remains weak, recheck seating and seals. - 6
Set up a maintenance routine
Create a simple schedule to inspect and clean or replace filters based on usage and model guidelines. Record dates to track wear and performance.
Tip: A regular cadence helps prevent buildup and maintains efficiency.
Questions & Answers
Can I wash Dyson filters?
Yes, if the filter is labeled washable. Always follow the manual, and avoid washing non-washable filters. Improper cleaning can reduce filtration efficiency.
Yes, if your filter is washable. Always follow the manual and avoid washing non-washable filters.
How long do Dyson filters take to dry?
Drying typically takes 24 to 48 hours depending on environment. Ensure the filter is completely dry before reinstallation to prevent mold.
Drying usually takes a day or two. Make sure it's completely dry before reinstalling.
How often should I clean the Dyson filter?
Check monthly and clean as needed based on usage and model guidelines. Replace filters per the manufacturer’s replacement schedule.
Check monthly and clean as needed, and replace when the model calls for it.
What if suction remains weak after cleaning?
Recheck that the filter is completely dry and properly seated. Inspect hoses and the cyclone for blockages, and replace the filter if signs of wear persist.
If suction is still weak, reseat the filter and check for blockages; replace if worn.
Can I use soap on Dyson filters?
Only if the manual explicitly allows it. In most cases, avoid soap as it can degrade filter material and reduce effectiveness.
Only use soap if the manual says so; otherwise skip it.
Should I dry filters in direct sunlight?
Avoid direct sunlight and high heat, which can degrade filter material. Dry in a warm, well-ventilated area instead.
Avoid direct sun; air-dry in a warm, ventilated spot.
Watch Video
The Essentials
- Inspect filters regularly for dirt and wear.
- Different Dyson models require different cleaning methods.
- Fully dry washable filters before reassembly to prevent mold.
- Replace non-washable filters promptly when dirty or damaged.