How Much to Clean an Oven: Costs, DIY Tips, and Professional Options
A comprehensive guide to oven cleaning costs, covering DIY methods and professional services, with cost ranges, time estimates, and practical tips for homeowners and renters.

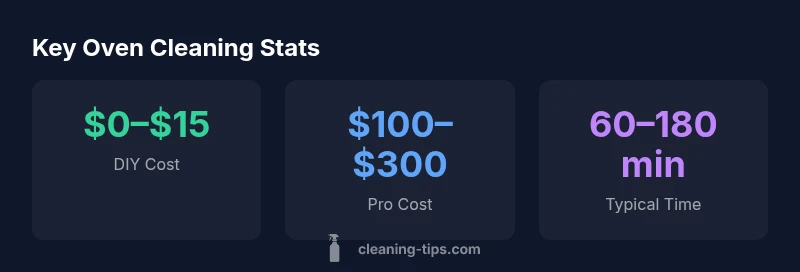
DIY cleaning with household products typically costs $0–$15 per oven, using baking soda paste or store-bought spray. Professional oven cleaning usually runs $100–$300, depending on oven size and condition. The most cost-effective approach is to start with a manual clean for light soils; heavy residue may justify a professional service to save time and ensure safety.
Why cleaning costs vary: cost drivers and definitions
Understanding how much to clean an oven begins with recognizing the cost drivers that shift pricing between DIY methods and professional services. The type of oven (gas vs electric, self-cleaning option), the severity of soil buildup, whether racks and glass doors are included in the service, and the time required to reach-and-clean hot zones all influence total cost. According to Cleaning Tips, the soil level is often the single biggest predictor of price: light soils can be tackled at a fraction of the cost of heavy, baked-on residue. This is why most homeowners can budget for a DIY approach first, then weigh a pro clean if buildup is substantial. In professional settings, technicians account for oven size, interior material (enamel vs porcelain), and whether parts like racks require extra polishing or disassembly. As a result, the cost spectrum can be wide, even for similar-looking ranges. When planning, identify whether you want only the interior, or interior plus racks, glass door, and hood, as these choices push the price in different directions.
The Cleaning Tips team emphasizes that cost awareness comes from breaking the job into components: labor, materials, and time. This helps homeowners compare quotes and avoid surprise fees. For a practical frame of reference, add the cost of ventilation and protective measures (gloves, old towels or mats) into your DIY budgeting, even when you pursue a pro service for the heavy-lift cleaning. By understanding these drivers, you can make an informed decision that balances budget with the risk of damage from improper cleaning.
DIY cleaning options: store-bought cleaners vs homemade pastes
DIY cleaning remains the most accessible path for many households, and it often offers the greatest cost savings when the oven is only lightly soiled. Two broad approaches exist: using store-bought oven cleaners and making a simple baking soda paste. Store-bought sprays typically advertise quick-acting formulas that loosen grime, while baking soda paste provides a gentler, less odor-heavy option that’s easy to customize with a splash of water or a bit of lemon juice. The trade-offs are clear: store-bought products can deliver fast results but may contain strong chemicals, while homemade pastes require more elbow grease but are gentler on the enamel over repeated use. Regardless of method, plan for ventilation and wear gloves to protect skin and eyes. A key step is to remove racks and soak or scrub them separately, then reassemble after the interior has dried. For best results on light soils, a 15–30 minute pre-soak with a baking soda solution can dramatically reduce scrubbing time.
When choosing between methods, consider your oven type and your tolerance for odors and fumes. Stainless steel interiors may respond differently than porcelain-coated ones, so always test a small, inconspicuous area before applying cleaners widely. If your goal is to minimize chemical exposure, baking soda and water is a safe default, and you can add a small amount of white vinegar for stubborn residue. The key is to avoid aggressive scrubbing that can scratch surfaces. Regular maintenance—wiping after use and avoiding spillovers—complements any cleaning approach and reduces overall costs over time.
When to hire a professional and how costs are structured
Professional oven cleaning becomes a sensible choice when buildup is heavy, the oven is difficult to access, or there are persistent odors that DIY methods haven’t resolved. In most markets, professional cleaning services fall into a broad cost band, typically around $100–$300, with prices influenced by oven size, design (single versus double oven), interior material, and whether extra features like a glass door or hood are included. Some technicians price by the hour for complex jobs or charge a flat rate for standard interior cleaning plus racks. When considering a pro, request a written estimate that itemizes interior cleaning, racks, glass, and hood if applicable. Ask whether the service uses non-caustic cleaners and how long the interior must remain cool before re-use. Scheduling can also affect price; off-peak times or bundled services (cleaning multiple appliances) may yield savings. In cases of severe grime, a pro can often complete the job more quickly and safely than a DIY approach, reducing the risk of damage to enamel or heating elements.
From a cost perspective, a professional clean is typically a balance between time saved and price paid. For busy households or ovens with heavy residue, the opportunity cost of a DIY approach—additional scrubbing, multiple rounds, or repeated cleaning cycles—can exceed the upfront expense of a pro service. The Cleaning Tips team notes that professional cleaning not only improves aesthetics but can restore peak oven performance by removing grime that interferes with heat distribution and energy efficiency. If you rely on self-cleaning cycles regularly, a pro can also advise on whether this feature remains the best long-term option for your model.
Time considerations and scheduling
Time is a major factor in deciding how to approach oven cleaning, especially for households juggling work and family responsibilities. A DIY interior clean typically takes about 60–120 minutes for light soils, and 120–180 minutes for heavier buildup when you factor in prep, soaking, scrubbing, and final wipe-down. The other variable is the oven’s design; double ovens or gas ranges with sealed burners may require extra disassembly time, while single, old-fashioned toaster ovens can be faster to service. Plan for additional time if you decide to remove racks, clean the door glass, or service warming drawers. When scheduling a professional cleaning, aim for a mid-morning or mid-afternoon slot to minimize disruption, and confirm whether the service includes a wipe-down of exterior surfaces and vent hood areas. If you’re coordinating multiple appliances, ask for a bundled quote to potentially save on labor charges.
For most households, a weekend cleaning session is practical, but if you’re preparing for a party or a holiday, consider booking the pro service a few days ahead to avoid last-minute delays.
Step-by-step DIY clean for light soil
This section provides a practical, repeatable sequence you can follow for light soil conditions. Before you begin, remove racks and trays, then lay down old towels to catch drips. 1) Prepare a baking-soda paste by mixing 1/2 cup baking soda with enough water to form a thick paste. 2) Spread the paste over interior surfaces, avoiding heating elements, and let it sit for 15–20 minutes to soften grime. 3) Use a damp sponge or non-scratch scrubber to wipe away the paste and grime; repeat if necessary. 4) For stubborn spots, spray a light vinegar solution on the paste residue and wipe again. 5) Clean the racks separately in warm water with dish soap; dry before reinstalling. 6) Wipe interior surfaces with a clean, damp cloth to remove any remaining residue, then leave the door ajar to air-dry. 7) Run the oven’s lowest heat for 5–10 minutes to ensure any remaining moisture evaporates. 8) Reinsert racks and wipe the exterior with a mild cleaner for a polished finish. This method emphasizes safety and minimal chemical exposure while delivering solid results for light soils.
Maintenance tips to reduce future costs and maintain efficiency
To keep future oven cleaning costs low, adopt a simple maintenance routine: wipe spills immediately after cooking, use oven liners to catch drips, and scrub the bottom surface lightly after each use. Place parchment or aluminum foil on racks to reduce baked-on residue, and run a quick wipe-down after the oven cools to minimize grime buildup. When practical, schedule a quarterly interior check, especially if you bake frequently or roast fatty foods. If you do end up with heavy buildup, a professional assessment can help you determine whether a one-time pro clean or a few periodic DIY cleans will best protect enamel surfaces and maintain energy efficiency. Regular maintenance also helps you avoid damage or warping that could lead to higher repair costs later.
Safety considerations and ventilation
Ventilation is essential during any oven cleaning, particularly when using chemical cleaners. Open windows, turn on a range hood or exhaust fan, and keep children and pets away from the kitchen during cleaning. Wear protective gloves and eye protection, and follow label directions for any cleaners you use. If you notice unusual heat, fumes, or smoke during a DIY clean, stop immediately and ventilate the space, then reassess whether a pro service is warranted. Never mix cleaners unless the product instructions explicitly permit it, as certain combinations can release hazardous gases. For models with self-clean cycles, review the manual to understand potential risk factors like metal discoloration or seals; some manufacturers advise against frequent manual intervention after a self-clean operation. Safe handling and thorough ventilation reduce health risks and protect both your family and your appliance.
Authoritative note on data and methodology
The content above synthesizes general best practices from consumer guidance and appliance-care resources. All cost ranges reflect typical market observations for 2026, presented as guidance for homeowners and renters. For a detailed, data-backed view, see the authority sources listed in the section at the end of this article. Cleaning Tips’s methods emphasize practical, low-risk options with transparent budgeting, enabling readers to tailor decisions to their home and schedule.
Cost and time comparison of common oven cleaning methods
| Method | Typical Cost | Time Required | Pros | Cons |
|---|---|---|---|---|
| DIY with store-bought cleaner | $0–$15 | 60–120 minutes | Low cost, convenient for light soils | Chemicals may be strong; variable results for heavy soils |
| DIY with baking soda paste | $0–$10 | 60–120 minutes | Non-toxic, customizable; gentle on enamel | Requires scrubbing and ventilation |
| Professional oven cleaning | $100–$300 | 120–180 minutes | Thorough removal, may improve efficiency | Higher upfront cost, scheduling needed |
| Self-cleaning cycle (if applicable) | Typically included in purchase price, varies | 1.5–3 hours | Hands-off for many soils | Not effective for heavy grime; potential odor |
Questions & Answers
What factors impact the cost of oven cleaning?
Cost is driven by oven size and type, the degree of soil buildup, whether racks or glass doors are included, and whether professional labor or specialized cleaners are used. Market rates vary by region, and bundled services can offer savings.
Cost depends on size, soil level, and whether you need racks or glass cleaned; professional labor and regional pricing also matter.
Is DIY cleaning always cheaper than hiring a pro?
In most cases, DIY is cheaper for light soils and routine maintenance. For heavy buildup or difficult access, a pro can be more cost-effective when considering time, safety, and potential enamel damage from improper cleaning.
DIY is cheaper for light soils, but heavy grime may justify a pro to save time and protect the appliance.
How long does a professional cleaning typically take?
Most professional oven cleanings take between 2 and 3 hours, depending on oven size and interior complexity. If the service includes racks or hoods, the duration may be longer.
Most pros take about two to three hours, depending on features and soil.
Can I use self-cleaning mode to avoid manual cleaning?
Self-clean cycles are convenient for routine grime but may not remove heavy, baked-on residues. They can also produce heat and odor and should be used sparingly, following the manufacturer’s guidelines.
Self-clean can help with light grime but isn’t a cure-all for heavy buildup.
How often should I clean the oven to minimize future costs?
Clean the oven interior regularly after spills and perform a light maintenance clean monthly or quarterly, depending on usage. This reduces buildup and keeps the appliance operating efficiently, potentially lowering long-term costs.
Clean spills promptly and do light maintenance regularly to cut future costs.
“Regular oven maintenance reduces cleanup frequency and preserves efficiency, making cost management easier over time.”
The Essentials
- Assess soil level before choosing method
- DIY methods are cheapest for light soils
- Heavy buildup often justifies a professional service
- Ventilate properly and wear protective gear
- Regular maintenance reduces future costs