How to Clean a Fuel Injector: Step-by-Step Guide
Learn how to clean a fuel injector safely with a comprehensive, step-by-step guide. Discover cleaners, tools, timing, and maintenance tips to restore spray, improve idle, and boost engine performance.

Follow this guide to safely clean a fuel injector and restore engine performance. You'll learn when cleaning is needed, what cleaners are safe to use, and how to flush the system with proper precautions. The steps cover bench or in-vehicle methods, required tools, and essential safety tips to protect fuel lines and sensors. Expect improved idle, smoother acceleration, and potentially better fuel economy after a successful clean.
Why fuel injectors matter for engine performance
Fuel injectors are the tiny nozzles that spray gasoline into the intake air, forming a precise air-fuel mixture the engine uses to produce power. Over time, deposits from fuel, oil, and combustion can accumulate on the injector tips, changing spray pattern, opening/closing behavior, and atomization. When spray becomes irregular, you may notice rough idle, misfires, hesitation, or reduced fuel efficiency. According to Cleaning Tips, a clean injector helps restore optimal spray, improve combustion, and support smoother operation across RPM ranges. In modern vehicles, the injector's electronics and the engine control unit (ECU) coordinate timing; even small changes in flow can cause measurable performance changes. Cleaning is not a magic fix for severe mechanical wear, but it can buy time and improve performance in engines with moderate buildup. Before you begin, identify whether symptoms align with injector issues rather than spark plugs, vacuum leaks, or sensor faults. In this guide, we cover bench and in-vehicle options, plus safety considerations, so you can choose the right approach for your vehicle and skill level.
Safety first: essential precautions before you start
Cleaning a fuel injector involves handling gasoline, solvents, and pressurized systems. To avoid fire hazards and health risks, begin by working in a well-ventilated area away from flames, and wear eye protection and gloves. Disconnect the vehicle's battery to prevent accidental short circuits, and keep a fire extinguisher nearby. Familiarize yourself with your vehicle’s manual for any model-specific cautions, such as fuel rail torque specs or sensor connections. Never work on a hot engine or with a hot exhaust, and avoid inhaling solvent vapors. If you’re cleaning the injectors on a bench, ensure you have a dedicated, well-ventilated workspace and a containment tray to catch drips. By taking these precautions, you minimize the risk of injury and damage to your fuel system.
Symptoms that suggest injector buildup
Rough idle, misfires, poor acceleration, and reduced fuel economy are classic signs of injector deposits. You might also notice engine surging at steady RPM, increased fuel smell, or difficulty starting in cold weather. On many engines, a clogged injector can cause cylinder misfire codes or performance limitations that affect driveability. A fuel trim that remains unusually high or lean during testing can also indicate injector flow issues. This section helps you judge whether a cleaning attempt is likely to help before you invest time and resources.
Cleaning options: solvents vs. additives and how they work
Engine manufacturers and chemists design cleaners that either pass through the fuel system (in-rail) or are designed to soak injectors offline (bench cleaning). In-vehicle cleaners are added to the fuel tank and rely on running the engine to circulate; bench cleaners involve removing injectors and flushing them with specialized kits. Choose cleaners that are labeled for gasoline direct injection if applicable, and avoid mixing solvent types. For older vehicles, a simple additive may help deposits, while modern engines sometimes require mechanical cleaning or professional service. Always read the product label, and ensure compatibility with your engine's materials.
How cleaning actually works in practice
Deposits form from varnish and fuel residue that adheres to injector nozzles and internal passages. Detergent cleaners, solvents, and flushing cycles aim to dissolve or carry away these deposits, restoring spray patterns. Bench cleaning allows inspection of spray tips under magnification and ensures uniform fuel flow. In-vehicle cleaning introduces cleaner into the fuel rail or intake and relies on the injector to draw it through. The result should be improved atomization, more consistent spark timing, and steadier idle. However, if deposits are severe or injectors are mechanically worn, cleaning might be insufficient.
Bench cleaning vs. in-vehicle cleaning: which is right for you?
Bench cleaning involves removing injectors and cleaning them in a dedicated kit or ultrasonic bath, which often yields the most thorough results. In-vehicle cleaning is less invasive and can address minor buildup without dismantling. The choice depends on symptoms, budget, and skill level. In many cases, a staged approach—start with an in-vehicle cleaner and escalate to bench cleaning if symptoms persist—offers a balanced path.
DIY cleaning at home: practical tips and limits
Gather the necessary tools, protect the workspace, and follow the product directions exactly. Do not run the engine in a poorly ventilated area, and ensure all solvent vapors are controlled. When using a bench cleaner, you’ll remove the fuel rail and injectors; reassembly requires careful torque and seal inspection. If you’re not confident with fuel system work, consider professional service to avoid fuel leaks or safety hazards. Keeping to manufacturer guidelines reduces the risk of damage and ensures safer results.
Common mistakes to avoid during injector cleaning
Using the wrong cleaner type or too much solvent can damage seals. Skipping pressure relief on the fuel system can cause sprays or leaks. Failing to recheck for leaks after reassembly is a common oversight. Rushing the process or skipping safe testing may leave deposits behind; always follow manufacturer specs. Do not overlook the importance of verifying spray pattern on each injector after cleanup.
Maintenance tips to prevent future injector buildup
Use high-quality fuel and change fuel filters as recommended. Periodic cleaning with mild in-tank cleaners can help, but avoid overuse of solvents. Keep the intake system clean by addressing PCV and vacuum leaks. Regularly inspect spark plugs, oxygen sensors, and ECU codes to catch issues early. According to Cleaning Tips analysis, cleaner fuel and properly maintained systems correlate with fewer deposit-related symptoms and longer injector life.
When to seek professional service
If symptoms persist after a DIY clean, or if you have a diesel engine or direct-injection system, professional service is advised. A mechanic can perform professional injector testing, ultrasonic cleaning, or replacement. They will also verify fuel pressure, injector spray patterns, and compression to avoid unnecessary repairs. The Cleaning Tips team recommends consulting a qualified technician if you’re unsure about any step or if safety concerns arise during cleaning.
Tools & Materials
- Safety glasses(ANSI-rated eye protection)
- Nitrile gloves(Protect hands from solvents)
- Fuel injector cleaner (gasoline-compatible)(Follow label directions and use for cleaning, not as additive while running)
- Rags or shop towels(For catching drips and wiping surfaces)
- Drain pan(To collect used solvent and fuel)
- Socket wrench set(To disconnect fuel lines or rail components)
- Fuel rail removal tools (optional)(Needed if bench cleaning requires rail removal)
- Safety mask or respirator (optional)(Use in poorly ventilated areas or with strong solvents)
- Service manual / model-specific guide (optional)(Torque specs and connector arrangements vary by model)
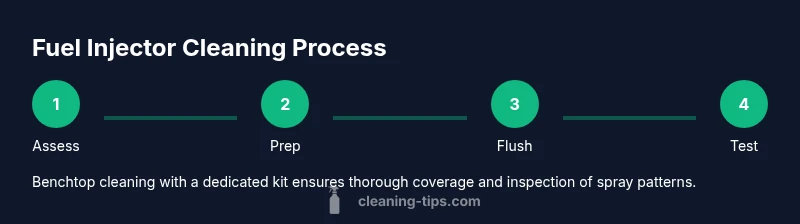
Steps
Estimated time: 45-90 minutes
- 1
Assess symptoms and plan
Identify the symptoms and confirm that injector buildup is a plausible cause. Document idle roughness, misfires, or reduced fuel economy before starting. This helps determine whether a DIY clean is appropriate or if professional service is warranted.
Tip: Write down observed symptoms and the vehicle’s make/model to guide tool selection. - 2
Safety prep and disconnect battery
Park on a level surface, turn off the vehicle, and disconnect the negative battery terminal. This reduces the risk of short circuits during electrical work or when disconnecting fuel components.
Tip: Allow the engine bay to cool for 10–15 minutes before touching components. - 3
Relieve fuel pressure
Relieve the fuel system pressure according to your vehicle’s manual to prevent fuel spray when lines are disconnected. Follow safe practices and work in a well-ventilated space.
Tip: Place rags under connections to catch drips and avoid skin contact with solvents. - 4
Access injectors and remove as needed
If bench cleaning, carefully remove the intake manifold or rail to access the injectors. Label electrical connectors and take photos to aid reassembly. Keep track of all seals and O-rings.
Tip: Use the correct socket sizes and torque specs from the service manual. - 5
Connect cleaner kit or flush lines
Attach the cleaner kit or flush adapters to the injectors as per the kit’s instructions. Ensure all connections are secure and that the cleaner is compatible with your injector type.
Tip: Verify the cleaner’s compatibility with your engine’s materials. - 6
Run cleaner through the system
If in-vehicle, run the engine according to the cleaner’s instructions, then shut off and inspect for leaks. If bench cleaning, cycle the cleaner through the injectors and monitor for consistent flow.
Tip: Do not exceed recommended run times to avoid solvent exposure or damage. - 7
Reassemble and check for leaks
Reinstall the fuel rail or injectors, torques per manual, and reconnect electrical connectors. Refill fuel system only as directed and inspect for leaks at all connections.
Tip: Prime the fuel system slowly and check for leaks before starting the engine. - 8
Test run and verify
Start the engine and observe idle smoothness and throttle response. Use a scan tool to check for trouble codes and ensure injector pulse width is within spec.
Tip: Listen for abnormal noises and re-check after a short drive.
Questions & Answers
Do I need to remove the fuel rail to clean injectors?
It depends on the cleaning method. In-vehicle cleaning often doesn’t require rail removal, but bench cleaning typically involves injector access and rail removal. Always follow the vehicle’s service manual.
It depends on the method. In-vehicle cleaning may not require removing the rail, but bench cleaning usually does. Check your manual.
Can you clean fuel injectors without removing them?
Yes, through in-vehicle cleaners added to the fuel and circulated by engine operation. However, results can be more limited than bench cleaning for severe buildup.
Yes, you can clean them without removing them, but results may be more limited for heavy deposits.
What are common injector cleaners?
Retail gasoline injector cleaners are detergents designed for in-rail use; for bench cleaning, specialized kits or ultrasonic cleaners are used. Always use products labeled for gasoline engines and compatible with your vehicle.
Common cleaners are detergents made for gasoline engines and kits designed for bench cleaning.
Are fuel injector cleaners safe for gasoline engines?
Generally safe when used as directed and compatible with your engine. Misuse or overuse can cause seals damage or solvent exposure; always follow the product label and your manual.
They're typically safe if you follow the directions and use compatible products.
How long does cleaning take?
DIY in-vehicle cleaning can take 30–60 minutes; bench cleaning may take 60–90 minutes or longer depending on access and kit complexity. Plan for setup and testing.
Most cleans take about an hour or two from setup to test drive.
Will cleaning improve gas mileage?
If deposits were hindering injector performance, cleaning can improve fuel economy modestly. Results vary by engine condition and driving style; don’t expect a miracle if there isn’t underlying deposit buildup.
It can help fuel economy a bit if deposits were reducing efficiency.
Watch Video
The Essentials
- Assess symptoms before starting the clean
- Use proper safety gear and a ventilated space
- Choose the right cleaner type for your engine
- Bench cleaning yields thorough results; in-vehicle cleaning is less invasive
- Verify no leaks and test drive after cleaning