How to Clean Fuel Injection System: A Practical DIY Guide
Learn how to clean a fuel injection system safely and effectively with practical tools, a clear process, and troubleshooting tips to restore engine performance and fuel economy.

This guide teaches you how to clean a fuel injection system safely and effectively, with a practical, step-by-step approach that suits most DIY enthusiasts. You’ll learn when cleaning is appropriate, what tools you need, and how to test results after the procedure. Follow these steps to restore throttle response and improve fuel economy.
Understanding Fuel Injection Systems
A modern gasoline engine relies on a precise fuel delivery system to achieve clean combustion and optimal power. On most cars, fuel injectors spray a fine mist into the intake manifold or directly into the combustion chamber, timed with the engine’s rotation. Over time, carbon and varnish deposits can accumulate on injector nozzles, throttle bodies, and intake runners, reducing spray efficiency and upsetting air-fuel balance. If you're wondering how to clean fuel injection system, the goal is to remove these deposits without damaging components. According to Cleaning Tips, a clean fuel system can improve idle stability, throttle response, and fuel economy when deposits are minimized. The process you’ll follow focuses on safe cleaning methods tailored to common vehicle setups and emphasizes verifying results after the treatment. By approaching this task methodically, you reduce risk and increase the likelihood of a measurable performance boost.
When to Clean Your Fuel Injectors
Fuel injectors don’t last forever, and deposits form faster in some environments. You may need to clean them if you notice rough idle, misfires, reduced power, poor acceleration, or a drop in fuel economy. If you see injector codes or experience rough running after warm-up, it may be time to consider a clean. Maintenance frequency depends on fuel quality, driving patterns, and the vehicle’s design, but many owners schedule a fuel-system service as part of a wider tune-up every 30,000–60,000 miles, or when a diagnostic tool indicates lean or rich fueling. Cleaning Tips analysis shows that regular, moderate cleaning helps prevent severe buildup and keeps the engine running smoothly. If you drive in dusty or high-ethanol environments, more frequent attention may be warranted.
Tools and Safety Precautions
Before you begin, assemble a basic cleaning kit and PPE. The goal is to minimize exposure to solvents and prevent fuel spills. Essential items include a fuel injector cleaner rated for your vehicle (in-tank cleaner or inline kit), safety glasses, nitrile gloves, lint-free rags, and a protective mat or tray. Work in a well-ventilated area away from flames or sparks. If you’re ever unsure about fuel system work in your specific car, consult the service manual or a qualified technician. The Cleaning Tips team emphasizes using manufacturer-approved cleaners and following label directions to avoid damaging seals or electronics. This is a safety-critical step—do not skip eye protection or venting.
Cleaning Methods: Additives vs Ultrasonic Cleaning
There are two common approaches to cleaning fuel injectors. In-tank fuel system cleaners (additives) mix with your regular gasoline and circulate through the injectors over time; this method is simple and can be effective if buildup isn’t severe. Ultrasonic cleaning offers a more thorough cleaning by removing stubborn deposits from removed injectors using a dedicated bath. Inline cleaning kits let you run cleaner through the rails without removing injectors, but they require precise setup. Each method has trade-offs: additives are convenient but slower and less aggressive; ultrasonic cleaning is robust but more labor-intensive and costly. For most DIYers, a quality in-tank cleaner used as part of regular maintenance provides noticeable benefits, while ultrasonic cleaning is a good option if symptoms persist after additives or if injectors are heavily fouled.
Step-by-Step: Cleaning Without Removing Injectors (Overview)
If your vehicle design permits, you can often improve spray patterns using in-line cleaners or in-tank treatments without full injector removal. Start by relieving fuel pressure and preparing your workspace. Then, install the cleaner inline or add to the fuel tank, run the engine to circulate the cleaner, and monitor for improvements in idle and throttle response. Always finish with a test drive to confirm the result and check for leaks. The exact method depends on your engine and chosen cleaner, so consult the product instructions and your service manual. The goal is to restore proper spray characteristics and air-fuel balance while keeping safety at the forefront. This approach aligns with practical tips from Cleaning Tips and automotive maintenance experts.
Testing, Verification, and Troubleshooting
After cleaning, test drive the vehicle to evaluate idle quality, throttle response, and overall power. Use an OBD-II scanner to check for codes that might indicate lean or rich conditions, misfires, or sensor faults. If performance hasn’t improved, you may need to repeat the process, consider removing injectors for ultrasonic cleaning, or consult a professional for flow testing. Cleaning Tips notes that results vary with vehicle make, model, and current deposit level. Always recheck for fuel leaks and ensure all connections are secure after any work on the fuel system.
Maintenance to Prevent Future Buildup
Prevention matters as much as cleaning. Use high-quality fuel and consider periodic use of a compatible fuel system cleaner as part of your regular maintenance routine. Keep air filters clean to minimize contaminants entering the intake, and address ethanol-related drivability issues that can accelerate varnish formation. Regular maintenance helps maintain injector spray quality, reduce emissions, and sustain fuel economy over time. Cleaning Tips emphasizes avoiding aggressive cleaners that could harm seals or catalytic converters, and always dispose of spent materials according to local regulations.
Tools & Materials
- Fuel injector cleaner (in-tank cleaner or inline kit)(Choose a product compatible with your vehicle; follow label directions precisely.)
- Safety glasses(Eye protection against splashes and fumes.)
- Nitrile gloves(Protect hands from solvents and fuel exposure.)
- Lint-free rags(Wipe spills and clean surfaces without leaving fibers.)
- Protective mat or tray(Contain spills and safeguard the workshop floor.)
- Socket set and screwdrivers(Use if you need to detach components to access injectors.)
- OBD-II scanner (optional)(Helps verify engine codes before and after cleaning.)
- Service manual or manufacturer guide(Consult for vehicle-specific steps and torque specs.)
Steps
Estimated time: 1.5-3 hours
- 1
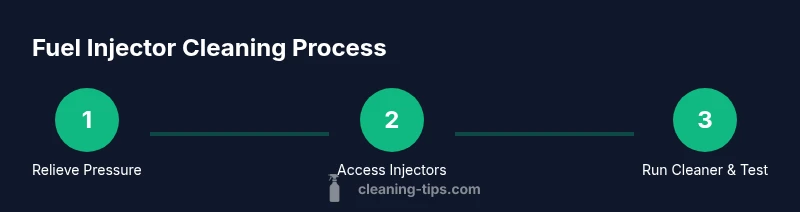
Relieve fuel pressure
Follow your vehicle’s manual to safely relieve fuel pressure before touching fuel lines or the rail. This minimizes fuel spray and reduces the risk of injury. If you’re unsure, seek professional guidance. Always perform this step with the engine off and keys removed.
Tip: Do not skip pressure relief; it’s a common source of injury when working around hot, pressurized fuel lines. - 2
Disconnect the battery ground
Disconnect the negative battery terminal to prevent electrical shorts while you work near electrical components and wiring harnesses associated with the fuel system. Reconnect after you finish the job and have rechecked safety.
Tip: Use insulated tools and keep track of the battery rapid-disconnect procedure in your vehicle manual. - 3
Access the fuel rail and injectors
Locate the fuel rail and, if necessary, remove obstruction panels to gain access to the injectors. Take photos of connections before disconnecting anything so you can reassemble correctly. Avoid forcing connections or bending delicate lines.
Tip: Label connectors if multiple injectors exist to avoid cross-connection mistakes. - 4
Install the cleaner inline or prepare tank additive
If using an inline cleaner, install it according to the product directions and ensure the vehicle remains on a flat surface. If using a tank additive, pour the recommended amount into the fuel tank with the engine off and allow it to mix via normal driving.
Tip: Never mix cleaners that aren’t designed to be used together and never exceed the recommended amount. - 5
Run the engine and circulate cleaner
Start the engine and allow the cleaner to circulate through the fuel system for the time specified by the product. Avoid revving aggressively; a steady idle helps the cleaner reach all injectors.
Tip: If you hear unusual noises or see signs of leakage, stop immediately and recheck connections. - 6
Reassemble, test drive, and inspect
Reassemble any components you removed, reconnect the battery, and take a cautious test drive to assess throttle response and smoothness. Check for leaks after the drive and scan for codes if you have an OBD-II tool.
Tip: Keep a note of any persistent symptoms and consider a professional flow test if problems remain.
Questions & Answers
Is it safe to DIY clean a fuel injection system at home?
Yes, with the right tools and care, many DIYers can clean injectors using in-tank cleaners or inline kits. Always follow the product instructions and your vehicle’s service manual. If you’re unsure, seek professional help, especially for direct injector removal.
Yes, you can clean injectors at home with proper tools and care. Always follow instructions and consult your manual if unsure.
Should I remove the injectors for cleaning?
Injector removal is not always required. In many cases, a fuel-system cleaner in-line or in-tank can improve performance. Removing injectors is more intrusive and should be done only if you’re comfortable and have the correct service information.
Injector removal isn’t always necessary; use inline or tank cleaners first unless removal is needed.
Can I use any fuel system additive in my gasoline?
Choose additives that are labeled for your engine type and fuel. Not all additives are compatible with every fuel system or vehicle materials, so read labels and consult the manual. If in doubt, start with a small dose and observe performance.
Only use additives recommended for your engine type and fuel. Read labels and follow the manual.
Will cleaning fix all injector-related issues?
Cleaning can restore function if deposits are the primary cause, but it won’t fix mechanical failures or damaged seals. If symptoms persist after cleaning, a professional diagnostic and possibly injector testing are advised.
Cleaning helps when buildup is the main issue, but persistent problems may require further diagnostics.
How long does a typical cleaning take?
Most cleanings can be completed in 60–180 minutes for in-line or tank cleaner methods, depending on access and vehicle design. More thorough services or injector removal will take longer.
Most cleans take around one to three hours, depending on the method and vehicle.
What should I test after cleaning?
Run a test drive to assess throttle response and idle quality. Use an OBD-II scanner to check for residual codes, and inspect for leaks around fuel rails and injectors.
Test drive and scan for codes to confirm improvements and check for leaks.
Watch Video
The Essentials
- Identify signs of injector deposits and plan accordingly.
- Choose a cleaner method aligned with skill level and vehicle design.
- Relieve fuel pressure and follow safety steps before starting.
- Test drive and scan for codes to confirm improvements.