Where to Clean Injectors: A Practical Home Guide 2026
Learn where to clean fuel injectors, when to DIY vs. hire a pro, and a thorough step-by-step process. This Cleaning Tips guide covers tools, safety, and best practices for better engine performance.

In this guide you will learn where to clean fuel injectors and how to choose between at-home methods and professional service. You’ll gather safety gear, understand when to DIY, and follow a step-by-step approach to maintain engine performance. The process focuses on safety, proper cleaners, and when to seek expert help.
What are fuel injectors and why clean them?
Fuel injectors deliver precise amounts of fuel into each cylinder. Over time, deposits from gasoline, ethanol blends, and environmental contaminants can build up on the nozzle openings and in the intake pathway. That buildup alters spray patterns, reduces atomization, and can cause rough idle, misfires, or reduced fuel efficiency. Clean injectors help restore proper spray, improve combustion, and protect engine performance. According to Cleaning Tips, routine injector maintenance is a practical part of a healthy, low-stress engine. In this section, we’ll cover what to know before you decide how to clean them, and what outcomes to expect from different methods.
Signs your injectors need cleaning
Rough idle, hesitation, or misfires during acceleration are common indicators of dirty injectors. You may also notice reduced fuel economy or higher emissions, occasional engine surges, or visible exhaust smoke in extreme cases. If you recently filled up with a new fuel blend or experienced a long period of low-quality gas, deposits can form more quickly. The Cleaning Tips team notes that diagnosing injector issues often requires ruling out spark plugs, air filters, and vacuum leaks first before deciding on cleaning.
Cleaning options: DIY vs professional
Do-it-yourself cleaners poured into the fuel tank can help break down mild deposits and are a cost-effective first step. Always use cleaners approved for gasoline engines and follow the product directions closely. Flush-style injector cleaning kits that circulate cleaner through the system are another DIY option, but results vary by vehicle and skill level. For stubborn deposits or high-mileage engines, professional cleaning—often involving removing injectors and cleaning them ultrasonically or replacing worn parts—delivers the most thorough results. Cleaning Tips analysis shows that most drivers see noticeable improvements when combining a mild DIY cleaner with a professional assessment for persistent issues. Always consider your vehicle’s warranty and manufacturer recommendations before proceeding.
Safety, prerequisites, and preparation
Before any work, wear safety glasses and gloves, work in a well-ventilated area, and keep a fire extinguisher nearby. Disconnect the battery to prevent accidental sparks, and if you’re working on a high-pressure fuel system, carefully relieve pressure according to the service manual. Collect spills with absorbent pads and dispose of old cleaners according to local regulations. Have the vehicle’s service manual on hand for torque specs and injector specifications. If you’re unsure about depressurizing the system, stop and consult a professional. The Cleaning Tips team emphasizes safety first and recommends stopping if you detect fuel leaks, unusual fumes, or damaged wiring.
What to expect from a cleaning session
A successful cleaning session should improve spray quality, idle stability, and throttle response, especially in older or high-mileage engines. In many cases, you may notice smoother starts and a small uptick in fuel economy after the first few drive cycles. If the symptoms persist after standard DIY cleaners, professional service is often the best route to avoid potential engine damage. The Cleaning Tips team reminds readers that some deposits require mechanical cleaning or injector replacement for lasting results.
Authoritative sources
For further reading on vehicle maintenance and fuel-system care, consult reputable sources such as government and major publications:
- https://www.nhtsa.gov/
- https://www.energy.gov/
- https://www.consumerreports.org/cars-maintenance/
toolsMaterialsVersion2_0_compatibilityNote”:null},
toolsMaterials
Tools & Materials
- Fuel injector cleaner (manufacturer-approved)(Choose a product compatible with your engine type and follow label directions.)
- Safety glasses or goggles(ANSI Z87.1 compliant if possible.)
- Mechanic’s gloves(Protect hands from spills and chemicals.)
- Owner’s manual or service manual(Refer to fuel system depressurizing steps and injector specs.)
- Bucket and absorbent rags(Clean spills and catch any drips during the process.)
- Fuel pressure gauge or service kit(Optional for advanced DIYs; used to monitor pressure during procedures.)
- Disconnect tools (if removing injectors)(Holds or releases lines as needed per vehicle model.)
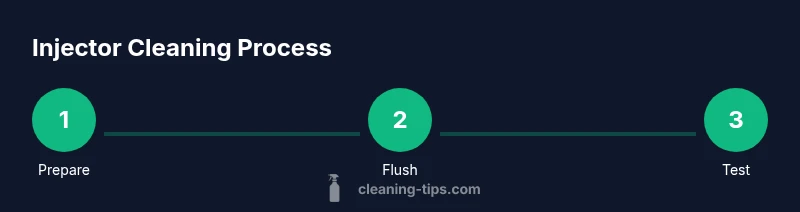
Steps
Estimated time: 60-120 minutes
- 1
Prepare safety gear and workspace
Set up in a well-ventilated area. Put on safety glasses and gloves. Gather all required tools and ensure you have the vehicle's service manual for reference. Ensure the engine is cool before starting to avoid burns.
Tip: Double-check that the area is free of ignition sources and that you have a clear path to collect and dispose of waste. - 2
Relieve fuel system pressure safely
Follow the manual to relieve pressure in the fuel rail. This minimizes spray risk when opening lines. If you’re uncertain, do not proceed—consult a professional to avoid fire hazards.
Tip: Never work on a hot engine; hot fuel lines can spray and cause serious burns. - 3
Add cleaner to the fuel tank
Pour the approved cleaner into the fuel tank as directed by the product label. Use the recommended amount for your fuel capacity and engine type. This helps dissolve varnish and deposits as you drive.
Tip: Run the engine long enough to circulate cleaner through the injectors, following the cleaner’s driving-cycle guidance. - 4
Drive or idle to circulate cleaner
Take a short test drive to circulate the cleaner through the fuel system. If your vehicle has a turbo or high-performance setup, follow any model-specific guidance from your manual.
Tip: If you notice unusual smells or misfiring, stop and reassess before continuing. - 5
Optionally flush with a dedicated kit
For stubborn deposits, use a flush kit that runs cleaner directly through the injectors while the engine runs. This step is more involved and may require injector removal in some models.
Tip: Direct injector cleaning provides deeper cleaning but increases complexity and risk. - 6
Inspect results and test drive
After the cleaning cycle, take the car for a longer test drive to confirm smoother idle and improved power response. If symptoms persist, schedule a professional inspection.
Tip: Document any persistent issues to share with a technician if needed.
Questions & Answers
What are the common signs that injectors are dirty?
Common signs include rough idle, misfires, reduced fuel economy, hesitation during acceleration, and unusual exhaust odors. If several symptoms appear, it’s wise to assess other causes like spark plugs or air filters before deciding on cleaning.
Look for rough idle or misfires, and reduced fuel economy as clues that injectors may be dirty. If you’re unsure, start with a simple cleaner as a first step and consult a pro if symptoms persist.
Can I clean injectors myself at home?
Basic fuel-system cleaners can help with light deposits. For stubborn buildup or high-mileage engines, professional cleaning is often recommended to avoid damage or incomplete cleaning.
Yes, you can try a safe fuel system cleaner first, but persistent problems usually require professional service.
Are fuel injector cleaners effective?
Cleaners can dissolve varnish and minor deposits, improving spray patterns and idle. They are less effective on large deposits or mechanical injector wear, which may require ultrasonic cleaning or replacement.
cleaners work for minor buildup, but serious deposits may need professional cleaning.
Is it necessary to remove injectors for cleaning?
Removing injectors is sometimes required for thorough cleaning, especially on older vehicles. In many cases, professional service uses ultrasonic cleaning or injector replacement.
Sometimes yes, sometimes no—depends on the deposit level and vehicle design.
How long does injector cleaning take?
DIY cleaning can take about 60-120 minutes, depending on whether you’re flushing via the fuel rail or removing injectors. Professional cleaning may take longer due to diagnostic checks and potential parts replacement.
A couple of hours for DIY; longer if you’re having a shop handle the job.
Should I replace injectors instead of cleaning?
Replacement is considered when injectors are worn, leaking, or severely clogged. Cleaning is a cost-effective first step for mild to moderate buildup.
Replacement is typically a last resort after cleaning and diagnostic checks.
Watch Video
The Essentials
- Identify symptoms early to interrupt deposit buildup
- DIY cleaners help with mild deposits but fail on severe cases
- Professional cleaning offers the most thorough solution for stubborn deposits
- Always prioritize safety and manufacturer guidance