How to Clean a Blackstone Griddle: A Step-by-Step Guide
Learn a proven method to clean a Blackstone griddle, protect the seasoned surface, and keep it ready for cooking with a simple, safe routine. Includes tools, steps, safety tips, and maintenance guidance from Cleaning Tips.

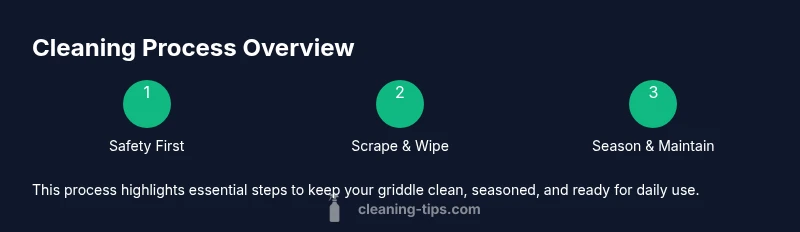
By following these steps, you will restore a Blackstone griddle to a like-new condition, removing grease, burnt-on food, and residue while protecting the seasoned surface. Start with safety prep, then choose the right tools and cleaners, perform the cleaning routine for hot and cold surfaces, and finish with proper reseasoning. This guide covers routine maintenance and deeper cleanings.
Why Regular Cleaning Extends Griddle Life
If you’re wondering how to clean blackstone griddle, regular cleaning is the most effective defense against stubborn burnt-on residue, rust, and flavor transfer. A clean surface heats more evenly, cooks more predictably, and preserves the natural patina that seasoned griddles develop over time. According to Cleaning Tips, a consistent cleaning routine reduces grease buildup that can trap odors and flavors, and it helps prevent hard-to-remove crusts that degrade performance. This section explains why a simple wipe-down after cooking, plus a deeper clean on a schedule, pays off in the long run. You’ll learn how to distinguish quick maintenance from a full cleanup, so you never overdo or underdo the process. The goal is to keep your grill surface smooth, even, and ready for your next plate, whether you’re searing fajitas or cooking breakfast hash.
Safety First: Handling Heat and Tools
Working around a hot cooking surface requires respect for heat and careful tool selection. Always turn off the burners and disconnect gas lines if applicable before you begin a cool-down routine. Use heat-resistant gloves when you touch the surface, and keep a clean, non-scratch scraper handy to remove debris without gouging the seasoned layer. If your griddle is still hot, wait 5–10 minutes after turning off the flame to let surface oils set and steam subside. Cooling times vary, but never rush cleaning when the metal is dangerously hot. A calm, methodical approach reduces the risk of burns and device damage while ensuring you don’t inadvertently spread residue.
Gather the Right Tools and Materials
Preparing the right tools prevents improvisation that can scratch the surface or miss stubborn bits. A dedicated metal scraper or brass brush can help lift crust without dulling the seasoning. For gentler cleanup, non-metal pads or scrubbers work well—especially on the flat top. Paper towels or clean cloths absorb moisture and debris, while a spray bottle of warm water or a light dish soap (optional) helps loosen grime. Finally, a small amount of high-smoke-point oil (like canola or flaxseed) for reseasoning keeps the surface non-stick and rust-resistant. Keeping these items organized within arm’s reach speeds up the process and reduces temptation to over-wet the surface.
Understanding Cleaning Methods: Quick Clean vs Deep Clean
There are two common cleaning paths for a Blackstone griddle. A quick clean involves scraping, wiping with a warm cloth, and a light oiling to preserve the seasoning after cooking. A deep clean targets burnt-on residue and older oil buildup, often requiring water, salt, and a more thorough scrub. The choice depends on how recently you cooked, what you cooked, and how dirty the surface is. For quick maintenance, you’ll focus on debris removal and surface drying. For deep cleans, you’ll systematically dissolve fats, reheat to set a new layer of seasoning, and reassess the surface texture before applying oil.
Pre-Clean Prep: Before You Start
Before you start cleaning, establish a clear plan and environment. Move any tools you’ll need within reach, ensure ample ventilation if you’re using soap, and lay out towels to catch splatter. If your griddle is mounted or in a cabinet setup, verify the handle and knobs won’t get damaged by water. A quick inspection now helps you avoid missed residues and ensures you have time to reheat after cleaning for seasoning. This prep step reduces the risk of accidents and speeds up the overall process.
Cleaning a Hot Surface: Quick Routine
When the surface is safely hot (not scorching), you can perform a faster cleanup to remove fresh residues. Start by lowering the heat slightly and scraping with a stiff scraper to lift grease. Wipe with paper towels or a clean rag, then apply a light mist of warm water to loosen tougher spots. Repeat scraping and wiping until the surface glistens. Finish by drying thoroughly and applying a thin layer of oil to protect the surface as it cools. This approach minimizes crust formation and keeps your griddle ready for immediate use.
Post-Clean and Reseasoning for Longevity
After a complete cleaning, reseason the griddle to maintain the protective patina. Apply a very thin coat of high-smoke-point oil across the surface, then heat gradually until the oil polymerizes into a smooth, dark film. Wipe away excess oil and let the surface cool completely. Regular reseasoning builds a non-stick barrier that resists rust and makes future cleanings easier. Cleaning Tips recommends performing a light reseasoning after every deep clean and after heavy cooking sessions like barbecues or seafood feasts to keep the surface resilient.
Tools & Materials
- Griddle scraper or stiff brass brush(Use for crusted residue; avoid metal that gouges the surface)
- Non-metal scrub pad or chain mail scrubber(Helpful for stubborn spots but gentle on seasoning)
- Paper towels or clean lint-free cloths(For wiping and drying without leaving fibers)
- Warm water spray bottle(Assists in loosening grime during deep cleaning)
- Mild dish soap (optional)(Use sparingly if you prefer a soap clean; not always necessary)
- High smoke point oil (canola or flaxseed)(For reseasoning after cleaning)
- Oven mitts or heat-resistant gloves(Protect hands during hot handling and reheating)
- Soft towel or microfiber cloth(Polish surface after reseasoning)
- Salt (kosher or sea salt) for abrasive cleaning(Helps lift burnt-on residue when surface is hot)
- Non-scratch plastic spatula or tongs(Assist in moving debris without scratching)
Steps
Estimated time: 30-60 minutes
- 1
Power down and cool
Turn off the burners and allow the surface to cool to a safe handling temperature. This reduces steam and ensures you won’t burn your hands. If mounted on a wall, lower any heat source completely and wait 5–10 minutes.
Tip: Cooling is essential before scraping to avoid steam burns and to prevent warping from quick temperature changes. - 2
Scrape off loose debris
Use a stiff scraper to lift and remove grease and food remnants while the surface is still warm. Work in sections, moving from the front to the back, and avoid forcing off crust that protects the seasoning.
Tip: Keep scrapings in a container to prevent re-depositing on the surface. - 3
Wipe with a towel
Wipe the surface with a dry paper towel to remove as much loose residue as possible. If you see sticky patches, dampen the towel slightly and wipe again.
Tip: A dry wipe helps you assess how much cleaning will be required next. - 4
Deep clean if needed
For stubborn areas, apply a small amount of warm water and a light soap (optional) or sprinkle salt and scrub with a non-metal pad. Rinse by wiping with a damp cloth and repeat until clean.
Tip: Avoid soaking the griddle; moisture can cause rust if not dried thoroughly. - 5
Rinse and dry
Rinse the surface with a damp cloth or more warm water if you used soap. Dry the griddle completely with towels to prevent rust.
Tip: Drying is critical; even small amounts of water left behind can lead to spots and rust. - 6
Apply a thin oil layer
Spread a very thin coat of oil across the entire surface. Use a lint-free cloth to ensure an even, light film that won’t gum up when heated.
Tip: Less is more; heavy oil can create a sticky layer during reheating. - 7
Heat to polymerize
Turn the heat back on briefly and allow the oil to bake into a protective patina. Stop when you see a dark, smooth surface and no smoke.
Tip: If you see excessive smoke, wipe excess oil and reduce the flame slightly. - 8
Cool and inspect
Let the griddle cool completely, then inspect for uniform color and sheen. If needed, repeat a light reseasoning after a few cooks.
Tip: Regular checks help you catch rust or uneven seasoning early.
Questions & Answers
Do I need to season after every cleaning?
A light reseason after a deep clean or heavy use helps maintain the non-stick surface. For routine wipe-down cleans, a minimal oil layer is usually enough until your next cook.
Yes, a light reseason after a deep clean or heavy use helps protect the surface. For quick cleans, a thin oil layer is usually enough until the next cook.
Can I use soap on a Blackstone griddle?
Soap is optional on a Blackstone griddle. If you choose to use soap, use a small amount and rinse thoroughly. Many cooks prefer warm water and salt for a soap-free deep clean to preserve seasoning.
Soap is optional. If you use it, use a small amount and rinse well; otherwise warm water and salt can do a good job without disturbing the seasoning.
How often should I deep clean the griddle?
Deep cleaning should be done when you notice heavy grease buildup, burnt residues, or after cooking strong odors. For frequent weekend cooks, a quarterly full clean is common, with lighter cleanings between uses.
Deep clean when buildup is noticeable or after cooking strong odors. Many people do a full clean quarterly with lighter cleans in between.
What tools are best for burnt-on residue?
A stiff scraper and a non-metal scrub pad work well for burnt-on bits. For very stubborn spots, use salt as an abrasive with warm water, then wipe clean.
Use a stiff scraper and a non-metal scrub pad; for stubborn spots, salt with warm water helps lift the crust.
Is it safe to use water on a hot surface?
Avoid pouring water on a fully hot surface. Allow cooling to a safe temperature before cleaning to prevent warping and dangerous steam.
Don’t pour water on a hot griddle. Let it cool to a safe temperature before cleaning to prevent warping and burns.
Can I use vinegar on my griddle?
Vinegar can be used in small amounts for odor control, but avoid aggressive acidic cleaners that could strip seasoning. Rinse well if used and reseason after.
Vinegar is okay in small amounts for smell control, but don’t overdo it and make sure you reseason afterward.
Watch Video
The Essentials
- Regular cleaning protects seasoning and extends life
- Use the right tools to avoid scratching the surface
- Deep cleans remove built-up residue and refresh the patina
- Season lightly after cleaning to maintain non-stick performance