How to Clean Gear Cycle: Practical DIY Cleaning Guide
Learn a complete, step-by-step method to clean a bike's gear cycle, protect drivetrain parts, and extend life. Get practical tools, safety tips, and maintenance routines for a smoother ride.

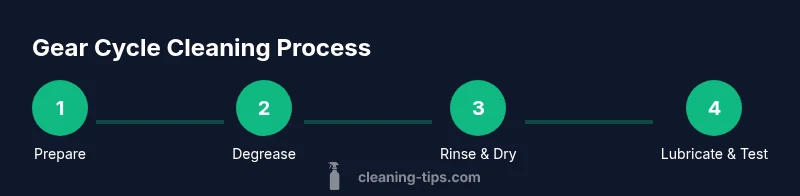
You will learn a complete, step-by-step method to clean the bike gear cycle, including inspection, degreasing, scrubbing, rinsing, drying, and lubrication. Gather essential tools, choose safe degreasers, and follow a defined sequence to protect drivetrain components and improve shifting performance.
Why clean gear cycle matters
Keeping the bike gear cycle clean matters for shifting precision, drivetrain longevity, and overall ride quality. Regular cleaning removes grit and old lubricant that can grind against bearings and wear teeth on the chainring and cassette. A clean drivetrain shifts more smoothly, wastes less energy, and resists rust in wet conditions. According to Cleaning Tips, proactive maintenance reduces component wear and helps you ride with confidence in rain, mud, or dusty environments. In this guide, you’ll learn how to clean gear cycle components—the chain, chainrings, cassette, and derailleurs—using safe cleaners and proper technique. You’ll also build a simple maintenance routine you can repeat after every few rides or after heavy dirty conditions, ensuring a healthier, more efficient bicycle.
Assessing the gear cycle before cleaning
Before you touch any tool, do a quick diagnostic of the drivetrain. Shift through all gears to identify stiff links, skipped shifts, or sluggish response. Look for rust on the chain, bent derailleur pulleys, or excessive wear on chainrings. If you notice persistent skipping, unusual noises, or chains that feel loose, plan for deeper maintenance or possible replacements. A thorough pre-check helps you decide whether to perform a light wipe-down or a full degrease and scrub. This prep also minimizes wasted steps and keeps you safe by avoiding sprung tension on the cassette or derailleur.
Cleaning agents and degreasers: choosing the right solution
Choose gentler, bike-specific degreasers for heavy grime and mild dish soap for routine cleaning. Avoid harsh solvents that can degrade seals, plastics, or painted surfaces. For wet, muddy rides, a two-step approach works well: apply a bike-specific degreaser to the chain and cassette, then scrub with brushes before rinsing. Some riders opt for biodegradable cleaners to reduce environmental impact. After selecting a cleaner, test it on a small area first to ensure it doesn’t affect rubber seals or lubrication compatibility. Cleaning Tips recommends aligning your cleaner choice with your local climate and riding style to balance effectiveness and safety.
Pre-cleaning safety and workspace setup
Safety comes first. Wear gloves to protect skin from solvents and dirty water, and work in a well-ventilated area. Use a stand or stable surface to ensure the bike won’t tip over during scrubbing. Keep a dedicated set of brushes and rags for drivetrain cleaning to avoid cross-contamination with kitchen or household cleaners. If your bike has electronic components or integrated systems, disconnect power sources if applicable and follow the manufacturer’s guidelines. A tidy workspace reduces the risk of slips and makes every step clearer.
Deep clean and degrease process: hands-on steps
The deep clean targets every moving part: chain, chainrings, cassette, derailleur pulleys, and jockey wheels. Apply degreaser to the chain and cassette, let it dwell for a moment, then scrub with a stiff brush. Use a smaller brush for tight spots between teeth and around pulleys. After scrubbing, rinse thoroughly with water to remove all cleaner and dissolved grime. For stubborn gunk, repeat the degrease-and-scrub cycle once more. Ensure you don’t get water into bearing housings or sealed areas that may trap moisture, which can promote corrosion.
Rinse, dry, and lubricate: finishing the job
Rinse the drivetrain completely and dry it with clean towels or microfiber cloths. After drying, inspect for remaining grime and dry any moisture from the derailleur pulleys and chain links. Apply the appropriate lubricant to the chain, wiping off excess to prevent attracting dirt. Lubricate pivot points and derailleur joints as recommended by the bike manufacturer. Finally, re-check shifting by rotating the cranks and clicking through gears to confirm smoothness. A proper dry and lube sequence helps prevent future buildup and preserves shifting accuracy.
Maintenance plan and future-proofing your gear cycle
Establish a maintenance cadence based on riding conditions and frequency. After muddy or wet rides, clean and re-lubricate the chain promptly. For dry conditions, lighter cleans may suffice, followed by a quick lube and wipe-down. Keep a simple log of cleaning days and any adjustments to the derailleur alignment or chain wear. Consider periodic inspections by a shop technician if you notice unusual wear patterns or persistent shifting issues. Cleaning Tips emphasizes consistency: a small, regular routine beats infrequent, heavy cleans.
Common mistakes and quick troubleshooting
Common mistakes include using household solvents that degrade seals, neglecting to dry the drivetrain thoroughly, over-lubricating, and skipping the rinse step which leaves sticky residue. If shifting feels gritty after cleaning, re-check for moisture in the pulleys, ensure the chain is fully dry, and re-lubricate. If the chain remains sticky or shows persistent rust, consider replacing worn components. Remember, a clean drivetrain is not just about cosmetics; it protects performance and efficiency over time.
Tools & Materials
- Bike-specific degreaser(Choose biodegradable if possible; apply to chain and cassette)
- Stiff-bristled brush set(One stiff brush for cogs, one soft brush for links)
- Old toothbrush(For tight spots between teeth and around pulleys)
- Microfiber cloths / rags(Use separate cloths for degreaser and cleanup)
- Chain lubricant (dry or wet)(Select based on climate and riding style)
- Water source (hose or spray bottle)(Gentle spray or hose; avoid high-pressure jets on bearings)
- Bike stand or stable work surface(Keeps bike steady during scrubbing)
- Protective gloves(Optional, for skin protection and grip)
Steps
Estimated time: 60-75 minutes
- 1
Prepare workspace and bike
Place the bike on a stand or stable surface. Gather all tools, and shift the gears to ease access to the chain and cassette.
Tip: Set up a dedicated cleaning area to avoid cross-contamination with household surfaces. - 2
Apply degreaser to drivetrain
Spray degreaser generously on the chain, cassette, and derailleur pulleys. Allow a brief dwell time to loosen grease.
Tip: Avoid soaking sealed bearings; keep degreaser focused on moving parts. - 3
Scrub moving parts
Use the stiff brush for the chainring and cassette and the toothbrush for tight spots. Scrub until grime loosens and foams.
Tip: Work from the inside of the chainring outward to minimize recontamination. - 4
Rinse and inspect
Rinse with controlled water flow to wash away dissolved grime. Inspect for remaining gunk and repeat degreasing if needed.
Tip: Keep water away from the derailleur’s pivots to avoid infiltration. - 5
Dry drivetrain thoroughly
Pat dry with clean towels; allow any moisture to evaporate before lubrication.
Tip: Drying completely prevents dilution of lubricant and rust formation. - 6
Lubricate and test
Apply a thin layer of lubricant to the chain and pivot points. Wipe off excess to prevent dirt pick-up, then rotate pedals and shift through gears to test.
Tip: Use bike-friendly lube appropriate for your climate; less is more.
Questions & Answers
Do I need to remove the chain to clean the gear cycle?
Not always. You can clean most of the drivetrain without removing the chain, but a full degrease may be easier with the chain off for complete access. If the chain is very dirty or rusty, removal is recommended.
You can usually clean the drivetrain without taking off the chain, but for heavy grime, removing the chain makes deep cleaning easier.
Can I use household degreasers or dish soap?
Household degreasers are not ideal for bike components; choose bike-specific degreasers or mild cleaners. Dish soap can work for light cleaning but may require extra rinsing to remove residues.
Stick with bike-specific degreasers when possible; dish soap is okay for light cleaning but rinse well.
How long does a typical clean take?
A standard clean, including masking and lubrication, typically takes around 60 minutes depending on dirt level and component wear.
Most cleanings take about an hour, more if there’s heavy grime or rust.
What lubricant should I use after cleaning?
Choose a bike-specific chain lubricant suitable for your riding conditions. Apply a thin film and wipe away excess to prevent dirt buildup.
Use a proper bike chain lubricant and wipe off the excess after applying.
Is WD-40 suitable for bike chains?
WD-40 is a solvent, not a lubricant for bikes. It can help loosen grime, but you should apply a proper bike lubricant afterward to protect the chain.
WD-40 helps clean but it isn’t a lubricant for bikes; re-lubricate after cleaning.
How often should I clean the gear cycle?
Clean the drivetrain after heavy exposure to mud and grime, or at least every few rides in wet conditions. In dry climates, a lighter wipe-down can suffice between deeper cleans.
Clean as conditions demand, aiming for a deeper clean after muddy rides.
Watch Video
The Essentials
- Inspect drivetrain before cleaning to plan the approach
- Use bike-specific degreasers and tools for safe cleaning
- Dry thoroughly and lubricate to prevent rust and wear
- Establish a regular cleaning schedule based on riding conditions
- Avoid harsh solvents that could damage seals and paint