How to Clean Ice Maker with Vinegar
Learn a safe, practical method to clean your ice maker using vinegar. This 1800-word guide covers prep, dilution, rinsing, and maintenance for fresher tasting ice.

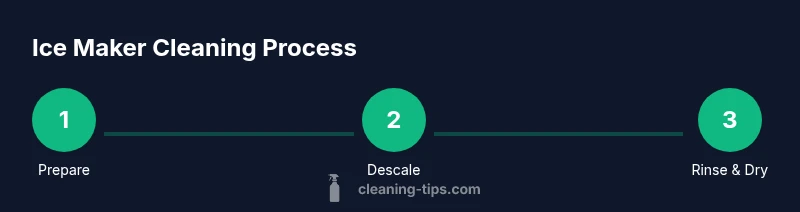
According to Cleaning Tips, you can safely clean an ice maker with distilled white vinegar as a natural descaler. Start by emptying the bin, unplugging the unit, and removing any removable parts. Run a vinegar solution through the reservoir, pause to soak mineral buildup, then flush with fresh water and dry before reassembling.
Understanding why vinegar works for ice makers
Mineral buildup from hard water is a common culprit behind cloudy ice, slower production, and off flavors. Over time, calcium and magnesium compounds precipitate on surfaces inside the ice maker—the reservoir, the ice mold, and the thin tubing that feeds water to the tray. This scale creates micro-channels that restrict flow, reduce ice quality, and can harbor odors. Distilled white vinegar contains acetic acid, a mild descaler that can dissolve mineral deposits without harsh fumes or residues more aggressive cleaners might leave behind. When used correctly, regular vinegar descales can extend the life of an ice maker and keep ice tasting neutral.
The Cleaning Tips team suggests a conservative approach: limit contact time by running a vinegar rinse rather than soaking the entire assembly, and always rinse thoroughly afterward. The goal is to loosen mineral layers and flush them away rather than to aggressively scrub the plastic or metal. Because every model differs, always start with the lowest effective concentration and reduce exposure if you notice any unusual reaction in gaskets or seals. If you notice darker mineral deposits that resist vinegar, try a diluted lemon juice solution or a manufacturer-approved cleaner as a backup plan.
For most households, vinegar is a convenient, low-cost option for routine maintenance. It’s especially appealing for renters who want a straightforward method without buying specialty products. Cleaning Tips analysis shows that a standard vinegar rinse, followed by a clean-water flush, can remove odors and mineral residue with minimal downtime. End users should still follow basic safety measures and consult the manual to confirm that vinegar use won’t void warranties or affect seals.
Safety and prep steps
Before any cleaning, power off and unplug the ice maker to avoid electrical shock. Empty the ice bin and remove any removable parts, such as the ice scoop or ice bucket, so you can access the reservoir and trace minerals more easily. Place a towel or shallow tray under the unit to catch drips. Gather your supplies: distilled white vinegar, water, measuring cup, soft cloth, and a small brush for crevices.
Because vinegar is acidic, avoid prolonged contact with seals or gaskets if your model uses rubber components. If you’re unsure, test a small area first or consult the manual. Do not mix vinegar with bleach or ammonia, which can create hazardous fumes. If your ice maker is inside a refrigerator, you may need to pull the fridge away from the wall to access the back panels safely. Finally, consider turning off nearby appliances to prevent any accidental spills during the cleaning process.
Safety first: keep children and pets away, and work in a well-ventilated area. After you finish, wipe all exposed surfaces and dry connections before reassembling.
Choosing the right vinegar solution
Use distilled white vinegar with approximately 5% acidity. Prepare a mild descaler by mixing 1 cup (240 ml) vinegar to 4 cups (960 ml) water in a measuring cup. This ratio provides enough acidity to dissolve mineral buildup without aggressively corroding parts. If your water is very hard, you can increase the water proportion slightly, but avoid saturating seals for long periods. Always start with a small batch to observe how your ice maker responds before committing to a full cleaning cycle.
Discontinue the use of essential oils or citrus oils in the cleaning solution, as they can leave residues that affect ice taste. If you notice a plastic or rubber odor after cleaning, run extra water-only rinses and allow the unit to air-dry completely before reusing.
For best results, use distilled water for all rinses to minimize new mineral deposits and to protect metal surfaces from rapid re-scaling. The goal is a clean surface with neutral ice flavor, not a temporary masking of odors.
The cleaning process overview
A successful clean with vinegar involves descaling, flushing, and thorough drying. Start by filling the reservoir with the vinegar solution and initiating a rinse cycle if your ice maker has a built-in cleaning cycle. If not, manually run the solution through the water line until the reservoir is empty. Pause briefly (about 10–15 minutes) to allow the acetic acid to work on mineral deposits, then resume to finish the run. Next, drain the vinegar solution and run multiple cycles of clean water to flush out any vinegar scent. Finally, wipe down the exterior, dry all removable parts, and reassemble.
At this stage, it’s wise to inspect for any mineral crusts in hard-to-reach areas or around seals. A soft brush can help loosen stubborn buildup without scratching surfaces. After the rinse, run a few trayfuls of fresh water and discard the ice until you’re confident there’s no vinegar taste left. This step minimizes any lingering acidity in the ice and helps restore optimal color and clarity.
Common mistakes and troubleshooting
Common mistakes include using undiluted vinegar for long periods, soaking parts for hours, or skipping a thorough rinse. Prolonged acidic exposure can soften gaskets or degrade finishes on certain models. Always consult your manual regarding approved cleaners and recommended contact times. If you notice any unusual sensations from seals or a distinct vinegar taste in the ice after rinsing, stop and perform an additional water-only rinse.
If deposits persist after a cleaning, repeat the process with a slightly longer contact time or try a manufacturer-approved cleaner designed for ice makers. Do not mix cleaners with vinegar, as this can create hazardous fumes. If the ice maker is integrated into a fridge, ensure airflow around the back and sides—blocked vents can affect performance after a cleaning cycle.
Finally, consider scheduling routine maintenance every few months to prevent heavy scale buildup. Regular light cleanings are safer and often more effective than sporadic deep cleanings, reducing the risk of unexpected malfunctions.
Maintenance schedule and post-cleaning care
To keep ice quality high, perform a vinegar-based cleaning every few months or as recommended by the manufacturer, especially in areas with hard water. After each cleaning, thoroughly rinse with clean water to remove all traces of acetic acid. Dry all surfaces completely before reassembly to prevent moisture from seeping into electrical components. Keep the ice maker lid closed when not in use to minimize contamination from kitchen odors. If you notice a persistent odor or cloudy ice, reevaluate your water source and consider a filtering system to reduce mineral content.
Based on Cleaning Tips analysis, vinegar-based cleaning remains a practical option for most home ice makers when used with proper rinsing and adherence to manufacturer guidelines. The goal is consistent maintenance, not aggressive cleaning that could require component replacements. A simple maintenance routine can prevent mineral buildup and extend the life of the ice maker.
Authority sources and practical references
- CDC: Cleaning and disinfecting guidance for household surfaces. https://www.cdc.gov/coronavirus/2019-ncov/community/clean-disinfection.html
- FDA: Food safety and handling guidelines for home appliances and utensils. https://www.fda.gov/food-safety
- EPA: Safer Choice and general cleaning product guidelines. https://www.epa.gov/saferchoice
These sources provide general principles for safe cleaning and sanitizing, which align with common kitchen appliance maintenance practices. Always verify your model’s manual for any model-specific cautions before using vinegar on ice makers. The Cleaning Tips team also emphasizes keeping concentrations mild, rinsing thoroughly, and avoiding contact with sensitive seals.
Authority sources (continued)
- Foodsafety.gov: Safe handling and cleaning recommendations for kitchen appliances. https://www.foodsafety.gov/
- University Extension resources may provide model-specific guidance for appliance maintenance and mineral buildup management. Always cross-check with your appliance’s documentation to prevent warranty issues. The Cleaning Tips team recommends a cautious, well-documented approach to ensure reliable ice production and safe consumption.
Tools & Materials
- Distilled white vinegar (5% acidity)(Use plain, undiluted vinegar for the descaling step, or dilute as described.)
- Water (distilled preferred)(Rinse water should be clean to avoid re-depositing minerals.)
- Measuring cup (250 ml)(For accurate vinegar-to-water dilution.)
- Soft cloth or sponge(For exterior cleaning and wiping seals.)
- Small brush or old toothbrush(Gently scrub crevices where buildup collects.)
- Towel or tray to catch drips(Protect the surface under the unit.)
Steps
Estimated time: 45-60 minutes
- 1
Power off and prepare
Unplug the ice maker and empty the bin. Remove any removable parts to give you full access to the reservoir and ice mold. Lay a towel nearby to catch spills and prepare your cleaning area.
Tip: Label or keep track of small parts so you don’t lose them during disassembly. - 2
Remove removable components
Take out the ice bucket, lid, and any removable trays. Gently clean these parts with a soft cloth and warm water, then set them aside to dry while you work on the unit.
Tip: Use a soft brush for stubborn mineral spots on the bucket rims. - 3
Prepare the vinegar solution
Mix 1 cup (240 ml) distilled white vinegar with 4 cups (960 ml) water in a measuring cup. This creates a mild descaler that’s effective but gentle on most appliance components.
Tip: Use distilled water if your tap water is very hard to minimize new mineral deposits. - 4
Descale the reservoir
Pour the vinegar solution into the reservoir and run the cleaning cycle if available, or manually circulate the solution through the water lines. Let it sit for 10–15 minutes to help dissolve mineral buildup.
Tip: Do not exceed the recommended contact time to prevent potential seal damage. - 5
Rinse with clean water
Drain the vinegar solution and run multiple cycles of clean water through the reservoir to flush out any remaining acid and dissolved minerals. Ensure the water runs clear and there’s no vinegar scent.
Tip: Run at least 2–3 full rinse cycles for thorough flushing. - 6
Dry and reassemble
Wipe all surfaces dry and reinsert the ice bucket and lid. Allow all parts to air-dry completely before turning the unit back on to avoid moisture-related malfunctions.
Tip: Leave the unit unplugged for a few minutes after reassembly to test its wiring and seals. - 7
Test and monitor
Plug the unit back in and run a small batch of fresh water to confirm there’s no vinegar taste. Then run a test ice cycle and inspect the ice for clarity and taste.
Tip: If you notice any off flavors or odors, repeat the rinse cycle or consider a manufacturer-recommended cleaner.
Questions & Answers
Can I use vinegar every time I clean my ice maker?
Yes, vinegar is a safe option for regular maintenance when used in proper dilution and followed by thorough rinsing. Always check your model’s manual for any cautions about acidic cleaners.
Yes, vinegar can be used for regular maintenance if you dilute it and rinse well afterward. Check your manual for any model-specific cautions.
Is it safe to use undiluted vinegar in an ice maker?
Undiluted vinegar is not recommended. Use a diluted solution as described, and limit contact time to protect seals and finishes. Always rinse completely.
Undiluted vinegar is not recommended; dilute it and rinse well to protect seals and finishes.
Should I use hot or cold water for rinsing?
Use cool or room-temperature water for rinsing to avoid thermal shock to components. Warm water can help dissolve residues but avoid extremely hot water that could affect seals.
Rinse with cool or room-temperature water to avoid stressing seals; warm water can help dissolve residue but avoid heat damage.
How long should I wait before using ice after cleaning?
Wait until the unit is completely dry and taste-free. Run a test cycle with clean water, then make a small batch of ice to confirm there’s no vinegar flavor.
Wait until everything is dry and tasting neutral. Run a water test, then a small ice batch to check for flavor.
What if mineral deposits keep returning?
If buildup recurs quickly, consider using a water filter or checking water hardness. A periodic deep clean with vinegar, followed by a thorough rinse, is still recommended.
If buildup returns often, check water hardness and consider a filter; repeat the cleaning routine as needed.
Can I use essential oils with vinegar?
Avoid essential oils in the cleaning solution for ice makers; they can leave residues and odors in ice. Use plain vinegar and water, then rinse thoroughly.
Don't add essential oils; they can leave residues in ice. Stick to vinegar and water, then rinse well.
Watch Video
The Essentials
- Unplug and prepare before cleaning
- Vinegar dissolves mineral buildup safely with proper rinsing
- Rinse thoroughly to avoid vinegar taste in ice
- Dry completely to prevent moisture damage
- Follow manufacturer guidance to protect seals and warranty