How to Clean Ifanze Ice Maker: Step-by-Step Guide
Learn how to clean an Ifanze ice maker safely with a step-by-step method, descaling, sanitizing, and maintenance tips for fresh, clean ice.

This guide teaches you how to clean ifanze ice maker to prevent mineral buildup, odors, and ice contamination. You’ll unplug, empty the bin, descale with a mild solution, rinse thoroughly, and reinstall for a safe test run. Follow these steps to restore clean ice and reliable performance.
Why Cleaning Ice Makers Matter
Regular cleaning of an ice maker helps prevent mineral buildup, slime, and off flavors. According to Cleaning Tips, routine appliance maintenance keeps your kitchen healthier and the ice tasting fresher. For the Ifanze ice maker, a compact reservoir and removable ice bin can trap mineral scale and biofilm if cleaning is skipped. When scale accumulates, ice production can slow, ice may taste stale, and the dispenser may clog. By adopting a simple cleaning routine, homeowners and renters can maintain better ice quality and minimize the risk of mold or bacteria growth in hidden crevices. This is the foundation for how to clean ifanze ice maker effectively and safely. A predictable maintenance cadence also reduces surprises during holiday hosting or busy weeks, when you want reliable ice without a second thought.
Safety First: Prep and Power Down
Before touching any internal parts, unplug the unit and, if connected, shut off the water supply to prevent leaks. Remove all ice from the bin and place a towel or shallow tray underneath to catch drips. If the ice maker sits inside a fridge or under a counter, avoid moving heavy components and keep a small cleanup kit handy. Wear gloves to protect hands from cleaning solutions and use a clean workspace so residues don’t migrate to other surfaces. By taking these precautions, you minimize the risk of electric shock, water damage, and accidental contact with cleaning agents.
Tools, Materials, and What to Gather
Gather a few essential items so you can clean without interruption. A microfiber cloth, soft-bristle brush, mild dish soap, and a spray bottle are your core tools. Have distilled water for rinsing, white vinegar for a gentle descale, and a clean basin to collect rinse water. Optional manufacturer-approved ice maker cleaners can simplify the process, but always follow label directions. Keep gloves handy and use a separate towel for drying to avoid cross-contamination from kitchen surfaces. This preparation reduces the chance of missed spots and ensures you complete the job efficiently.
Cleaning Solutions: What To Use And What To Avoid
Choose a mild cleaning approach to protect metal surfaces and seals. A 50/50 solution of distilled white vinegar and water is a common descaling option, followed by a thorough rinse with distilled water. Dish soap in warm water helps remove loose grime from ice bins and removable parts. For sanitizing, a food-grade sanitizer or a diluted vinegar rinse can be effective. Avoid chlorine bleach, ammonia-based cleaners, and abrasive pads that can scratch stainless steel or plastic components. Test any cleaner on a small, inconspicuous area first, and never mix cleaners. Following safe, manufacturer-friendly methods is essential to maintain performance and warranty alignment.
The Cleaning Process in Depth
This section walks through the core actions you’ll perform when how to clean ifanze ice maker. Start by powering down and unplugging, then remove the ice bin and any removable trays. Create your cleaning solution, apply it with the cloth or brush, and scrub all accessible surfaces including corners where mineral deposits hide. Rinse surfaces with distilled water, ensuring there is no soap residue. If you can, run a rinse cycle with plain water to flush lines. Finally, sanitize with a food-safe option and let all parts dry completely before reassembly. Remember to demand patience: a thorough rinse and thorough dry prevent hidden residues that can affect taste and odor.
Reassembly, Testing, and Maintenance Schedule
Reassemble all components carefully and return the ice bin to its position. Run a short test cycle with plain water to confirm there is no cleaning residue and that ice production returns to normal. If your model has a water line, ensure connections are tight and free of drips. Establish a maintenance cadence based on usage and water quality. In homes with hard water, descaling may be needed more frequently, whereas soft water may require less frequent cleaning. Using a simple calendar reminder can help you stay on track. By creating a predictable maintenance habit, you’ll sustain clean ice and avoid unexpected downtime.
Common Mistakes And Troubleshooting
Common mistakes include skipping the rinse step, using overly concentrated cleaners, and neglecting to dry removable parts completely. If ice tastes strange or appears cloudy after cleaning, repeat the rinse and drying steps, and verify that you didn’t leave any soap residue. If mineral buildup recurs quickly, consider a dedicated ice maker cleaner or installing a filter if your model supports one. For persistent issues, consult the user manual or contact support, as improper disassembly can void warranties or damage components.
Tools & Materials
- Distilled white vinegar(Use 50/50 with water for descaling)
- Mild dish soap(Non-abrasive, gentle formula)
- Soft-bristle brush or toothbrush(For crevices and bins)
- Microfiber or lint-free cloth(For wiping and drying)
- Spray bottle(For applying cleaning solution)
- Distilled water for rinsing(Minimize mineral carryover)
- Gloves(Protect hands from cleaners)
- Small basin or tray(Catch rinse water and spills)
- Optional: manufacturer-approved ice maker cleaner(Follow label directions if used)
Steps
Estimated time: 45-60 minutes
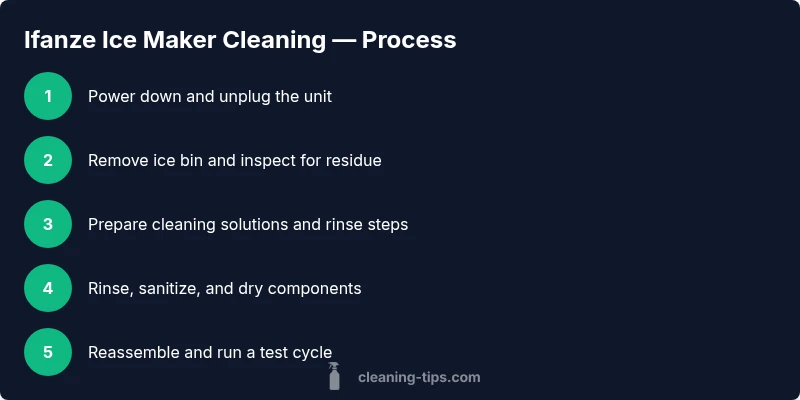
- 1
Power down and prep
Unplug the ice maker and, if needed, shut off the water supply. Move ice to a storage container and place towels to catch drips. This prevents electric shock and keeps the workspace clean.
Tip: Keep a damp towel handy to wipe spills as you go. - 2
Remove ice bin and inspect
Take out the ice bin and check for clogs, residue, or mold. Clean the bin separately with warm soapy water before reinstalling.
Tip: Use a soft brush to remove stubborn build-up inside the bin. - 3
Prepare cleaning solution
Mix a mild cleaning solution (distilled water with a 50/50 vinegar mixture or a manufacturer-approved cleaner). Avoid mixing cleaners.
Tip: Label your spray bottle to prevent accidental misuse. - 4
Wipe interior surfaces
Dampen a cloth with the cleaning solution and wipe all interior surfaces, including shelves, rails, and crevices. Use the brush for hard-to-reach areas.
Tip: Do not saturate electronic components; avoid spray directly onto them. - 5
Rinse and flush
Rinse all surfaces with distilled water. If possible, run a rinse cycle with plain water to flush residue from lines or reservoirs.
Tip: Rinse until the water runs clear with no soap scent. - 6
Sanitize the unit
Apply a food-safe sanitizer or a diluted vinegar rinse to sanitize surfaces. Let sit briefly if the product requires it, then rinse again.
Tip: Check sanitizer contact times on the label and don’t skip the final rinse. - 7
Dry components thoroughly
Wipe all parts dry with a clean cloth and allow the bin and interior to air-dry completely. Moisture can promote mold growth if left behind.
Tip: Place parts on a clean towel in a warm area for faster drying. - 8
Reassemble and test
Put the ice bin back in place, reconnect the water line if applicable, and run a short test cycle with plain water before using ice.
Tip: Observe for leaks and listen for unusual noises during the test run.
Questions & Answers
Can I use bleach to clean the Ifanze ice maker?
Bleach is generally not recommended for ice makers as it can leave residues and affect taste. Use a mild vinegar solution or a manufacturer-approved cleaner, and rinse thoroughly.
Bleach isn't usually advised for ice makers. Use vinegar or a cleaner approved by the manufacturer, then rinse well.
How often should I clean the Ifanze ice maker?
Clean the unit every 1–3 months depending on usage, water hardness, and the manufacturer’s guidance. If you notice cloudy ice, odd odors, or mineral buildup, clean sooner.
Clean about every one to three months, or sooner if you notice issues like cloudy ice.
Do I need to turn off the water supply during cleaning?
If your model has a water line, shut off the supply valve before cleaning to prevent leaks. If there is no direct line, simply unplug and remove the ice bin.
Shut off the water if you have a line; otherwise unplug and remove the ice bin.
Why is there a milky film on ice after cleaning?
Milky ice can be mineral residue or soap film. Ensure thorough rinsing with distilled water and run a plain-water cycle to flush residues.
Milky ice usually means it wasn’t rinsed well—rinse again and run a test cycle.
Is distilled water necessary for rinsing?
Distilled water minimizes mineral deposits during the rinse. If unavailable, boil and cool tap water before use.
Distilled water is best for rinsing to prevent new buildup.
Can I use lemon juice as an alternative cleaner?
Lemon juice can be used as a mild citric cleaner, but avoid high concentrations or long soaking. Rinse completely to prevent lingering flavors.
Lemon juice can work in a pinch, but rinse well.
Watch Video
The Essentials
- Unplug and prep before cleaning to prevent accidents.
- Descale with a mild solution; avoid harsh chemicals.
- Rinse thoroughly and dry all parts completely.
- Test cycle before returning to normal use.
- Schedule regular maintenance based on water quality and usage.