How to Clean an Ice Machine: A Step-by-Step Guide
Learn to clean an ice machine safely, removing mineral buildup and odors. This comprehensive guide covers prep, disassembly, sanitation, rinsing, and maintenance to keep ice tasting fresh and machines running efficiently.

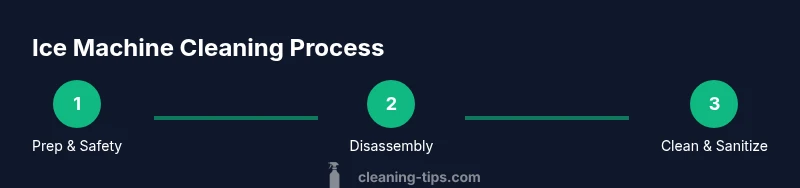
By following these steps, you will clean an ice machine safely and effectively, removing mineral buildup, odors, and slime from interior passages. The process includes unplugging, disassembly, brushing, sanitizing, and a thorough rinse, then reassembly and a test run. You’ll also learn maintenance habits to prevent future scale and ice-taste issues.
Why Cleaning an Ice Machine Matters
Ice machines are workhorses in busy kitchens and offices, producing countless cubes daily. Over time, mineral buildup, biological residues, and odors can accumulate in the water path, ice bin, and condenser coils. This buildup not only dulls flavor but can affect machine efficiency and ice clarity. Regular, thorough cleaning helps prevent clogs, reduces scale, and safeguards ice quality for consumers and guests. According to Cleaning Tips, consistent maintenance lowers the risk of sudden equipment failures and keeps ice tasting clean and fresh. In homes, a well-maintained ice machine can extend appliance life and improve water quality indirectly by reducing contaminant niches where bacteria might linger.
Key benefits:
- Cleaner-tasting ice and improved odor control
- Fewer clogs and easier maintenance
- Prolonged machine life and better energy efficiency
- Compliance with basic safety standards for food-contact surfaces
If you rely on ice for daily use, scheduling a routine cleaning every few months (or per manufacturer guidance) is a wise habit. This section outlines what to clean, how to sanitize, and practical tips to keep the process efficient.
Safety First: Unplug and Prep
Always start with safety to prevent electric shock or water intrusion into electrical components. Unplug the unit and turn off any water supply to the ice maker. If your model has a dedicated power switch, switch it off there as well. Remove the ice bin and set it aside on a clean surface. Put on protective gloves to guard your hands against cleaners and sharp edges. Clear the area of trip hazards and have towels or a tray ready to catch spills. Remember, never spray cleaners directly into vents or electrical connectors. The goal is to create a dry workspace where you can access the interior without risking water contact with live parts.
Tip: Read your manufacturer’s manual for model-specific safety instructions and disassembly cautions.
Tools and Materials You’ll Need
Before you begin, gather tools and cleaners to streamline the process. A prepared setup reduces interruptions and helps you work methodically. Essential items include a screwdriver for panel removal, a soft-bristle brush for crevices, non-abrasive cloths for wiping, a food-safe sanitizer, and a mild descaling solution (such as a vinegar-water mix) if your water is hard. Have a measuring cup for dilutions, a clean bucket or tray for used water, and fresh towels for drying. If your model has a detachable water line, you may need a small wrench or pliers, but only if you’re comfortable and the manual allows it. Keep a timer handy to observe sanitizer contact times.
Note: Do not substitute abrasive scrubbers or bleach-containing cleaners on ice-storage components.
Step-by-Step: Prep and Disassembly
- Power down and unplug the machine. 2) Remove the ice bin and any removable panels with the appropriate screwdriver. 3) Inspect for loose connections or residue around the bin housing. 4) Set aside small parts in a labeled container so you don’t lose them. This step ensures you have clean access to all surfaces without risking damage to electronics. 5) Wipe away loose debris with a damp cloth before deeper cleaning.
Tip: Work slowly and keep components dry; if you’re unsure about detaching a part, consult the user manual or manufacturer support.
Step-by-Step: Cleaning and Sanitizing Interior Surfaces
Begin with a mild cleaning solution to remove slime, mineral deposits, and biofilm from accessible surfaces. A diluted vinegar solution (1:1 with water) can act as a gentle descaler, followed by a thorough rinse with clean water. Use a soft-bristle brush to scrub interior walls, the ice bin channel, and around the spray nozzles. Wipe dry with lint-free cloths to prevent water pooling near electrical components. After brushing, apply a food-safe sanitizer to all contacted surfaces, ensuring the sanitizer stays on surfaces for the recommended contact time (as per label). Avoid oversaturation that could seep into sealed electronics.
Important: Never spray cleaner directly into wiring, sensors, or seals. Use a damp cloth for delicate parts and a brush for hard-to-reach crevices.
Step-by-Step: Final Rinse, Reassembly, and Test Run
Rinse all interior surfaces and flush lines with clean water until no cleaner residue remains. Dry interior components thoroughly before reassembly to minimize microbial growth in moisture pockets. Reattach panels and the ice bin, reconnect power, and run an empty cleaning cycle or a short ice-making cycle to confirm proper operation. Discard the first batch of ice after a cleaning cycle to ensure safety and taste quality. Document any anomalies (unusual noises, leaks, or inconsistent ice shape) for future maintenance.
Pro tip: Allow the unit to air-dry for a few minutes after reassembly before making ice to prevent trapped moisture.
Common Mistakes and Troubleshooting
Common issues include insufficient sanitizer contact time, residual cleaner odors, and missed spots in hard-to-reach channels. Always follow label directions for dilution and dwell times, and avoid mixing cleaners unless the manufacturer approves it. If you notice unusual ice taste or lingering odors, re-clean focusing on the ice bin, prod cutouts, and reservoir lines. Leaks or unusual noises may indicate loose fittings or a need for professional service. If your unit is under warranty, consult the manufacturer before attempting repairs that could void coverage.
Maintenance Tips to Prevent Buildup
Create a simple maintenance calendar and stick to it. Clean the ice machine every 3–6 months if you use it heavily, or per the manufacturer’s recommendations. Use filtered water if possible to reduce mineral content and scale. Keep the area around the machine clean and dry to prevent mold growth in damp pockets. Label and store cleaners safely away from food and toys, and maintain a log of each cleaning session with date and notes. Regular maintenance will extend the life of your ice machine and keep ice tasting clean.
Testing, Odor Checks, and When to Replace
After cleaning, monitor ice clarity and taste over the next several batches. If off-taste or persistent odors return within a few weeks, reassess the cleaning routine or seek professional maintenance to inspect refrigerant lines and seals. If the ice machine shows persistent leaks, excessive mineral buildup, or failed performance tests, it may be time to replace certain components or consider a replacement unit. Cleaning Tips recommends evaluating warranty terms and energy efficiency when planning upgrades.
Tools & Materials
- Screwdriver set (Phillips or flathead)(Use size that fits your ice machine panels)
- Soft-bristle brush(For interior channels and crevices)
- Non-abrasive cleaning cloths(Lint-free for wiping surfaces)
- Food-safe sanitizer(Follow label for contact time and dilution)
- White vinegar (optional descaler)(Dilute 1:1 with water if using as a descaler)
- Measuring cup(For diluting sanitizers or vinegar solutions)
- Protective gloves(Nitrile gloves recommended)
- Clean rinse water(Tap or filtered water for final rinse)
Steps
Estimated time: 60-90 minutes
- 1
Power down and prep
Power off the ice machine, unplug it, and turn off the water supply. Remove the ice bin and clear the workspace. Put on gloves and lay towels to catch spills. This reduces the risk of electrical shock and keeps the area dry during cleaning.
Tip: Check for model-specific safety notes in the user manual. - 2
Access interior and remove panels
Use the screwdriver to remove the service panel or access cover. Gently lift away any panels to expose interior walls, ice bin channels, and possible residue. Keep screws organized so you don’t lose them during reassembly.
Tip: Take a quick photo of connections before disassembly to aid reassembly. - 3
Empty ice and inspect
Discard any remaining ice, wipe the bin, and inspect seals and gaskets for wear or cracks. Remove obvious debris and wipe down accessible surfaces with a damp cloth before deeper cleaning.
Tip: If you notice cracks in gaskets, plan for replacement to prevent leaks. - 4
Clean interior surfaces
Unplugged, scrub interior walls, the ice bin channel, and spray nozzles with a mild cleaning solution. Rinse with warm water and then wipe dry with lint-free cloths. Avoid getting liquids on electrical components.
Tip: If mineral buildup resists brushing, use a vinegar-water solution in a small patch first, then rinse thoroughly. - 5
Sanitize and flush
Apply a food-safe sanitizer to all reachable surfaces and allow it to dwell for the recommended time. Rinse thoroughly to remove any sanitizer residue and prevent chemical taste in ice.
Tip: Never mix sanitizers with cleaners unless the manufacturer approves it. - 6
Final rinse and reassembly
Flush lines with clean water, dry components, reattach panels, and rebuild the ice maker. Reconnect power and run an empty cycle to confirm proper operation. Discard the first batch of ice after cleaning.
Tip: Let the machine air-dry briefly before making ice. - 7
Test, document, and maintain
Observe ice quality and machine performance over the next few cycles. Record cleaning dates and any notes in a maintenance log. Schedule the next cleaning per your model’s guidance.
Tip: Keep a simple calendar reminder for quarterly checks.
Questions & Answers
Do I need to unplug the ice machine before cleaning?
Yes. Unplug the unit and shut off the water supply to avoid electrical shock and water damage while cleaning.
Always unplug and shut off water before cleaning.
Can I use household bleach to sanitize the ice machine?
Bleach is generally not recommended for ice machines. Use a food-safe sanitizer and follow the label for contact time.
Bleach isn’t usually recommended; use a food-safe sanitizer instead.
How often should I clean my ice machine?
Most manufacturers recommend cleaning every 3–6 months, but adjust based on usage, water hardness, and observed ice quality.
Clean every 3 to 6 months, or as your usage and water quality require.
Should I run a cleaning cycle with ice in the machine?
No. Run the cleaning cycle with an empty ice bin, then discard the first batch of ice after cleaning.
Always clean with an empty machine and discard the first ice after.
What are signs of scale buildup or bad ice taste?
Cloudy or off-tasting ice, slower ice production, and visible mineral residue are common signs you need a cleaning.
Cloudy ice, odd taste, and reduced production can indicate buildup.
When should I call a professional?
If leaks, unusual noises, or persistent problems occur after cleaning, consult the manufacturer or a certified technician.
If issues persist after cleaning, seek professional help.
Watch Video
The Essentials
- Schedule regular cleanings to maintain ice quality.
- Follow manufacturer safety guidance and use non-abrasive tools.
- Sanitize after cleaning and perform a thorough rinse.
- Document maintenance to guide future service.
- Monitor ice taste and appearance between cleanings.