How to Get Rid of Clean Up App: A Practical Step-by-Step Guide
Learn how to safely remove the Clean Up app across Windows, macOS, Android, and iOS, reclaim storage, protect data, and prevent leftovers with practical, OS-specific steps.

To get rid of the Clean Up app, uninstall it from your device, clear its data, and remove any associated permissions. This quick action can reclaim storage and reduce background activity. This guide covers Windows, macOS, Android, and iOS, plus safeguards for data, privacy, and future app management for users.
Why you might want to remove the Clean Up app
According to Cleaning Tips, keeping device software lean helps performance and privacy. The Cleaning Tips team found that unused apps often run in the background, drain battery, and may access permissions you no longer need. If you notice slowdowns, higher data usage, or unexpected popups after the Clean Up app is installed, you may be due for removal. This is more than a simple space reclaim—it's about reducing digital clutter and limiting ongoing data access. For many people, a clean digital footprint helps the device run more smoothly and protects personal information. If the Clean Up app auto-starts at boot, requests broad permissions, or you rarely use its features, removing it is worth considering. When you decide to proceed, follow the OS-specific steps and verify you recover storage without sacrificing important data.
How to evaluate whether to keep or remove the Clean Up app
Start by listing what the app does for you. If it offers a single feature you rarely use, it’s a candidate for removal. Check your storage usage: if the app plus its caches take a noticeable chunk of space, removing it is likely beneficial. Review the app’s permissions; if it has access to data you don’t need in daily life, that’s a red flag. Consider whether you still rely on any reminders or background tasks the app performs. If unsure, disable it temporarily (see the alternative) and observe device behavior for a week before uninstalling. Cleaning Tips suggests taking a cautious approach: back up data, then proceed with uninstall steps for your platform. After removal, run a quick storage cleanup to reclaim residual files and confirm storage is freed.
Uninstalling on Windows and macOS
Windows users typically remove apps through Settings, while Mac users use the Applications folder. On Windows, go to Settings > Apps > Apps & features, locate Clean Up, and click Uninstall. Follow any on-screen prompts and restart if requested. On macOS, open Finder, go to the Applications folder, locate Clean Up, and drag it to Trash. Empty the Trash and check Library folders (~/Library and /Library) for caches or support files that can be deleted. This helps ensure leftovers don’t linger and take up space. Always search for any related folders or configuration files that the uninstaller might not remove automatically, then delete or quarantine them if you’re confident.
Uninstalling on Android devices
Android users should navigate to Settings > Apps > See all apps > Clean Up > Uninstall. If the app has device administrator rights, revoke those permissions first. After uninstalling, clear the app’s cache if offered, then restart the device. It’s common for residual data to hide in the Android/data or Android/obb directories; use a file manager to locate and remove those folders if you’re comfortable. If the app offered any auto-start or background activity, disable those settings to prevent re-launches. This helps prevent the app from appearing again due to misconfigured autostart rules.
Uninstalling on iOS devices
On iPhone or iPad, locate the Clean Up app on the Home screen, press and hold the icon until it wiggles, then tap the X (or Delete App) to remove it. If you see an option to Offload App, choose Delete App to remove data stored by the app. If iCloud backups might contain app data, ensure you haven’t inadvertently deleted something you still need. After removal, review any associated data in iCloud and disable any related automations or shortcuts to avoid re-creation of the app’s footprint.
Freeing up storage beyond uninstalling
Removing the app is a solid first step, but you can reclaim more space by clearing caches in other apps and cleaning up large downloads, old media, and temp files. Use built-in storage tools on each platform: Windows Disk Cleanup, macOS Storage Management, Android's Storage settings, and iOS’ iPhone Storage menu. Consider using a storage analyzer to identify the largest files, then delete or move them to cloud storage. Do not delete files you don’t recognize unless you’re sure they’re app leftovers. This two-pronged approach maximizes free space and reduces future clutter.
Safeguards and best practices after removal
Back up important data before uninstalling and re-check that you’ve removed all traces. Reassess your device’s app load every few weeks to ensure no new clutter has accumulated. If you rely on the app’s functionality occasionally, consider lighter alternatives or a web-based version that doesn’t require installation. The goal is a lean, private, and efficient device with minimized background activity. The Cleaning Tips team recommends validating the removal by checking storage and performance after a few days, then adjusting your routine to keep the device clean.
Privacy and security considerations
Uninstalling an app helps reduce ongoing data access, but you should also review any permissions you’ve granted to other installed apps. Revoke unnecessary permissions in Settings > Privacy on mobile devices and review browser extensions on desktops. If the app required a login, ensure you’ve signed out and removed any saved credentials pertinent to that app. Keeping your system updated and enabling security features like antivirus scans protects you from potential residual threats. Always stay vigilant about new app permissions in the future to maintain a clean digital footprint.
Quick checklist before you delete
- Back up important data to cloud storage or an external drive.
- Verify the app isn’t essential for system functions or other apps.
- Revoke device admin permissions if applicable.
- Uninstall using the OS-specific steps and restart if prompted.
- Search for leftover files in app data and caches and remove them.
- Run storage analysis to confirm freed space and monitor for reinstalled leftovers.
- Review privacy settings and revoke unnecessary permissions on other apps.
Authority sources
For further reading and verification, consult these authoritative sources:
- https://www.ftc.gov
- https://www.nist.gov
- https://www.consumer.gov
Tools & Materials
- Windows PC or laptop(Use Windows Settings; admin rights may be needed)
- Mac computer(Applications folder; potential Library cleanup)
- Android device(Settings > Apps; revoke Device Admin if needed)
- iOS device (iPhone/iPad)(Home screen uninstall; consider Offload vs Delete)
- Backup storage(Optional: cloud or external drive for data safety)
- Storage analysis tool(Optional: helps locate leftovers after uninstall)
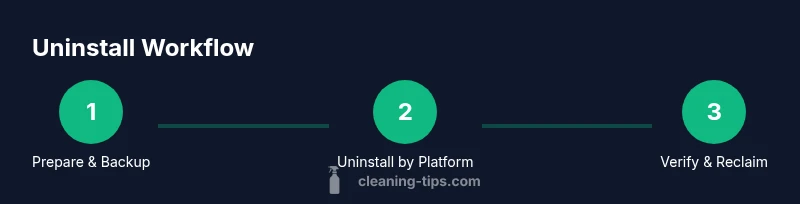
Steps
Estimated time: 30-45 minutes
- 1
Prepare and back up data
Before removing Clean Up, back up any data connected to the app (if applicable) to cloud storage or an external drive. This minimizes the risk of losing important information. Note where you may need to reconfigure accounts or login credentials after reinstallation.
Tip: Verify recent backups by attempting a quick restore test on a separate device. - 2
Identify removal method by platform
Determine whether you’ll uninstall from Windows, Mac, Android, or iOS. Each platform has a distinct path and potential leftovers. If you’re unsure, start with the OS that most recently received updates or where the app is most active.
Tip: If you’re unsure about device admin rights, disable those rights before uninstall to avoid prompts. - 3
Uninstall on Windows
Open Settings, go to Apps & features, find Clean Up, and click Uninstall. Follow any prompts and restart if prompted to ensure all components are removed.
Tip: After uninstall, use Disk Cleanup to remove caches tied to the app. - 4
Uninstall on macOS
Open Finder > Applications, drag Clean Up to Trash, and empty the Trash. Check Library folders for residual caches or support files (~/Library and /Library). Delete any related files you confirm are leftovers.
Tip: Use a search for 'Clean Up' in Library folders to catch hidden leftovers. - 5
Uninstall on Android
Go to Settings > Apps > See all apps > Clean Up > Uninstall. If prompted, revoke Device Admin rights first. Clear cache, then restart the device.
Tip: Check Android/data and Android/obb for leftover folders and remove if safe. - 6
Uninstall on iOS
Long-press the app icon until it wiggles, then tap the X to delete. If offered, choose Delete App rather than Offload to remove data entirely.
Tip: Sign out of associated accounts if you won’t be using them soon. - 7
Clean residual data
Search for leftover files and caches across all platforms. Use built-in tools or a trusted cleaner to identify and safely remove residual files.
Tip: Avoid deleting system or program files you don’t recognize. - 8
Verify and reconfigure
Reboot the device, verify storage free space, and reconfigure any settings you changed during removal. If you need the app later, plan a cautious reinstallation.
Tip: Keep a note of which data you backed up and where it’s stored.
Questions & Answers
What is the Clean Up app, and why remove it?
The Clean Up app is a cleaning utility that may run in the background. If you don’t use it regularly or it requests excessive permissions, removing it can improve device performance and privacy. Always assess whether its features are truly needed before removing.
The Clean Up app is a cleaning utility that may run in the background; remove it if you don’t use it or it asks for too many permissions.
Will uninstalling delete my saved data associated with the app?
Uninstalling usually removes app-local data, but data stored in cloud accounts or linked services may remain. Check any account settings and back up important files before removal.
Uninstalling may remove local data; cloud data could stay. Back up important files first.
Can I disable the app instead of uninstalling?
Yes. Disabling stops background activity and prevents startup, which can be a good intermediate step before a full uninstall.
Disabling stops the app from running and is a good middle step before uninstalling.
How do I remove leftovers after uninstall?
Use a storage analyzer to locate residual files and manually delete known leftovers in app data directories for each platform.
After uninstall, scan for leftovers and remove them manually if you’re sure they’re safe to delete.
Is it safe to remove system apps?
Removing system apps can cause instability. Avoid deleting core OS components. If in doubt, consult official guidance for your device.
Only remove non-essential apps; avoid touching core system components.
How can I reinstall the app later?
You can reinstall from the original store (Windows Store, Mac App Store, Google Play, or Apple App Store) if you need the app again. Be mindful of permissions and updates during reinstallation.
If you need it again, reinstall from the app store and review permissions during setup.
Watch Video
The Essentials
- Uninstall safely with OS-specific steps
- Back up data before removal
- Check for leftover files to reclaim space
- Review permissions before deletion
- Reinstall only if necessary