Windows Clean Disk: Quick Guide to Free Space
Learn how to reclaim disk space on Windows with built-in tools, practical steps, and safety tips. This guide covers Disk Cleanup, Storage Sense, large-file management, and routine maintenance for a healthier PC.

Windows clean disk involves using built-in tools to reclaim space safely. See our detailed step-by-step guide for selecting cleanup options, identifying large files, and verifying results. You’ll learn which areas to target, how to schedule automatic cleanups, and how to verify results without risking important files.
Why Windows clean disk matters
A clean disk isn't just about freeing space; it's about maintaining responsive performance, reducing fragmentation, and extending the life of your storage. For homeowners and renters who rely on a dependable PC for work, study, or chores, keeping the drive tidy translates to quicker startups, smoother application launches, and fewer crashes during important tasks. The Cleaning Tips team notes that regular, organized cleanup helps prevent concerns like disk fullness that can trigger automatic throttling by Windows, slow defragmentation, and hidden junk accumulating in system folders. By reclaiming space on the system drive and relocating transient data to appropriate destinations, you also improve indexing efficiency and reduce file search times. In short, Windows clean disk routines are a practical form of device maintenance that pays off with measurable, everyday benefits while preserving your important files and configuration settings.
Before you begin: backups and safety
Before you touch system files or remove data, back up your important files. Create a restore point if your version of Windows supports it, and ensure you have a reliable backup option (external drive or cloud). Avoid deleting personal documents from user folders unless you’ve confirmed they’re duplicates or temporary files. This step reduces the risk of accidental data loss and makes it easier to recover if something goes wrong. The Cleaning Tips team emphasizes the importance of safety: never delete files you don’t recognize, and review each category of files before removing them. A little preparation goes a long way toward a stress-free cleanup.
Built-in Windows tools for disk cleanup
Windows ships with built-in tools designed to reclaim space without needing third-party software. The Disk Cleanup utility offers a simple, proven workflow for removing temporary files, system cache, and obsolete installer data. Storage Sense can automate routine cleanup tasks, and the Windows Settings interface provides a centralized view of storage usage. Together, these tools cover most home cleanup scenarios, from freeing up a few gigabytes to reclaiming space on a nearly full drive. The advantage of using built-in options is that they’re maintained by Microsoft and closely integrated with your OS, reducing compatibility risks and the chance of removing important data.
Step-by-step: using Disk Cleanup (classic tool)
Open Disk Cleanup by searching in the Start menu, select the drive you want to clean (often C:), and let the tool scan for removable cache and temporary files. Review the file types list, check only the categories you’re comfortable removing (Temp files, Recycle Bin, Delivery Optimization files, etc.), and run the cleanup. If you see a button that says 'Clean up system files,' use it to include deeper system-level caches. Finally, confirm and let Windows delete the selected items. This process is safe for most users when done thoughtfully, and it creates visible space savings without disturbing personal data.
Step-by-step: using Storage Sense and automatic cleanup
Storage Sense automates routine cleanup: you can configure it to remove temporary files, content from the Recycle Bin, and unused local cloud content on a schedule. Access it via Settings > System > Storage, enable Storage Sense, and customize how often it runs and what it targets. If you have large, infrequently accessed files, Storage Sense can relocate or remove them according to your preferences. Verification is simple—run a quick check of how much space is free after Storage Sense runs. This reduces manual cleanups and keeps your PC running smoothly over time.
Free up space with large files and apps
A focused approach is to identify large files and apps you no longer need. Use built-in tools like File Explorer’s Large icons view or the Storage settings page to spot files over a certain size threshold. Uninstall apps you no longer use, especially games and rarely opened software, and move large media or project folders to an external drive or cloud storage. If possible, compress old archives and move nonessential data off your primary drive. This targeted cleanup can produce noticeable gains without erasing essential content.
Maintenance tips for ongoing health
Schedule regular cleanups—monthly or quarterly, depending on usage—to prevent buildup. Keep a current backup of your data, and review Disk Cleanup categories before deleting anything. Run Disk Cleanup after major software updates or large downloads to reclaim new temporary files. Guard against automatic cleanups deleting items you still need by periodically inspecting the Recycle Bin and Temporary files folders. Finally, keep your system updated; Windows updates often include performance and cleanup-related improvements that support ongoing disk health.
Authority sources and further reading
For deeper guidance, consult official Microsoft resources and reputable publications. Microsoft’s own storage features documentation provides detailed steps and options for Storage Sense and Disk Cleanup. Cleaning Tips recommends reviewing these resources to tailor cleanup settings to your usage. For broader context on data hygiene and system maintenance, see the following sources:
- https://www.microsoft.com/en-us Windows help and Storage Sense documentation (official)
- https://www.nist.gov (gov) for general data integrity and system maintenance concepts
- https://www.pcworld.com (major publication) practical tips and reviews on system cleanup tools
Authority sources
The following sources provide official guidance and independent analysis on disk cleanup and system maintenance:
- https://support.microsoft.com/en-us/windows
- https://www.microsoft.com/en-us/windows/features/storage-sense
- https://www.pcworld.com
Tools & Materials
- Windows PC with admin access(Any supported Windows version (10/11) with administrative privileges recommended)
- External storage or cloud backup(Back up important files before cleanup)
- Disk Cleanup utility and Storage Sense(Built-in tools included with Windows)
- Stable internet connection(Optional for cloud backups or online help)
Steps
Estimated time: 45-60 minutes
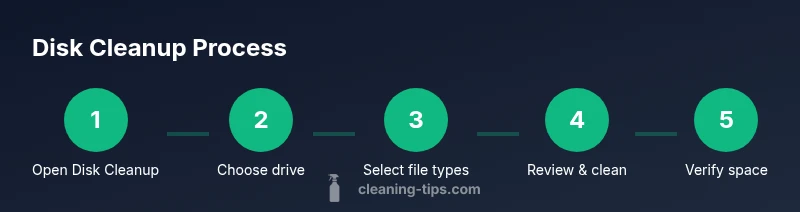
- 1
Open Disk Cleanup
Click the Start menu, type Disk Cleanup, and select the tool. Choose the drive (usually C:) you want to clean, then let Windows scan for removable cache and temporary files.
Tip: If prompted, select 'Clean up system files' to include deeper caches. - 2
Review file types to remove
In the Disk Cleanup window, review the list of file types. Check categories like Temporary Internet Files, Downloads cache, and Recycle Bin. Deselect items you want to keep.
Tip: Be conservative with Downloads and Documents; you can delete items later from their respective folders. - 3
Run cleanup and confirm
Click OK to start cleanup and confirm when prompted. Allow the process to complete; larger caches may take longer depending on drive speed.
Tip: If space is still tight, rerun after a short break to catch leftovers. - 4
Use Storage Sense for automation
Go to Settings > System > Storage, turn on Storage Sense, and customize frequency and targets (e.g., temp files, Recycle Bin).
Tip: Set Storage Sense to run automatically after a defined period to keep space from creeping up again. - 5
Handle large files and apps
Identify large files or apps you rarely use, uninstall unnecessary software, and move media to external storage or cloud.
Tip: Avoid deleting personal documents; instead, archive or relocate them. - 6
Verify and monitor
Check free space after cleanup and monitor over time. Schedule monthly checks or align with major updates.
Tip: Keep a backup copy of important data before every cleanup cycle.
Questions & Answers
What is Windows Clean Disk and why should I use it?
Windows clean disk refers to reclaiming space by removing unnecessary files using built-in tools like Disk Cleanup and Storage Sense. Regular use improves performance and reduces clutter without risking personal data if done carefully.
Windows clean disk helps you reclaim space and speed up your PC with built-in tools.
Is Disk Cleanup safe to run regularly?
Yes, when used thoughtfully. Back up important files first, and review each category before deleting. It removes temporary files and caches without affecting documents you need.
Yes, but back up important files first and double-check what you delete.
How often should I run a clean disk?
Most users benefit from a monthly cleanup, with quarterly or more frequent checks for heavy usage. Adapt to your storage needs and changes in usage.
Most people clean monthly or quarterly; heavy users may need more frequent cleanups.
What if Disk Cleanup doesn’t free space?
Consider removing large unused apps, moving data to an external backup, or using third-party tools with caution. Always back up before more aggressive cleanup.
Try removing large apps or moving data to backup storage.
Can Storage Sense clean automatically?
Yes, Storage Sense can run automatically, but review what it deletes and tailor the settings to your needs to avoid losing needed files.
Yes, you can set Storage Sense to run automatically, with caveats.
Will cleanup affect installed programs?
Disk Cleanup removes temporary files and caches; it won't uninstall installed programs. You may lose some local cache data for apps.
No, it won't uninstall programs, but some temporary files may be removed.
Watch Video
The Essentials
- Schedule regular cleanups to maintain space
- Use Disk Cleanup and Storage Sense together
- Back up data before proceeding
- Review what you delete to avoid data loss