Bleach and Clean: A Practical Guide to Safe Disinfection
Learn how to safely use bleach for cleaning and disinfection. This guide covers dilution, surface compatibility, safety gear, and best practices to keep your home healthy.

With bleach and clean, you will disinfect common household surfaces safely and effectively. This guide covers choosing the right bleach product, proper dilution, surface compatibility, safe handling, and dwell times. You'll learn steps for pre-cleaning, applying a disinfectant solution, waiting, and rinsing, plus tips to avoid common mistakes. By following these steps, you'll reduce germs while protecting you and your home.
Why bleach and clean
According to Cleaning Tips, safe and effective cleaning with bleach starts with understanding what bleach can and cannot do, choosing the right product, and using it as directed. Bleach is a strong disinfectant that can eliminate many germs on non-porous surfaces and whiten or brighten surfaces when used correctly. The phrase bleach and clean is not just about keeping things white; it's about disinfecting high-touch areas such as countertops, sinks, toilet rims, and bathroom tiles. This section explains the roles bleach plays, when to reach for it, and how to pair it with routine cleaning for a healthier home. While it is powerful, it must be used carefully to avoid lines of damage or fumes. The goal is to balance sanitation with safety, not rush through a quick fix.
Safety first: PPE and ventilation
Personal protective equipment (PPE) makes a big difference in how safely you handle bleach. Always wear chemically resistant gloves and eye protection. Ensure the room is well ventilated by opening a window or turning on a fan. If you are cleaning in small, enclosed spaces, consider stepping outside briefly between applications to reduce exposure. PPE and ventilation reduce irritation, help you maintain control of the cleaning process, and protect children and pets nearby. In a household setting, a calm, methodical approach yields the best results without unnecessary risk.
Understanding dilution and label directions
There is no universal bleach dilution; always read the product label and follow the recommended concentrations for your intended use. Bleach products differ in strength and formulation, and disinfection requirements vary by surface. The label will specify whether the product is designed for general cleaning or disinfecting, the contact time, and whether it should be rinsed after use. When in doubt, opt for a lower concentration and shorter contact time rather than over-treating a surface. Applying too much solution or leaving it too long can damage finishes and create strong fumes.
Surface compatibility: what surfaces can handle bleach
Bleach works best on non-porous surfaces like glazed tiles, stainless steel, glass, enamel, and most counter materials. It can discolor or weaken some materials, including certain metals, dyed fabrics, and natural stone. Always test on a small, hidden area before broad application and follow the label guidance for porosity. For grout lines and bathroom surfaces, bleach can be effective against mildew, but avoid porous wood or stone and never let bleach stand on color-treated fabrics.
Disinfection process: safe, repeatable steps
A practical disinfection routine with bleach starts with pre-cleaning the surface to remove visible dirt, grime, and residues. Apply the bleach solution evenly using a cloth or spray bottle, ensuring complete coverage. Let the surface stay wet for the recommended dwell time as stated on the label. Then rinse with clean water or wipe dry with a lint-free cloth. Finally, allow the surface to air dry or towel dry to prevent streaks and residue. Always follow label directions for dwell time and rinsing requirements.
Bleach alternatives and when to use them
Bleach is not the only option for disinfection. Hydrogen peroxide can be gentler on some surfaces and is effective on many non-porous surfaces. Quaternary ammonium compounds are common in household cleaners but have different limitations. For fabrics and colored items, opt for color-safe oxygen bleaches or non-chlorine alternatives. In bathrooms and kitchens, you may choose products designed for each surface and task rather than relying on bleach alone. Always check compatibility with the surface and surrounding materials.
Common mistakes to avoid
A few simple missteps can undermine safety and effectiveness. Never mix bleach with ammonia or acids, as this releases toxic gases. Do not use bleach on porous materials like unsealed wood or natural stone unless the label permits it. Avoid using bleach in high-heat or poorly ventilated areas for long periods. And never blend bleach into a running spray with other cleaning agents; apply it in a controlled, surface-specific manner.
Cleaning routines: everyday vs deep cleaning
In daily maintenance, you may focus on high-touch surfaces like doorknobs, light switches, and faucet handles using a diluted disinfecting spray per label directions. For deep cleaning, schedule a routine where you pre-clean, treat with a longer dwell time on non-porous surfaces, rinse thoroughly, and dry. Keeping a consistent schedule reduces the buildup of germs and helps you stay on top of health goals. Bleach can be part of a broader cleaning toolkit that includes non-chlorine cleaners for sensitive areas.
Special considerations: colored fabrics, grout, and mold
Bleach can whiten and disinfect many surfaces, but fabrics with color can fade. When dealing with mold on non-porous surfaces, bleach can be effective if the surface is non-porous and mold growth is superficial; for porous materials like drywall or wood, consider professional guidance or alternative cleaners. For grout lines, a gentle, targeted application is often sufficient. Always wear PPE and ventilate when treating mold areas, and test a small patch first.
Maintenance and storage: shelf life and safe disposal
Store bleach in a cool, well-ventilated area away from direct sunlight and heat. Check the product label for shelf life and any storage instructions; bleach loses strength over time, reducing its effectiveness. Never mix old bleach with new solutions, and dispose of unused portions according to local guidelines. Keep cleaning supplies out of reach of children and pets, and label bottles clearly to avoid accidental misuse.
Tools & Materials
- Bleach (sodium hypochlorite) product(Choose unscented household bleach (5-6%) unless label says otherwise.)
- Water(Use clean, cold water for dilution.)
- Gloves, nitrile or rubber(Protect skin from irritation.)
- Eye protection (safety goggles)(Prevent splashes to eyes.)
- Ventilation (open window or fan)(Ventilate to reduce fumes.)
- Spray bottle or bucket(For applying solution.)
- Measuring cup or spoon(Accurate dilution as per label; avoid guesswork.)
- Microfiber cloths or sponge(For pre-cleaning and wiping surfaces.)
- Toothbrush or grout brush(For grout or crevices if needed.)
Steps
Estimated time: 20-40 minutes
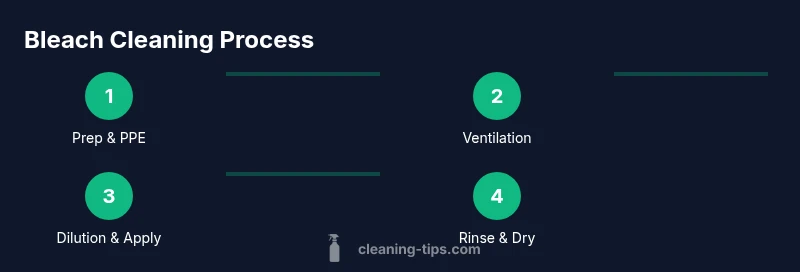
- 1
Identify surfaces and gather supplies
Survey areas in the home where you plan to use bleach. Gather gloves, goggles, ventilation, a spray bottle or bucket, measuring tools, and cleaning cloths. This ensures you have everything ready before you start.
Tip: Check surface labels and test on a hidden area first. - 2
Ventilate and put on PPE
Open windows or run a fan to circulate air. Put on gloves and eye protection to protect skin and eyes from splashes. A little prep reduces risk and makes the process smoother.
Tip: Do a quick scent check to ensure no strong odors irritate you. - 3
Read label and determine dilution
Read the product label for dilution guidance and surface suitability. Use the recommended ratio and note any surfaces to avoid. This prevents under- or over-treating surfaces and maintains safety.
Tip: If in doubt, choose a lower concentration. - 4
Pre-clean target surfaces
Wipe away visible dirt and grime before applying disinfectant. A clean surface helps the bleach contact germs more effectively and reduces residues. This step improves results.
Tip: Use a separate cloth for pre-cleaning to avoid cross-contamination. - 5
Apply the disinfection solution
Apply the bleach solution evenly to fully cover the surface. Use a spray or microfiber cloth to ensure complete contact. Avoid pooling in corners to minimize runoff.
Tip: Work in small sections to maintain control. - 6
Maintain contact time and monitor
Leave the surface wet for the time specified on the label. Avoid drying it with a cloth immediately. The dwell time is critical for disinfection effectiveness.
Tip: If the surface dries, re-apply as needed. - 7
Rinse and dry the surface
Rinse with clean water when required by the label, or wipe dry with a lint-free towel. Residual bleach can cause streaks or damage finishes. Drying helps prevent diffusion of fumes.
Tip: Use a dedicated towel for bleached surfaces. - 8
Store leftovers safely
Seal the bottle and store it in a cool, dark place away from sunlight and heat. Keep out of reach of children and pets. Label any secondary containers clearly to avoid confusion.
Tip: Never mix old and new bleach; replace as directed.
Questions & Answers
Does bleach work on mold on bathroom surfaces?
Bleach can kill mold on non-porous surfaces, but it is less effective on porous materials like grout or drywall. For porous surfaces, consider alternative cleaners or professional guidance.
Bleach can kill mold on non-porous surfaces, but porous materials may need other cleaners or professional help.
Can I mix bleach with other cleaners?
Never mix bleach with ammonia or acids. Mixing can release hazardous gases and cause serious health risks.
Never mix bleach with ammonia or acids; it can release toxic gases.
What is the safe dilution for household surfaces?
Always follow the product label for dilution; concentrations vary by product and surface. Use the lowest effective concentration and avoid over-wetting sensitive materials.
Follow the product label for dilution; use the lowest effective concentration.
Is it safe to use bleach on colored fabrics?
Bleach can fade or damage colors. Use color-safe oxygen bleaches or spot-test a hidden area before cleaning fabrics.
Bleach can fade colors; test first or use color-safe alternatives.
How long should surfaces stay wet with bleach?
Follow the label for dwell time. It is usually a few minutes, after which you rinse or wipe as directed.
Follow the label for how long to keep the surface wet; usually a few minutes.
What safety steps should I take with kids and pets nearby?
Keep children and pets away from treated areas until surfaces are dry and the room is ventilated. Store bleach securely.
Keep kids and pets away until surfaces dry and air is clear.
Watch Video
The Essentials
- Always follow label directions for dilution and contact time
- Test on a hidden area before broad use
- Never mix bleach with ammonia or acids
- Ventilate and wear PPE during use
- Rinse and dry surfaces thoroughly after treatment