How to Clean House: A Step-by-Step Guide for a Healthier Home
Master a practical, room-by-room plan to clean house efficiently. This Cleaning Tips guide covers tools, steps, safety, decluttering, and eco-friendly options for a healthier, happier home.

Goal: Learn a practical, repeatable method to clean a house efficiently, following a room-by-room plan and a clear six-step sequence. This guide covers planning, essential tools, time-saving techniques, safety tips, and eco-friendly options so you can achieve a truly clean house without wasting your weekend. Whether you rent or own, this approach scales to small apartments and large homes alike.
Why a clean house matters for health and daily life
A clean house is more than a pristine surface; it supports healthier air, better sleep, and fewer allergy triggers. When dust, pet dander, and mold spores accumulate, you may notice sneezing, coughing, or itchy eyes, especially in bedrooms and living spaces. The goal of this guide is not perfection, but a sustainable routine that makes everyday living easier and more comfortable. According to Cleaning Tips, a consistent cleaning habit reduces cognitive load and stress, because the home environment no longer feels chaotic. The idea of a calm, organized space helps you focus on what matters most—family time, work, and rest. This is why we emphasize a practical, repeatable plan that you can adapt whether you live in a compact apartment or a spacious house. A clean house also sets a good example for kids, making chores feel like teamwork rather than punishment.
Quick-start planning and time management
Effective cleaning begins with a plan and a timer. Start by selecting a realistic window for your weekly clean; even 30 minutes can move the needle if you stay focused. Create a simple checklist that covers the major zones: kitchen, living areas, bedrooms, and bathrooms. Decide which tasks belong to maintenance (dusting, vacuuming) and which are deeper cleans (ovens, grout, behind furniture). Use a 15-minute sprint approach: set a timer, complete a short, high-impact task, and move on. The key is consistency—brief sessions on a regular schedule beat long, sporadic cleaning sessions. Cleaning Tips notes that households with routine cleaning report less buildup and easier maintenance over time. Record your plan in a reusable notebook or an app so you can track progress and celebrate small wins as you go.
Efficient tool setup and supplies
Before you start, assemble a dedicated cleaning caddy with all your essentials. Avoid running back and forth to the pantry; this wastes precious minutes and interrupts momentum. A well-rounded kit includes microfiber cloths, an all-purpose cleaner, a broom, a vacuum, a mop, sponges, and a trash bag system. Consider investing in a small squeegee for bathroom surfaces and an extendable duster for high ceilings and light fixtures. Using separate cloths for different surfaces reduces cross-contamination and makes cleanup faster. Cleaning Tips suggests labeling tools and keeping them in a central location for quick access, which is especially helpful for renters who need to manage limited storage space.
Room-by-room cleaning workflow
Adopt a top-to-bottom, left-to-right approach to avoid re-cleaning areas. Start at the highest surfaces (dusting fans, shelves, picture frames) and work down to floors. In living rooms, focus on dusting electronics and wiping down furniture with a microfiber cloth; vacuum upholstery to remove hidden dust. Kitchen tasks should begin with clearing counters, then wiping surfaces, and finally cleaning appliances with a dedicated spray. Bedrooms benefit from changing linens, dusting nightstands, and vacuuming under beds. Bathrooms require attention to grout, mirrors, and fixtures, followed by a quick mop of the floor. A consistent sequence prevents backtracking and reduces total cleaning time. The Cleaning Tips team emphasizes maintaining a steady pace and avoiding over-wetting surfaces, which can spread dirt rather than remove it.
Deep-clean tasks and seasonal routines
Deep-cleaning tackles stubborn grime and neglected areas. Schedule a quarterly deep clean for appliances (oven, range hood, fridge seals) and grout lines, plus annually for behind large furniture. Seasonal routines help align cleaning with changes in weather: spring for dust and allergens, fall for preparing the home before heating season, and winter for anti-slip floor care and window tracks maintenance. Use a stepladder to reach high corners and a soft brush for delicate surfaces. Sharing the responsibility across family members makes these tasks less daunting and ensures nothing is forgotten. Cleaning Tips notes that seasonality improves overall indoor air quality and reduces long-term maintenance costs.
Safety, eco-friendly options, and waste reduction
Safety comes first. Wear gloves when using cleaning products, follow label directions, and ventilate the space. For eco-friendly cleaning, rely on simple ingredients such as vinegar and baking soda for common tasks, but never mix bleach with ammonia or vinegar with bleach. Use low-VOC cleaners or make your own when possible to minimize chemical exposure. Collect packaging waste from cleaning products and recycle or reuse containers when feasible. Reducing waste also means choosing multi-use tools and reusing cloths. The Cleaning Tips team highlights that mindful product selection supports healthier homes and reduces environmental impact over time.
Common mistakes and how to avoid them
Common pitfalls include over-wetting carpets, using abrasive tools on delicate surfaces, and neglecting overlooked areas like door frames and baseboards. Another error is cleaning in the wrong order, which can undo earlier progress. To avoid these issues, follow a defined workflow, test cleaners in a small area, and use gentle products on sensitive finishes. Don’t rush—speed must come from a clear plan, not from skipping steps. When in doubt, re-check surfaces and adjust the plan to accommodate room layout or household needs. The goal is to be efficient, not aggressive, and to maintain safety for everyone in the home.
Maintenance mindset: turning cleaning into a habit
A healthy cleaning routine becomes a habit through consistency, not perfection. Schedule regular short sessions and celebrate small wins to reinforce positive behavior. Create a visual checklist that marks off completed tasks, and use alarms or reminders to stay on track. Encourage family members to contribute by assigning age-appropriate chores. With time, cleaning will feel less like a chore and more like a routine part of home maintenance. The Cleaning Tips team recommends framing cleaning as care for your living space and all who share it.
Quick-start checklist and sample 60-minute plan
If you’re short on time, start with a 60-minute plan: 10 minutes for decluttering and setup, 15 minutes for dusting and surfaces, 15 minutes for vacuuming, and 20 minutes for a focused kitchen or bathroom wipe-down. Keep a wall clock or timer visible so you can stay on track. After finishing, reset the space by returning tools to their caddy and folding towels or throws. A simple, repeatable template helps you reach a consistently clean house even on busy weeks. Cleaning Tips observes that this approach reduces mental load and makes housekeeping feel achievable rather than overwhelming.
Renters vs homeowners: adapting the plan
Renters can implement most of the same steps with attention to storage and landlord requirements. Use removable, non-damaging cleaning solutions and be mindful of shared spaces in multi-unit buildings. Homeowners may have more flexibility to deep-clean behind appliances or tackle grout issues with a rental-friendly method. The key is to adapt the room-by-room plan to your dwelling size, storage constraints, and lifestyle while maintaining safety and consistency. The core idea remains the same: a clean house supports health, mood, and daily efficiency.
Tools & Materials
- All-purpose cleaner(Choose a versatile formula or make your own with 1:1 water and white vinegar, if absent bleach.)
- Microfiber cloths(Multiple colors recommended to prevent cross-contamination across surfaces.)
- Broom and dustpan(Wide head for faster sweeping; keep dustpan close.)
- Vacuum cleaner(Bagless or bagged; with attachments for upholstery.)
- Mop and bucket(Microfiber mop heads are preferable for durability.)
- Sponges(Non-abrasive for counters and sinks.)
- Scrub brush(Useful for grout and stubborn grime.)
- Gloves(Protect skin from cleaners.)
- Trash bags(Use appropriate sizes for each room.)
- Disinfectant wipes or spray(For high-touch surfaces.)
- Ventilation mask(Optional for strong cleaners or aerosol tasks.)
- Vinegar(Natural cleaner; avoid mixing with bleach.)
- Baking soda(Great for deodorizing and gentle scrubbing.)
- Old towels(For absorbing spills and drying surfaces.)
- Timer(Helps enforce the 60-minute plan.)
- Caddy or tote(Keeps tools organized and portable.)
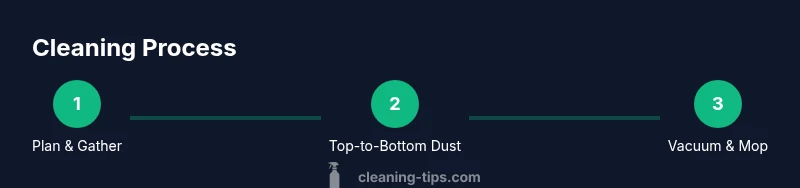
Steps
Estimated time: 60-90 minutes
- 1
Clear clutter and prepare
Remove items from floors and surfaces, collect trash, and put items in their designated spots. This prevents re-soiling and creates a clean canvas for the rest of the tasks.
Tip: Do a quick sweep of each room before you start cleaning. - 2
Dust from top to bottom
Dust ceiling corners, light fixtures, shelves, and furniture starting at the highest point and moving downward to avoid re-deposits.
Tip: Use a microfiber cloth and a long-handled duster for hard-to-reach areas. - 3
Vacuum all rooms
Vacuum carpets, rugs, and hard floors; use attachments for edges and upholstery.
Tip: Vacuum in multiple directions to lift embedded dirt. - 4
Mop and wipe hard floors
Mop kitchen and bathroom floors after dusting; allow to air-dry to prevent streaks.
Tip: Rinse mop frequently and change water for heavily soiled areas. - 5
Clean kitchen surfaces
Wipe counters, backsplashes, and appliance exteriors; clean stovetop and sink to prevent grime buildup.
Tip: Follow manufacturers' directions on stainless steel surfaces to avoid streaks. - 6
Tackle bathrooms thoroughly
Scrub sinks, toilets, showers, and tiles; wipe mirrors and polished fixtures; finish with a quick floor mop.
Tip: Use a separate cloth for mirrors to avoid lint residue. - 7
Change linens and organize bedrooms
Strip and replace beds, straighten surfaces, and vacuum under beds when possible.
Tip: Rotate pillow covers and keep a small laundry bin handy. - 8
Final tidy and reset
Return tools to the caddy, collect any stray items, and set a tidy zone for the next cleaning session.
Tip: Set a 5-minute reset timer to finish with a neat space.
Questions & Answers
How often should I clean my entire house?
Aim for a weekly maintenance session plus a quarterly deep-clean for kitchens and bathrooms. Adjust based on household activity, pets, and climate. Consistency matters more than perfect timing.
Aim for a weekly maintenance clean with quarterly deep-clean tasks; adjust to your household needs.
What order should I clean in for efficiency?
Clean from top to bottom and from the farthest room toward the door. Start by dusting high surfaces, then wipe down counters, and finish with floors to prevent recontamination.
Clean from top to bottom, then move room-to-room toward the exit to stay efficient.
If I don’t have a vacuum, what should I do?
Use a broom for hard floors and a handheld cleaner for carpets if available. Consider renting or borrowing a vacuum for deeper cleans. Quick spot cleaning works well until you can access a vacuum.
Use a broom on floors and borrow a vacuum for deeper cleans when possible.
Are natural cleaners effective for everyday cleaning?
Vinegar and baking soda work well for many surfaces, but some stains require specialty cleaners. Always test in an inconspicuous area first and avoid mixing with bleach.
Natural cleaners can work well for many tasks; test first and avoid mixing chemicals.
How can I stay motivated to clean regularly?
Set small, achievable goals and reward yourself after completing a routine. Keep a visible checklist and involve others in the household to share responsibility.
Create small goals, celebrate progress, and share tasks with others to stay motivated.
Is it safe to clean around kids and pets?
Choose kid- and pet-safe products, ventilate well, and keep cleaners out of reach. Schedule stronger cleaning tasks when children and animals are out of the space.
Use safe cleaners, ventilate, and keep chemicals out of reach around kids and pets.
Watch Video
The Essentials
- Start with a clear plan and 60-minute time blocks.
- Dust top-to-bottom to prevent re-deposits.
- Use microfiber cloths and color-coded supplies.
- Tackle rooms in a practical order to maximize efficiency.
- Maintain safety and eco-friendly options for a healthier home.