How to Clean Ear Wax Safely at Home: A Complete Guide
Learn safe, at home methods to clean ear wax without risk. This guide covers gentle drops, irrigation basics, safety signs, and when to seek professional care for ear health.

This guide explains how to clean ear wax safely at home using gentle methods that soften wax and protect the ears. You will learn to avoid inserting objects into the ear canal, know when to seek professional care, and follow practical steps and safe tools for effective, pain-free cleaning.
Why Ear Wax Exists and Why You Should Care
Cerumen, or ear wax, is produced by the outer ear to protect and moisturize the canal. It traps dust, slows drying, and helps shield the skin from infection. Most people produce and clear wax naturally, but buildup can occur, especially with hearing aids, headphones, or frequent cleaning. If you are wondering how clean wax from ears without causing irritation, the answer lies in gentle, conservative methods. According to Cleaning Tips, safe ear care respects the ear's natural defenses and avoids aggressive probing. Ear wax is not dirt to be scraped away indiscriminately; it is a protective substance that usually exits the ear on its own. This section explains what ear wax does, why buildup happens, and how to approach removal without forcing wax deeper or damaging the canal. The goal is to provide a clear, practical path to safer cleaning that reduces irritation and the need for medical care.
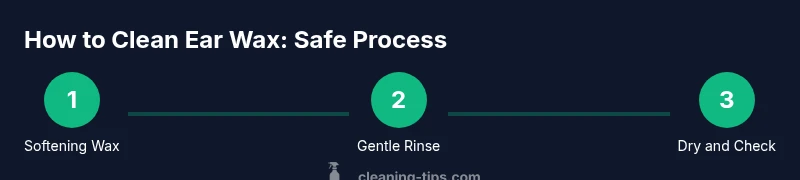
Safe Methods to Clean Ear Wax at Home
Safe ear care starts with softening wax before any attempt to remove it. Using a few drops of mineral oil, baby oil, or an over the counter ear drop, wait several minutes to let the wax soften. Do not touch the ear canal with objects during this process. After softening, you can use a bulb syringe with warm water to gently rinse the outer ear. Tilt your head to the side and pull the earlobe down to straighten the canal, then redirect the flow away from the eardrum. Stop if you feel resistance or pain. This approach emphasizes patience and mild pressure to minimize risk while still helping wax exit naturally in many cases. The Cleaning Tips team notes that conservative methods work well for most people, especially when you avoid aggressive probing.
Common Myths Debunked
A frequent misconception is that cotton swabs clean ears effectively. In reality they often push wax deeper or irritate the delicate skin. Ear candles are another popular myth but are dangerous and not recommended by experts. Irrigation should be avoided if you have a history of ear infections, a perforated eardrum, or tubes. Natural remedies like baking soda or hydrogen peroxide can irritate the ear canal, so it is better to rely on mild options and professional guidance for persistent issues. Remember that wax buildup is sometimes a sign to pause and monitor symptoms rather than forceful removal.
Ear Drops: How They Work and How to Use Them
Ear drops soften wax and make it easier to remove. Choose mineral oil, baby oil, or an OTC ear drop and follow the label directions. Warm the drops to body temperature to prevent dizziness and never use drops if you have a known perforation or tubes in the ear. Tilt the head, place the recommended number of drops in the ear, and stay in that position for several minutes to allow the product to work. After use, wipe away any excess and wait before attempting irrigation. This section shows you how to apply safely and why proper temperature matters for comfort and safety.
Gentle Irrigation: Rinsing Wax Gently
Irrigation involves using warm water to flush softened wax from the ear canal. Use a bulb syringe and direct the stream toward the roof of the ear canal rather than straight at the eardrum. Keep the water at about body temperature to prevent dizziness and discomfort. Stop immediately if you feel pain or see drainage, and avoid forcing movement in the canal. After irrigation, dry the outer ear with a soft towel and keep the ear upright for a few minutes to let any remaining moisture escape. This step helps complete the cleaning without pushing wax deeper.
Special Cases: Hearing Aids, Children, and Older Adults
Children may have smaller ear canals and different wax production patterns, so use gentler drops and shorter irrigation sessions. Hearing aid wearers should clean the outer ear more carefully and avoid direct irrigation into the canal. For older adults or people with a history of ear infections, consult a clinician before attempting home cleaning. If you wear a prosthetic or device that touches the ear, keep the area dry and monitor for irritation.
When to See a Doctor: Red Flags and Next Steps
Seek medical attention if you experience severe pain, sudden hearing loss, persistent dizziness, fever, or drainage from the ear. If wax keeps accumulating or blocks hearing despite careful at-home cleaning, a clinician might remove it with specialized tools. Do not attempt aggressive removal if you have a perforation, tubes, or a prior surgical history in the ear. Early professional evaluation can prevent complications and protect hearing health.
Maintenance and Prevention: Keeping Ears Clean and Healthy
Daily hygiene remains important but avoid overcleaning. Gentle external cleaning of the outer ear is fine, but the ear canal should be left alone unless guided by a clinician. Regularly inspect your ears for signs of irritation or discharge, manage allergies that cause itching, and schedule periodic checkups if you notice consistent wax buildup. This section provides practical, long-term strategies to keep ears comfortable and reduce the need for frequent cleaning.
Tools & Materials
- Ear drops (mineral oil, baby oil, or OTC ear drops)(Softens wax; follow label directions)
- Bulb syringe or gentle ear irrigation bottle(Use with body-temperature water; avoid forced jets)
- Towel or soft cloth(Protects clothing and catches drips)
- Warm water (body temperature)(Test on wrist; not hot)
- Gloves (optional)(Keep hands clean during process)
Steps
Estimated time: 30-45 minutes
- 1
Prepare and soften wax
Lie on your side and apply the recommended drops into the outer ear. Keep the head tilted for several minutes to allow the drops to soften the wax. This softening step reduces the risk of pushing wax deeper during subsequent steps.
Tip: Set a timer for 5 to 10 minutes to ensure the wax is adequately softened. - 2
Rinse with warm water
Gently draw warm water into a bulb syringe and direct the stream toward the upper part of the ear canal, not the eardrum. Allow the water to flow out along with loosened wax, repeating as needed with patience.
Tip: Keep the water at roughly body temperature to avoid dizziness. - 3
Dry the outer ear
Pat the outer ear dry with a soft towel. Do not insert the towel into the ear canal. If moisture remains, wait a few more minutes before repeating any steps.
Tip: Use a clean, dry cloth and avoid rubbing inside the ear canal. - 4
Assess residual wax
Check the outer ear for any remaining wax or discomfort. If wax remains inside the canal or you still notice blockage, consider waiting and gently repeating with professional guidance.
Tip: Do not force or push any object into the ear canal. - 5
Consider professional evaluation
If you have a perforated eardrum, tubes, or persistent symptoms, seek medical advice before continuing at-home cleaning. A clinician can remove wax safely using specialized tools.
Tip: Ear conditions may require expert assessment for safe management. - 6
Special cases for devices
If you wear a hearing aid or cochlear device, clean the outer ear first and avoid inserting the device so as not to dislodge wax or irritate the canal. Follow device manufacturer guidance.
Tip: Always turn off devices before cleaning the surrounding area. - 7
Children and elderly care
Young children have smaller canals; use milder drops and shorter irrigation sessions. Elderly individuals may need extra care to avoid irritation or balance issues.
Tip: Check temperature and keep sessions short to minimize discomfort. - 8
Stop if pain or dizziness occurs
If you feel sharp pain, persistent dizziness, or any drainage, stop immediately and seek medical help. Do not continue cleaning when pain occurs.
Tip: Pain is a warning sign; safety overrides the desire to finish quickly.
Questions & Answers
Is it safe to clean ear wax at home
Yes, with gentle methods and proper drops. Do not insert objects into the ear and stop if pain or dizziness occurs. If symptoms persist, consult a clinician.
Yes, but use gentle drops and avoid putting objects in the ear. Stop if you feel pain and seek medical help if symptoms persist.
What should I do if cleaning causes pain or dizziness
Stop cleaning immediately. Rinse gently with warm water only if guided, and seek medical advice if pain continues or there is drainage or hearing loss.
Stop immediately and seek medical advice if pain or dizziness occurs.
Can hydrogen peroxide be used for ear wax
Hydrogen peroxide can irritate the ear canal in some people. Use only as directed by a clinician or product label and avoid if you have a perforated eardrum.
Hydrogen peroxide can irritate the ear; use it only as directed or avoid if you have a perforation.
How often should I clean ear wax at home
Most people should limit at-home cleaning to occasional sessions. Frequent cleaning can irritate the ear canal; follow clinician guidance for your situation.
Limit at home cleaning to occasional sessions and follow guidance from a clinician.
Are cotton swabs ever appropriate for ear care
Cotton swabs are not recommended for cleaning the ear canal as they can push wax deeper or cause injury. Use safer methods described here.
Cotton swabs are not recommended for ear cleaning; use gentler methods instead.
What should I do if wax keeps returning
Wax buildup can recur with natural variation. If you notice persistent blockage, pain, or hearing changes, see a clinician who can assess and offer safe removal options.
If wax keeps returning or you notice blockage, see a clinician for evaluation.
Watch Video
The Essentials
- Softening wax before irrigation reduces risk
- Never insert objects into the ear canal
- Use gentle, body-temperature irrigation with care
- Seek professional help for persistent symptoms