How to Clean Out Your Ear Safely: A Practical Guide
Learn safe, evidence-based methods to clean earwax at home. This guide covers when at-home care is appropriate, gentle drops, irrigation cautions, and signs you should seek professional help to protect hearing.

Goal: learn safe, at-home steps to clean out your ear without causing damage. You’ll soften wax with approved drops, avoid inserting objects into the ear canal, and know when to seek professional care. This guide emphasizes safety first and provides clear, step-by-step actions anyone can follow at home, with minimal risk.
Understanding earwax and ear health
Earwax, or cerumen, is a natural substance produced by glands in the outer ear canal. It traps dust and bacteria and helps protect the delicate skin of the ear. For most people, earwax moves outward on its own, carried by jaw movements like chewing and talking. Because the ear is self-cleaning for many, you typically don’t need to clean deep inside the canal. The question a lot of readers ask is: how do you clean out your ear without causing harm? The safest approach starts with gentle care and respect for the ear’s natural defenses. According to Cleaning Tips, ears are delicate, and safe cleaning prioritizes minimal intervention and conservative methods. If you notice pain, drainage, or sudden hearing changes, seek professional evaluation.
LSI keywords: earwax removal, ear irrigation, hearing health, ear drops, ear safety.
When at-home cleaning is appropriate
Home cleaning is reasonable when there is visible wax near the opening of the ear and no accompanying symptoms like pain, fever, or discharge. Do not force wax out of the canal, and avoid aggressive attempts. People with a history of ear surgery, tubes, a compromised immune system, diabetes, or a ruptured eardrum should avoid DIY cleaning and consult a clinician. The aim is to maintain ear health, not chase every speck of wax. In many cases, modest approaches reduce irritation and avoid injury. Cleaning Tips emphasizes that for most adults, minimal intervention paired with safe practices yields the best outcome.
Safe at-home methods: ear drops and timing
Softening earwax with recommended drops is the foundation of safe DIY cleaning. Options include mineral oil, glycerin-based drops, or carbamide peroxide-based products. Use drops exactly as directed on the label, and avoid homemade mixtures. After applying, wait the recommended time for the wax to soften, which makes natural migration easier and lessens the chance of pushing wax deeper. Do not substitute drops with water alone, and never insert objects into the ear canal. Cleaning Tips notes that conservative, evidence-based care reduces risk while still helping maintain ear health.
Step-by-step safety: preparing the environment
Before starting, create a clean, well-lit space and have a mirror handy. Use a clean towel to catch any runoff and wash your hands. Adjust lighting so you can clearly see the ear opening without inserting anything deeply. If you wear hearing aids or have a hearing assistive device, remove them gently to avoid interference. The goal is to minimize activity inside the canal while maintaining a clear view of what you’re doing. This preparation helps prevent accidental injury and supports a calm cleaning process.
Step 1: Gather supplies and set up
- Gather essential items: ear drops (softening solution) and a clean towel. Optional: a bulb syringe for gentle irrigation if advised by a clinician. Keep everything within reach and at room temperature to avoid shocking the ear with cold or hot liquids. The surface should be dry, and hands clean. Start by inspecting the ear enough to notice visible wax at the canal opening, not deep inside.
- Why: Having the right tools reduces the temptation to improvise with unsuitable materials, which lowers the risk of injury.
- Tip: Have a clock handy to time waiting periods accurately and avoid rushing.
Step 2: Apply ear drops to soften wax
Tilt your head to the side with the affected ear up. Administer the recommended number of drops into the ear canal, following product instructions. Keep the head tilted for the advised duration to allow the solution to saturate the wax. Then return to an upright position and let gravity help some of the softened wax move toward the outer ear opening. This step creates the conditions for gentle removal without scraping.
- Why: Softening wax makes mechanical removal safer and reduces the chance of pushing it deeper.
- Tip: If you feel a burning sensation or persistent irritation, stop and consult a clinician.
Step 3: Optional irrigation (only if advised)
If a clinician or product instructions suggest irrigation, use warm (not hot) water at body temperature to flush the ear gently. Hold the syringe like a fountain, aiming the stream toward the top back of the ear canal with the head tilted. Do not force the stream or use sharp objects. Irrigation should result in wax exiting the canal naturally or dispersing in the outer ear area. If you feel resistance or pain, stop immediately.
- Why: Proper irrigation can dislodge softened wax without scraping or damaging the ear drum.
- Tip: Always use water at body temperature to avoid vertigo or irritation.
Step 4: Drying and checking results
After irrigation, gently dry the outer ear with a clean towel. Do not insert anything into the canal to dry it. You may want to run a finger lightly along the outer edge to feel for dampness near the opening. If there is any residual wax, repeat the softening process after a day or two if advised by a clinician. If you notice persistent fullness, decrease in hearing, or pain, seek professional help.
- Why: Dry ear conditions prevent maceration and irritation that can come from damp wax.
- Tip: Avoid using cotton swabs beyond the outer ear opening as they can push wax inward.
When to see a clinician and what to expect
Some conditions require professional care: severe pain, bleeding, fever, or a feeling that wax remains despite home efforts. A clinician can assess with a gentle exam, remove wax using specialized instruments, or prescribe safe drops. If you have tubes, a history of ear surgery, or a perforated eardrum, DIY cleaning is generally not recommended. The best outcome comes from cautious, informed decisions and timely professional input. The Cleaning Tips team recommends prioritizing safety and seeking help for persistent symptoms.
Tools & Materials
- Ear drops (softening solution)(Mineral oil, glycerin-based drops, or carbamide peroxide-based products; warm to body temperature before use)
- Bulb syringe for irrigation (optional)(Only use if advised by a clinician; do not force water into the ear)
- Clean towels or cloth(For catching runoff and drying the outer ear)
- Warm water(For irrigation if prescribed; ensure it’s body temperature to avoid vertigo)
- Gloves (optional)(For hygiene if sharing equipment)
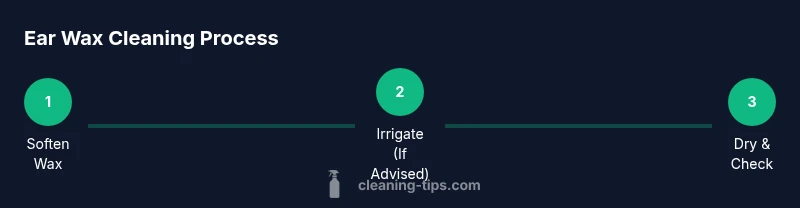
Steps
Estimated time: 30-60 minutes
- 1
Gather supplies and prep
Collect all necessary items and set up a well-lit, clean workspace. Ensure hands are clean and you have a mirror for careful visibility. Preparing the environment reduces mistakes and keeps you focused on safe technique.
Tip: Have a clock or timer handy to track waiting periods and irrigation times. - 2
Apply ear drops to soften wax
Tilt the head and administer the recommended number of drops into the ear canal, following product instructions. Keep the head tilted for the required duration to let the solution saturate the wax and begin loosening it.
Tip: If discomfort occurs, stop and consult a clinician before proceeding. - 3
Wait for the drops to work
Remain in the same position for the advised time to allow the drops to soften the wax. Avoid forcing movement or probing the canal during this period.
Tip: Use this time to review safety steps and breathe slowly to stay relaxed. - 4
Gently irrigate (if advised)
If recommended by a clinician, irrigate with warm water at body temperature using a bulb syringe. Aim the stream toward the upper back corner of the ear canal and avoid sharp pressure or deep insertion.
Tip: Never irrigate if you have a perforated eardrum or tubes. - 5
Dry and assess results
Pat the outer ear dry with a clean towel. Check for remaining wax or fullness; repeat only if advised by a clinician. Stop if you experience pain or dizziness.
Tip: Do not insert objects into the ear canal to dry or remove wax.
Questions & Answers
Is it safe to clean your ears at home?
In many cases, gentle at-home care is safe when you follow product directions, avoid inserting objects, and refrain from aggressive cleaning. If you have any risk factors or symptoms like pain or discharge, consult a clinician.
Yes, but only with gentle methods and by following product guidelines. Seek a clinician if pain or discharge occurs.
Can I use cotton swabs to clean my ears?
Cotton swabs are not recommended for cleaning inside the ear canal because they can push wax deeper or injure the eardrum. Use softening drops and, if needed, professional removal.
No. Avoid putting swabs in the ear canal; they can cause damage.
What should I do if I have ear tubes or a perforated eardrum?
DIY cleaning is usually not advised with tubes or a perforated eardrum. Seek professional care for safe assessment and removal, if needed.
If you have ear tubes or a perforated eardrum, avoid home cleaning and see a clinician.
How often should I clean my ears?
Most people do not need regular ear cleaning. Clean only when wax is visibly interfering with hearing or comfort, and always follow safe guidelines.
Only clean when wax affects you and use safe methods.
Are home ear-cleaning kits effective?
Home kits can be helpful if used as directed and for non-complicated cases, but they are not a substitute for professional assessment when problems persist.
Kits can help, but persistent issues should be evaluated by a clinician.
Watch Video
The Essentials
- Earwax is protective; you usually don’t need deep cleaning
- Use only recommended ear drops to soften wax
- Avoid cotton swabs and aggressive probing inside the canal
- Irrigate only if advised by a clinician and with proper technique
- Seek professional care for persistent symptoms or ear injuries