How to Safely Clean Your Ears: Practical At-Home Guide
Learn safe, at-home ear cleaning techniques: ear wax basics, when to avoid home care, safe drops, gentle irrigation, outer-ear hygiene, and signs you should see a doctor.

To safely clean your ears, start by softening earwax with recommended drops and only clean the outer ear. Do not insert objects into the canal. If irrigation is advised by a clinician, use warm water and gentle pressure. Wipe away excess moisture and seek medical help for pain, discharge, or persistent blockage.
Understanding ear wax and why cleaning matters
How do we clean our ears? The question is often asked, and the answer begins with a clear view of ear wax (cerumen) and its purpose. According to Cleaning Tips, ear wax is a natural, protective substance that traps dust, lubricates the skin of the ear canal, and helps repel bacteria. It normally moves outward as we chew, talk, and shed skin from the ear canal. For most people, minimal cleaning is required because the ear canal self-cleans itself in a gentle, ongoing way. Over-cleaning, or using objects to poke or scrape inside the canal, can push wax deeper, irritate the skin, or even injure the eardrum. This section sets the foundation for a safe at-home routine, emphasizing outer-ear care, safe products, and recognizing when professional care is warranted.
Common myths about ear cleaning
There are many beliefs about ear cleaning that lead to risky habits. A common myth is that inserting cotton swabs into the ear canal will remove all wax and improve hearing. In reality, Q-tips and similar objects can compact wax, scratch the skin, or perforate the eardrum. Ear candling is another widely spread myth that is ineffective and potentially dangerous. The ear is generally self-cleaning, and most people do not need aggressive cleaning beyond wiping the outer ear. Cleaning Tips emphasizes that the safest routine focuses on the outer ear and wax-softening strategies rather than aggressive canal manipulation. This myth-busting helps homeowners avoid unnecessary risks.
When home cleaning is not recommended
Certain ear conditions and situations demand caution or medical oversight. If you have a history of perforated eardrums, ear tubes, recent ear surgery, ongoing ear infections, or intense pain, do not attempt home canal cleaning. In these cases, self-cleaning may worsen symptoms or cause complications. Similarly, if there is drainage with blood or a fever, seek prompt medical evaluation rather than attempting home-based remedies. This section highlights red flags and underscores the importance of professional assessment when danger signs are present.
Safe at-home options for cleaning ears
A safe at-home approach centers on softening earwax, outer-ear hygiene, and careful irrigation only when advised by a clinician. Softening drops, typically containing mineral oil, olive oil, or carbamide peroxide, can loosen wax over a few minutes. Outer-ear cleaning with a damp cloth is acceptable, but never insert objects into the canal. If a clinician approves irrigation, use warm (body temperature) water and a bulb syringe at a shallow angle. Dry the outer ear thoroughly after any procedure to prevent moisture-related irritation. This section outlines a conservative, evidence-based plan that prioritizes safety and comfort.
How to pick and use ear drops effectively
Choosing the right drops depends on your needs and any medical advice you’ve received. Mineral oil or olive oil drops are gentle options for softening wax, while carbamide peroxide-based drops may help with wax loosening for some people. Always read the product label and use exactly as directed. To apply, tilt your head, place the recommended number of drops into the outer ear, and keep the head tilted for several minutes to let the drops contact the wax. Afterward, wipe away any excess from the outer ear with a clean tissue. If you experience burning, persistent itching, or worsening symptoms, discontinue use and consult a clinician. This section stresses the importance of following medical guidance and product instructions for safe outcomes.
Gentle irrigation: rules, techniques, and safety
Irrigation is not always appropriate, but when a clinician approves it, use warm water and a gentle, controlled flow. The bulb syringe should be used at a shallow angle toward the roof of the ear canal rather than straight in, to avoid injuring the canal or eardrum. Do not force water or attempt to rinse wax that is tightly packed against the eardrum. Stop immediately if you feel pain, dizziness, or hearing loss during irrigation. After irrigation, dry the outer ear and monitor for any signs of irritation. This section provides practical steps and cautions to minimize risk during canal irrigation.
Outer-ear hygiene and drying tips
Outer-ear hygiene means cleaning only the visible parts of the ear with a damp cloth or mild soapy water around the auricle (the outer ear) without entering the ear canal. After any cleaning or irrigation, gently dry the area with a clean towel. Avoid humid environments or prolonged moisture that can lead to swimmer’s ear or skin irritation. If you notice persistent redness, swelling, or discharge, contact a healthcare provider. This section reinforces safe outer-ear care as a low-risk aspect of ear hygiene.
Common mistakes and how to avoid them
Common mistakes include inserting objects into the ear canal, using irrigation when not advised, and cleaning too frequently. Even seemingly gentle tools can cause micro-injuries that later become painful or infected. To avoid these errors, reserve canal cleaning for outer-ear care, rely on clinician-approved drops, and limit irrigation attempts. If wax buildup continues to affect hearing or comfort, seek medical evaluation rather than attempting multiple home procedures.
Maintenance routine and when to recheck
Establish a simple maintenance routine that prioritizes outer-ear care and safe products. If you notice changes in hearing, persistent fullness, or recurring wax buildup, schedule a check with a clinician. Do not over-clean to avoid irritation or imbalance of the canal’s natural defenses. This section offers a sustainable approach to ear hygiene that reduces risk while supporting long-term ear health.
Quick-clean routine for kids and adults
For children, keep sessions brief, supervise all steps, and use appropriate, kid-safe drops with small quantities. Adults can follow the same steps, adjusting for tolerance and anatomy. The key is to be gentle, patient, and consistent, avoiding forceful cleaning that could damage the ear canal. This section provides a practical, adaptable routine suitable for families.
What to do if cleaning doesn't help
If wax remains after safe at-home methods or if you experience pain, fullness, or hearing loss, seek professional evaluation. A clinician can visually inspect the ear, determine if there is an obstruction or infection, and use specialized tools to remove wax safely. Do not resort to aggressive home methods that could worsen symptoms. This final guidance emphasizes when to escalate care and how to protect ear health over time.
Authoritative sources and further reading
For ongoing guidance on ear care, consult trusted sources. The National Institute on Deafness and Other Communication Disorders (NIDCD) provides reliable information about ear health and wax management. MedlinePlus, a service of the U.S. National Library of Medicine, offers patient instructions for ear-wax care. These sources support informed decisions and safe practices for how we approach ear cleaning at home.
Tools & Materials
- Ear drops (mineral oil, olive oil, or carbamide peroxide-based drops)(Used to soften earwax; follow label and doctor guidance.)
- Bulb syringe or ear irrigation kit(For safe irrigation if advised by a professional; never push into ear canal.)
- Towel or clean cloth(Place to catch spills and keep area dry.)
- Warm water (body temperature)(For irrigation; test on your wrist first to avoid discomfort.)
- Cotton balls (outer-ear cleaning only)(Use to dab around outer ear; do not insert into ear canal.)
- Gloves (optional)(For hygiene and comfort.)
Steps
Estimated time: 30-60 minutes
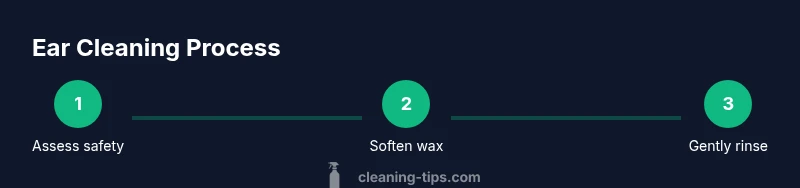
- 1
Assess safety
Before you begin, check for signs that home cleaning is inappropriate (pain, drainage, history of perforation, recent ear surgery). If any red flags appear, skip home cleaning and consult a clinician.
Tip: If you have prior ear problems, err on the side of caution or seek professional advice. - 2
Softening wax with drops
Apply the recommended drops to the outer ear according to the label, then remain in the tilted-head position for 5–10 minutes to allow the wax to soften.
Tip: Warm the drops to body temperature before use to prevent dizziness. - 3
Apply and wait
Keep the head tilted and allow the drops to contact the ear canal. Do not insert the dropper into the canal. Wait the full recommended time (usually 5–10 minutes).
Tip: Avoid touching the ear with the dropper to maintain hygiene. - 4
Gently irrigate (if advised)
If a clinician approves irrigation, fill the bulb syringe with warm water and flush at a gentle, shallow angle toward the roof of the canal. Stop if you feel pain or dizziness.
Tip: Use a 45-degree angle and gentle pressure; never force water. - 5
Dry the outer ear
Tilt the head to drain water and pat the outer ear dry with a clean towel. Do not insert the towel into the ear canal.
Tip: Drying helps prevent swimmer’s ear and irritation. - 6
Assess results and repeat if needed
If wax remains, wait at least 24 hours before repeating. Do not exceed 2 attempts within a 7-day period.
Tip: Over-cleaning can irritate the ear canal. - 7
Outer-ear care after cleaning
Clean surrounding skin with a damp cloth and avoid aggressive scrubbing. Keep ears dry and free of irritants.
Tip: Watch for redness or itching; stop if irritation occurs. - 8
Special considerations for kids
Supervise all steps for children and use age-appropriate drops and amounts. Sessions should be short and calm.
Tip: Use a gentle approach and stop immediately if the child protests. - 9
Know when to seek help
If pain, fever, discharge, or persistent hearing loss occurs, seek medical evaluation.
Tip: Persistent symptoms may indicate infection or a blocked canal needing professional care.
Questions & Answers
Is it safe to use cotton swabs to clean ear canals?
No. Inserting cotton swabs into the canal can push wax deeper or injure the eardrum. Use them only on the outer ear if at all, and consider safer alternatives.
No. Do not insert cotton swabs into the ear canal; use them only around the outer ear if needed, and consult safer options for wax removal.
When should I see a doctor about ear cleaning?
Seek medical advice if you have severe pain, fever, drainage, hearing loss, or a history of ear tubes or perforation. Do not attempt aggressive home cleaning in these cases.
See a clinician if you have ear pain, fever, discharge, or hearing loss, or if you’ve had ear tubes or perforations in the past.
Can ear drops alone remove wax?
Drops can soften and loosen wax, allowing it to exit more easily. If wax remains or is hard, irrigation or professional removal may be needed.
Ear drops can soften wax, but if it stays stuck, you may need a clinician to remove it safely.
How long should I wait after applying ear drops before irrigation?
Follow the product instructions; commonly a 5–10 minute waiting period is recommended before attempting irrigation.
Wait the time indicated on the drops label, usually about 5 to 10 minutes, before any irrigation if advised by your clinician.
Are there natural remedies for earwax?
Natural, safe options are limited; generally, approved ear drops are preferred. Avoid unsafe methods such as home remedies that irritate the ear canal.
There aren’t proven natural cures; use approved drops and be cautious with anything placed in the ear canal.
What are signs of wax impaction?
Hearing reduction, fullness, ringing in the ears, or recurrent ear discomfort may indicate wax impaction that should be evaluated by a clinician.
If your hearing is muffled or you feel full in the ear, get checked by a doctor to rule out impaction or other problems.
Watch Video
The Essentials
- Avoid inserting objects into the ear canal
- Soft wax with approved drops first
- Irrigation only when advised by a clinician
- Dry outer ear thoroughly after cleaning
- Seek medical help for pain, fever, or discharge
- Wait at least 24 hours before reattempting if wax persists