Best Way to Clean Ears: Safe, Effective Methods
Discover the best way to clean ears safely with practical, doctor-approved steps. This guide covers safe methods, common mistakes, and when to seek professional care.

To clean ears safely, avoid inserting objects into the ear canal. The safest approach is external cleaning and, if needed, medically approved softening drops or saline to loosen wax. Do not irrigate or probe deeply yourself. If you have pain, discharge, or a history of ear problems, seek professional care. This guide outlines tested steps and safety tips. According to Cleaning Tips, avoid deep insertion.
Understanding Ear Wax and Ear Health
Ear wax, or cerumen, is a natural protective substance produced by glands in the ear canal. It traps dust, helps fight bacteria, and keeps the skin of the ear from drying out. The ear is also designed to shed old wax and debris through natural movements of the jaw and the growth of skin within the canal. For most people, cleaning should be minimal and limited to the visible outer ear. The goal is to keep the entrance clean and dry, not to remove all wax from the canal. Over-cleaning or inserting objects into the ear canal can remove protective wax or damage the delicate skin, increasing the risk of irritation, infection, or a perforated eardrum. According to Cleaning Tips, wax buildup that affects hearing or causes discomfort should be addressed with safe, conservative methods or by a clinician. Cerumen comes in many textures; when the wax is hard or builds up, it may not easily exit on its own, which can cause temporary hearing dullness or fullness. Recognize that what you see at the opening may be only a fraction of the total wax present inside the canal.
Minimal Cleaning: The Core Principle
Most ears are designed to manage wax on their own. Routine cleaning beyond wiping the outer ear with a damp cloth is rarely necessary. The outer ear can be cleaned safely with a soft cloth after bathing. If you notice a visible wax build-up at the entrance, you can start with gentle external techniques, but never insert tools into the canal. The risk of injury increases with improvisation. Cotton swabs, hairpins, and other objects can push wax deeper, scratch skin, or rupture the eardrum. If you experience persistent fullness, decreased hearing, or pain, these may indicate deeper wax or infection and warrant professional assessment. Cleaning Tips analysis emphasizes conservative care: address surface debris on the outside and consult a clinician for canal-level concerns.
Risks of Improper Cleaning
Improper cleaning can cause multiple problems: wax may be forced deeper, leading to impacted cerumen, temporary hearing loss, or a blocked ear. Instrumental objects can create micro-tears in the ear canal or even perforate the eardrum. Water entering the middle ear during improper irrigation can cause infection or pressure injuries, especially if you have a history of eustachian tube dysfunction. Allergic reactions to drops or irritants in the ear canal are possible. People with tubes or a history of ear surgery should be particularly cautious. If you have diabetes, immune suppression, or a recent ear infection, avoid DIY cleaning and seek medical advice. According to Cleaning Tips, always prioritize safety and if in doubt, pause and consult a clinician.
Outer-Ear Cleaning Techniques (Safe)
Safe methods focus on the visible exterior and falling debris. Start by wiping the outer ear with a warm, damp cloth after a shower. If wax is visible at the entrance and your clinician approves, you may apply a small amount of cerumen-softening drops or saline, but never pour liquid into the ear canal. Gently pat the outer ear dry with a clean towel, and avoid any irrigation unless advised by a professional. If you use drops, follow the label directions and duration. The outer ear is accessible and safe to clean when you stay at the surface and avoid the canal entirely.
Preparing Your Environment and Tools
Before you begin, gather the right supplies and set up a comfortable space. You will want a soft washcloth, warm water, mild ear drops or saline, a clean towel, and optional tools like a bulb syringe for external rinsing if advised by your clinician. Ensure you have good lighting and a calm atmosphere. Avoid distractions, and do not begin if you have balance issues, active infection signs, or ear pain. Hygiene matters too: wash hands before and after touching the ear area. These precautions help minimize risk and promote safe practice.
Step-by-Step At-Home Approach Overview
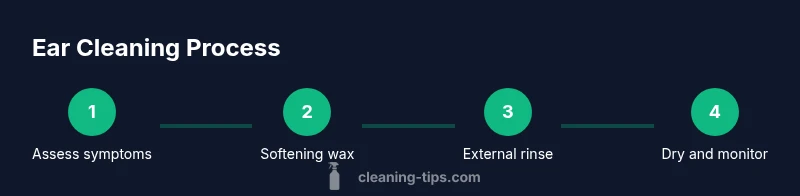
A safe at-home approach centers on surface cleaning and gentle wax management. Use warm air, soft cloth, and non-irritating solutions to protect the ear canal’s delicate lining. First, assess whether self-cleaning is appropriate and check for any symptoms that would require professional care. Then soften visible wax at the entrance with approved drops or saline, never forcing liquid into the canal. Finally, remove softened wax by external wiping and dry the area thoroughly. Remember: never insert objects, and stop immediately if you experience pain, dizziness, or drainage.
Special Considerations for Children and Older Adults
Children have smaller canals and more sensitive skin, so extra care is essential. For seniors, mobility and balance can complicate DIY cleaning, making external cleaning and professional assessments more prudent. If a child or older adult has hearing loss, pain, or discharge, seek medical guidance rather than attempting self-cleaning. It is also important to review any medical devices, such as hearing aids or tubes, with a clinician before attempting any home remedy. The goal remains to protect the ear while maintaining comfort and function.
Myths Debunked and Quick Fixes
A common myth is that all wax must be removed to improve hearing; in reality, a small amount of protective wax is normal and beneficial. Another myth is that irrigation is always safe; improper technique can cause harm. Quick fixes like candles or sharp objects are dangerous and should be avoided. The safest path balances exterior cleaning with professional advice when there is persistent fullness, pain, or sudden hearing changes. Clean, attach to evidence-based guidance, and keep your routine conservative.
Tools & Materials
- Soft washcloth(Microfiber or cotton-free; use to wipe outer ear gently.)
- Saline solution or mineral oil(Warm to body temperature; use only for the outer ear as directed.)
- Cerumen-softening ear drops (optional)(Follow product directions; do not use if advised against by a clinician.)
- Bulb syringe (optional)(For external rinse only; do not insert into the canal.)
- Towel or disposable wipes(Dry the outer ear after cleaning; keep the area clean.)
- Gloves (optional)(Helps maintain hygiene; not essential for everyone.)
Steps
Estimated time: 15-25 minutes
- 1
Check for symptoms first
Examine whether self-cleaning is appropriate. Look for pain, discharge, hearing loss, or a history of ear surgery. If any of these are present, avoid DIY cleaning and seek professional care. This step reduces risk by ensuring the ear is suitable for at-home care, not a medical problem hiding behind wax.
Tip: If you’re unsure, stop and consult a clinician before proceeding. - 2
Soften visible wax with drops
If wax is seen at the entrance, apply a cerumen-softening drop or warm saline as directed. Do not insert the dropper into the canal; keep it at the opening. Let the drop sit for the time specified by the product or clinician, which helps wax loosen without forcing it deeper.
Tip: Always test drops on a small area of skin before use to check for irritation. - 3
Wipe outer ear gently with a cloth
Use a warm, damp cloth to wipe the visible outer ear. Do not attempt to clean the canal or ear drum. This step removes surface debris and reduces the chance that wax will migrate inward when rinsing later.
Tip: Keep movements light and steady; avoid scrubbing. - 4
Rinse only the outer ear if advised
If a clinician approves irrigation, use a bulb syringe with warm water and gently rinse around the outside of the ear, never directly into the canal. Tilt the head to the side to help drain and then dry with a towel. Stop immediately if you feel pain or dizziness.
Tip: Do not force water into the ear canal; that can push wax inward or injure the ear. - 5
Dry, observe, and seek help if needed
Pat the outer ear dry and monitor for 24-48 hours. If fullness, pain, drainage, or hearing changes persist, consult a clinician. Persistent issues may indicate deeper wax or infection requiring professional care.
Tip: Keep ear dry; avoid swimming until symptoms resolve.
Questions & Answers
Is it safe to clean ears at home?
In many cases, safe cleaning means external cleaning with a damp cloth and avoiding canal insertion. If pain, discharge, or sudden hearing loss occurs, seek professional care rather than attempting DIY methods.
It's usually safe to clean only the outer ear with a damp cloth, but stop if you feel pain or see discharge.
Why shouldn't I use cotton swabs?
Cotton swabs can push wax deeper into the canal, cause irritation, or even puncture the eardrum. They’re not designed to clean canal wax safely. Use external cleaning methods and consult a clinician for deeper wax issues.
Cotton swabs push wax deeper and can injure the ear. Use external cleaning only and ask a clinician for deeper issues.
When should I see a doctor for ear wax?
If cleaning doesn’t relieve fullness, you have pain, drainage, or a history of ear problems, consult a clinician. A doctor can safely remove wax and check for infection or other conditions.
If cleaning doesn’t help or you have pain or drainage, see a clinician for safe removal.
Are ear drops safe for kids?
Use only products labeled for children and follow the dosing instructions. For kids under a certain age, consult a pediatrician before use and avoid home remedies without professional guidance.
Follow product labels for children and check with a pediatrician before use.
Can ear irrigation cause damage?
Yes. Improper irrigation can injure the ear canal or eardrum. Only perform irrigation if a clinician approves and follow their technique exactly.
Irrigation can damage the ear if done improperly; seek clinician guidance first.
What if I have a perforated eardrum?
A perforated eardrum requires professional evaluation. Do not attempt any home cleaning methods that involve inserting liquids or instruments into the ear.
If you have a perforated eardrum, seek medical care and avoid at-home cleaning.
Watch Video
The Essentials
- Avoid inserting objects into the ear canal.
- Clean only the visible outer ear surface.
- Softening wax before any rinse reduces risk.
- Seek professional care for persistent symptoms.