Steam Clean Tile: A Practical How-To Guide
Learn how to steam clean tile safely with a practical, step-by-step guide. Get the right tools, safety tips, and post-cleaning maintenance for a healthier home.

Steam cleaning tile is an effective way to loosen grime from ceramic and porcelain surfaces without harsh chemicals. Start with a compatibility test on a hidden patch, use a clean microfiber cloth, and keep the nozzle at a safe distance to avoid damage. This method works best on sealed, non-porous tiles with grout that tolerates warmth.
What steam cleaning tile is and when to use it
Steam cleaning tile uses a heated, pressurized stream of water to lift dirt, grime, and some grout stains from tile surfaces. It’s particularly useful for kitchens and bathrooms where moisture and soap scum accumulate. According to Cleaning Tips, steam cleaning can loosen grime on ceramic and porcelain tiles when used with proper technique and compatible equipment. This method avoids harsh chemical cleaners, making it appealing for households seeking greener routines. It’s most effective for smooth, glazed tiles and grout lines that are in good condition. Do not use steam on heat-sensitive stone, unsealed grout, or tiles with delicate finishes. Always perform a patch test on a small inconspicuous area to gauge heat tolerance and colorfastness. Real-world scenarios include ceramic subway tiles in bathrooms, glazed floor tiles in kitchens, and shower enclosures where mineral buildup is common. When used correctly, steam cleaning can reduce manual scrubbing time and minimize chemical exposure for children and pets.
Tiles and grout: compatibility and risks
Tile materials vary in how they respond to heat. Glazed ceramic and porcelain tiles generally tolerate steam well, while natural stone such as marble or limestone may etch or dull if exposed to high heat or prolonged moisture. Grout is another factor: epoxy grout tends to be more heat-resistant than cement-based grout, but both can weaken if exposed to repeated high-temperature bursts. Before steam cleaning, check tile and grout warranties and manufacturer guidance. If grout is cracked or loose, steam cleaning can worsen gaps or cause moisture intrusion behind the tile. For best results, maintain a steady distance (usually several inches) between the nozzle and the surface and avoid lingering steam directly on fragile seams. If you notice discoloration or bleeding color after a test spot, stop and switch to a gentler cleaning method.
Tools and cleaning solutions for steam tile cleaning
A quality steam cleaner with adjustable heat and multiple nozzles is essential. Pair it with microfiber cloths to capture loosened debris and protect surfaces, and use distilled water to prevent mineral deposits on tile and grout. While steam is often enough, you may use a mild cleaner sparingly on very stubborn grime, but avoid harsh chemicals that could react with the steam or tile finish. A grout brush helps target lines between tiles, and a soft scrub brush can dislodge stuck residue without scratching surfaces. Protective gear such as gloves and eye protection is recommended. Keep a spray bottle with clean water for quick rinsing if needed, and have absorbent towels ready for drying after steam passes. Finally, plan for good ventilation by opening windows or using a fan.
Preparation steps before you steam clean
Clear the area by removing bathroom or kitchen mats, toothbrush holders, and other small items. Vacuum or sweep loose dirt and dust from the tile to minimize debris that steam might push around. Inspect the grout and tile edges for cracks or looseness; address any structural issues before applying heat. Fill the steam cleaner’s reservoir with distilled water and ensure the device is in good working order. If your machine has a grout tool, attach it for targeted cleaning. Lay down a towel or mat to catch any drips and prepare a couple of microfiber cloths for quick drying and wipe-down after steaming. Finally, test the machine on a discreet patch to confirm there is no adverse reaction.
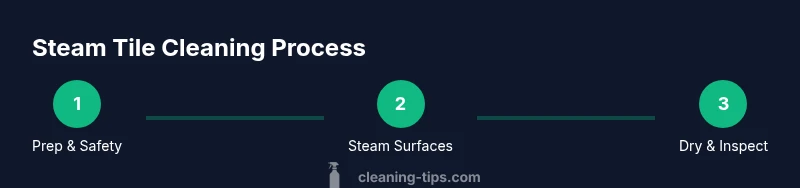
Step-by-step overview: steam cleaning tile
This section provides a high-level walkthrough of the process, highlighting key actions and expected outcomes without duplicating the detailed STEP-BY-STEP section. Begin by warming the area and establishing airflow, then proceed to direct steam along tile faces, avoiding prolonged heat on any single spot. Move slowly to maximize dirt loosening while keeping the nozzle at a safe distance from the surface. Use grout tools or a small brush to work along lines where grime tends to accumulate. After steam cleaning, wipe surfaces with microfiber cloths to remove loosened residue and quick-dry with a towel. The goal is to refresh the tile’s appearance and reduce the need for chemical cleaners.
Troubleshooting common issues and residue
Steam cleaning rarely leaves residue if used properly, but mineral deposits from hard water can build up on the nozzle or tile surface if water isn’t distilled. If you notice streaks or a milky film, wipe immediately with a damp microfiber cloth and dry thoroughly. Resinous or sticky residues may require a repeat pass with gentler steam and a light brush. In some cases, steam can cause grout to appear lighter as the surface dries; this is usually temporary and resolves after thorough drying. If grout looks damaged or crumbly after steaming, switch to a non-heat cleaning method and consult a professional.
Post-cleaning care: grout refresh and drying
Once cleaning is complete, allow the area to air-dry completely. Open windows or use a fan to accelerate drying and reduce the risk of mold growth. If grout appears dull or porous after steam cleaning, consider sealing or re-sealing it to help resist moisture and grime buildup. Use a grout-specific sealer following manufacturer directions and re-seal periodically as recommended. Regular maintenance—rinsing with clean water, drying surfaces, and avoiding abrasive scrubbing on delicate grout—will extend tile life. This approach supports a healthier home by minimizing chemical cleaners and improving indoor air quality.
Safety considerations and environmental impact
Steam cleaning reduces the need for chemical cleaners, which benefits indoor air quality and reduces chemical exposure for family members. Always operate steam cleaners in well-ventilated spaces and follow the manufacturer’s safety instructions. Use distilled water to prevent mineral buildup inside the machine and on tile surfaces. Keep pets and children away from the cleaning area while the surface is hot and damp. When finished, store equipment safely away from reach and unplug the device. If you have nutrient-rich or damp areas prone to mold, ongoing prevention with period cleaning and proper ventilation will help maintain tile integrity and cleanliness.
Tools & Materials
- Steam cleaner with adjustable heat and grout tool(Choose model with floor nozzle and grout-specific attachments)
- Microfiber cloths(Lint-free; multiple towels recommended)
- Distilled water(Avoid hard water deposits; keeps cleaner healthy)
- Grout brush or soft-bristle brush(For grout lines without scratching)
- Gloves and eye protection(Safety first; heat and splash protection)
- Spray bottle with plain water(For quick rinse if needed)
- Soft sponge or non-scratch pad(For gentle detail work)
- Towels or mats to absorb moisture(Drying and residue control)
Steps
Estimated time: 60-75 minutes
- 1
Prep area and safety check
Clear the space, remove obstacles, and ensure proper ventilation. Put on gloves and eye protection. Confirm the steam cleaner is in good working order and filled with distilled water. This preparation reduces mess and protects surfaces from unexpected heat exposure.
Tip: Have a towel ready to catch any drips and wipe spills promptly. - 2
Inspect tile and grout for damage
Look for cracks, loose tiles, or crumbling grout. Steam can worsen exposed gaps, so address any damage before proceeding. If you see compromised areas, repair them or skip steaming on those spots until fixed.
Tip: Avoid steam on cracked grout; damaged areas may need professional repair. - 3
Test a small patch
Choose a discreet area and run a brief steam pass to observe reaction. Check colorfastness and surface integrity after drying. A successful test confirms the tile is suitable for steam cleaning.
Tip: If color dimming or heat marks appear, stop and switch to a gentler method. - 4
Begin steaming tile surfaces
Hold the nozzle several inches from the surface and move in slow, overlapping strokes. Focus on areas with soap scum and mineral buildup but avoid lingering heat on any one spot. Wipe away loosened grime with a microfiber cloth as you go.
Tip: Keep the nozzle moving to prevent heat damage; never hover in one spot. - 5
Target grout lines
Switch to the grout tool or a small brush to scrub grout lines while applying light steam. Rinse to remove loosened particles if needed, and wipe clean with a cloth. Reapply steam to stubborn seams in small sections to avoid over-wetting surrounding tiles.
Tip: Grout is vulnerable; use gentle pressure and short passes. - 6
Rinse and wipe residue
After steaming, wipe tiles with a clean microfiber cloth to capture loosened residue. If residues remain, run a brief steam pass followed by another wipe. This prevents streaking and keeps grout looking fresh.
Tip: Dry the surface with a second cloth to prevent moisture buildup. - 7
Dry and inspect
Allow surfaces to air-dry completely and perform a quick inspection for any remaining stains. If needed, repeat targeted passes on persistent grime. Ensure the area is fully dry before replacing mats and items.
Tip: Check corners and grout corners where moisture lingers. - 8
Store equipment and plan maintenance
Turn off and unplug the steam cleaner, empty the reservoir, and rinse components per manufacturer directions. Store in a cool, dry place. Consider sealing grout after drying if you notice recurring staining.
Tip: Regular maintenance reduces future cleaning time and preserves tile life.
Questions & Answers
Is steam cleaning tile safe for ceramic and porcelain tiles?
Yes for most ceramic and porcelain tiles when used with low to medium heat and a distance from the surface. Always test first and avoid damaged areas.
Steam cleaning is generally safe for ceramic and porcelain tiles if you test first and keep heat moderate.
Can steam cleaning be used on sealed grout?
Steam can help clean grout but can degrade some sealants. Check the sealant type and manufacturer guidance; avoid prolonged heat on grout.
Steam can clean sealed grout, but verify the sealant and avoid long heat exposure.
Should I use cleaners with steam?
Typically no cleaners are needed; plain distilled water works. If you use cleaners, ensure compatibility with your steam cleaner and tile.
Usually plain water is enough; only use cleaners that are compatible with steam cleaning.
How long does it take for steam-cleaned tile to dry?
Drying time varies with ventilation and room humidity but expect at least 30 minutes before walking on treated areas.
Expect around 30 minutes or more to dry, depending on ventilation.
Can steam damage natural stone tiles?
Yes, high heat and moisture can damage natural stone; avoid steam on marble or limestone unless a professional confirms compatibility.
Natural stone can be damaged by steam; check stone type before using steam.
What maintenance follows steam cleaning?
Dry thoroughly, inspect grout, consider sealing, and ventilate to prevent mold. Regular cleaning reduces buildup over time.
Dry and inspect after cleaning, then seal grout if needed and maintain ventilation.
Watch Video
The Essentials
- Test tile compatibility before full cleaning
- Use distilled water to prevent mineral buildup
- Ventilate and dry thoroughly after steam cleaning
- Consider grout sealing after steam cleaning